How do you use graphite pencils?
Short answer
Graphite pencils are used by applying varying levels of pressure and selecting specific lead grades to create marks on paper. By layering strokes and blending, artists achieve tonal depth and texture. Mastery involves understanding the hardness scale, utilizing proper grip techniques, and employing tools like erasers and stumps for refinement.
On this page
How to understand the graphite pencil scale
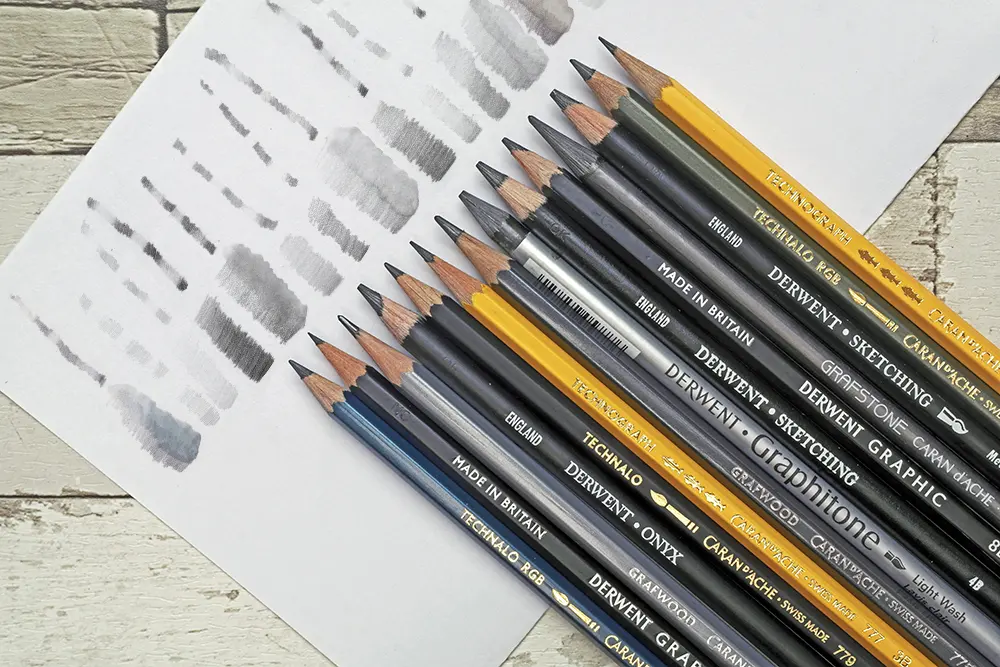
Graphite pencils are categorized by the HB scale, which indicates the balance between hardness and blackness. The "H" stands for hard, meaning the graphite contains more clay, resulting in a lighter, crisper line that holds a sharp point longer. The "B" stands for black, indicating a higher ratio of graphite to clay, which produces a softer, darker mark that smudges easily. An "HB" pencil sits in the middle of this spectrum, serving as the standard for writing and basic sketching.
Most manufacturers use a numerical system to further refine these grades. A 9H pencil is the hardest and lightest, while a 9B pencil is the softest and darkest available. Artists typically maintain a range of pencils to create dynamic contrast in their work. Beginners are often advised to start with a small set, such as a 2H, HB, 2B, and 4B, to understand how each grade behaves on different paper textures.
- 9H to 4H: Best for technical drawing and light construction lines.
- 3H to HB: Ideal for general sketching and initial shading.
- B to 9B: Used for deep shadows, bold textures, and final highlights.
How to hold a pencil for drawing
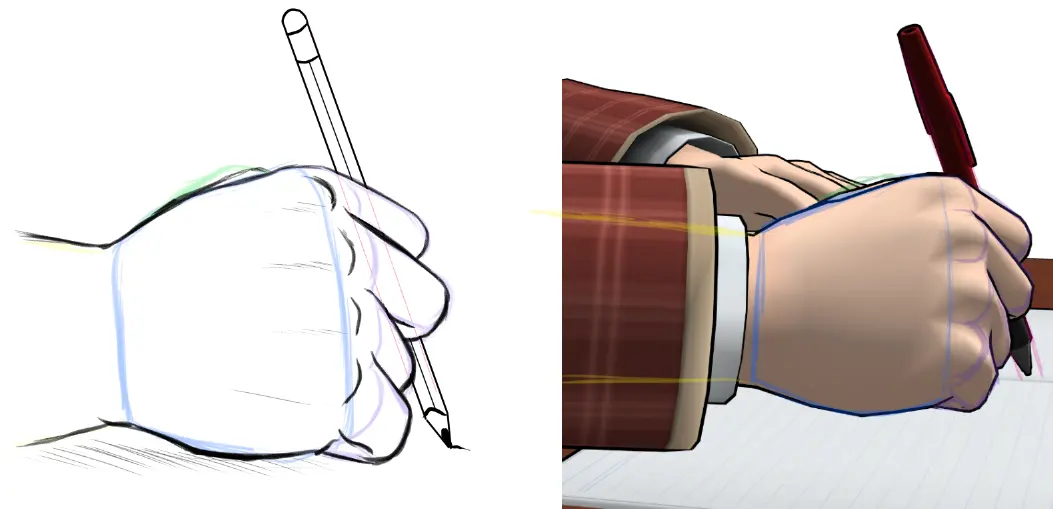
The way you hold your pencil significantly impacts the quality of your marks. For precise, detailed work, use the "tripod grip," holding the pencil close to the tip as you would for writing. This provides maximum control for fine lines and intricate textures. However, holding the pencil too tightly can lead to hand fatigue and unwanted indentations in the paper, which are difficult to erase.
For broader shading and looser sketches, try the "overhand grip." By holding the pencil further back from the tip and using the side of the lead, you can cover larger areas quickly and maintain a lighter touch. This technique encourages the use of the shoulder rather than just the wrist, resulting in more fluid and expressive strokes. Experimenting with these grips allows you to transition seamlessly between structural planning and final rendering.
- Grip the pencil loosely to avoid cramping.
- Use the tripod grip for details and sharp edges.
- Switch to the overhand grip for shading and large surfaces.
- Rotate the pencil frequently to maintain a consistent edge.

How to shade and blend graphite
Shading is the process of building value to create the illusion of three-dimensional form. Start by applying light, consistent strokes in the direction of the object's surface. Gradually add layers of graphite, increasing pressure or switching to a softer pencil grade to darken the shadows. Avoid "scrubbing" the paper, as this can damage the fibers and create an uneven, muddy appearance that is difficult to correct.
Blending helps transition between light and shadow to create smooth gradients. While many beginners use their fingers, this is discouraged because the natural oils on your skin can transfer to the paper, creating permanent smudges. Instead, use a paper blending stump or a piece of chamois to soften edges. If you need a very subtle transition, a clean, dry brush can gently move the graphite particles across the surface without losing the underlying texture of the paper.

Common mistakes when using pencils
One of the most frequent errors is pressing too hard during the initial stages of a drawing. Heavy pressure creates deep grooves in the paper that remain visible even after erasing, which ruins the surface for further refinement. Always begin with the lightest possible touch, building up darkness only when you are certain of your placement. If you need a dark area, it is better to layer soft graphite than to press a hard pencil into the paper.
Another common mistake is failing to protect the drawing surface while working. Graphite is easily smeared by the side of your hand as you move across the page. To prevent this, place a clean sheet of scrap paper under your drawing hand to act as a barrier. Additionally, avoid over-sharpening your pencils to an extreme needle point, as these tips often break under minimal pressure. A slightly rounded point is often more durable and versatile for general shading and line work.
How to choose the right paper for graphite
The surface texture, or "tooth," of your paper plays a vital role in how graphite adheres to the page. Smooth paper, often called "plate" or "hot-pressed," is excellent for fine, detailed work where you want minimal texture to interfere with your lines. Conversely, "cold-pressed" or textured paper has a visible grain that catches the graphite, making it ideal for expressive sketches and charcoal-like effects. The weight of the paper also matters; heavier paper can withstand repeated erasing and layering without buckling or tearing.
When selecting materials, consider the acidity of the paper as well. Acid-free, archival-quality paper ensures that your drawings will not yellow or degrade over time. If you are experimenting with different techniques, keep a sketchbook with various paper types to see how your pencils react to different surfaces. Ultimately, the combination of the right pencil grade and the appropriate paper texture will define the clarity and longevity of your finished artwork.
Key facts
- Graphite is a crystalline form of carbon mixed with clay; higher clay content creates harder, lighter lines, while more graphite creates softer, darker marks.
- The "H" in pencil grading stands for hardness, while "B" stands for blackness, with "HB" representing the standard middle-ground hardness.
- Use a kneaded eraser to lift graphite off the page gently without damaging the paper fibers, which is ideal for highlights.
- Hold the pencil further back from the tip for lighter, expressive shading, or closer to the lead for precise, controlled lines.
- Always sharpen pencils with a high-quality metal sharpener to prevent the lead from breaking inside the wood casing.
- Fix finished drawings with a spray fixative to prevent the graphite from smudging or transferring onto other surfaces over time.
The bottom line
Mastering graphite pencils requires understanding the balance between lead hardness and pressure. By selecting the right grade for your specific task—using harder leads for initial layouts and softer leads for rich, dark shading—you gain total control over your work. Maintain your tools properly, protect your paper from smudges, and practice consistent layering to build depth, turning simple sketches into professional-quality graphite illustrations with ease.
People also ask
What is the difference between a mechanical pencil and a wood-cased pencil?
Wood-cased pencils require periodic sharpening and offer varied line widths depending on the wear of the tip. Mechanical pencils use thin, pre-sized leads that provide a consistent line width without the need for sharpening.
How do I prevent graphite from smudging while drawing?
Place a clean sheet of scrap paper under your hand while you work to prevent oils from your skin and friction from smearing the graphite. You can also work from the top-left corner of the page to the bottom-right if you are right-handed.
Why does my pencil lead keep breaking?
This usually happens due to excessive pressure or a dull sharpener that leaves the lead unsupported. Use a lighter touch, and ensure your sharpener blade is sharp to avoid internal fractures in the graphite core.
Can I use different pencils in one drawing?
Yes, artists frequently combine grades to achieve depth. Start with an H pencil for light structural outlines and transition to 2B or 4B pencils for deep shadows and contrast.
What is the best paper to use with graphite?
Smooth paper, such as Bristol board, is excellent for fine detail and technical drawings. Textured paper, like cold-press watercolor paper, catches more graphite and is better for expressive, loose sketching.
How do I blend graphite effectively?
Use a paper stump or "tortillon" to move graphite particles across the surface for smooth transitions. Avoid using your fingers, as natural skin oils can create permanent, uneven spots on the paper.
This answer was created with the help of AI research tools and reference sources. Spotted an error? Let us know — we correct mistakes quickly. See our editorial policy.