How do you paint a jellyfish in watercolor?
Short answer
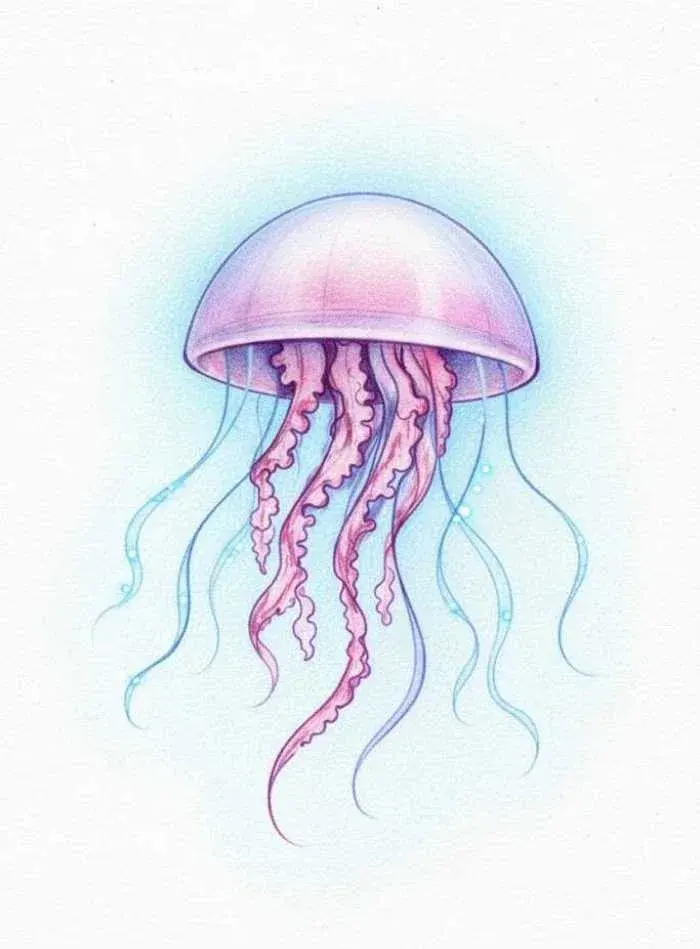
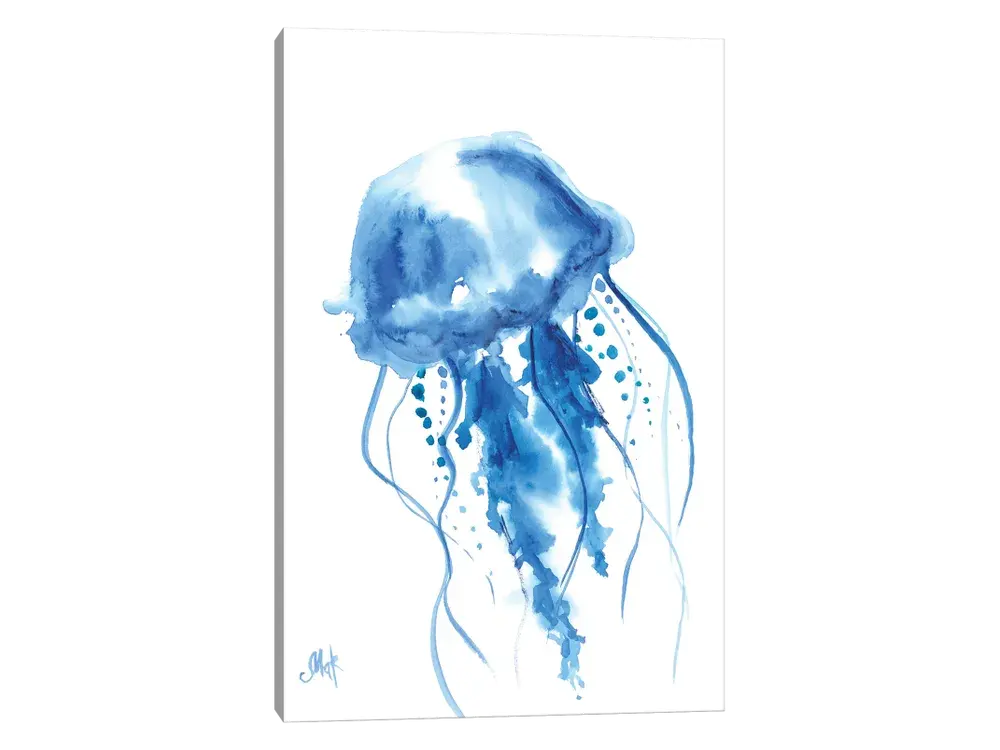
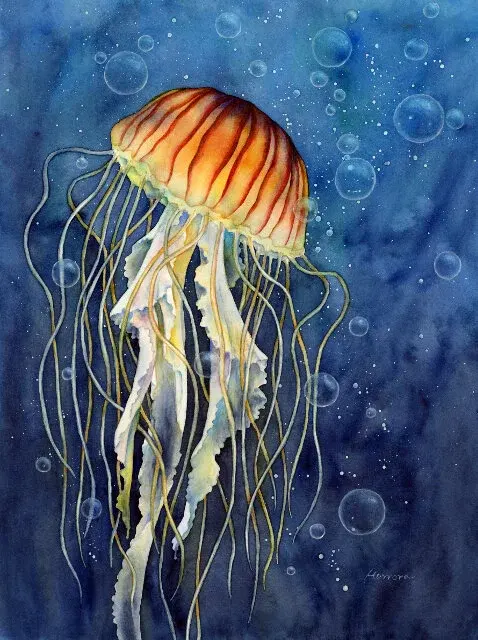
Painting a jellyfish in watercolor requires a focus on transparency, layering, and fluid brushwork. By utilizing the wet-on-wet technique for the bell and fine, trailing lines for the tentacles, you can capture the ethereal, bioluminescent quality of the creature. Success relies on managing water-to-paint ratios to maintain the delicate, translucent appearance of the subject.
On this page
What materials are needed for watercolor jellyfish?
To paint a convincing jellyfish, you need high-quality materials that support transparency and fluid movement. Use 100% cotton cold-press watercolor paper, as it handles repeated washes without warping or pilling. A weight of 140lb (300gsm) is the industry standard for maintaining structural integrity while allowing for wet-on-wet blending.
For brushes, prioritize synthetic or natural hair rounds with a fine point. Sizes 4 and 8 are ideal for the bell, while a size 0 or 2 rigger brush is essential for painting the long, flowing tentacles. Select transparent pigments rather than opaque ones; colors like Phthalo Blue, Quinacridone Rose, and Viridian work exceptionally well to mimic the natural, glowing hues found in marine life.
- 140lb cold-press watercolor paper
- Round brushes (sizes 0, 4, 8)
- Transparent, high-pigment watercolors
- Two containers of clean water
- Paper towels for lifting paint
How to paint the jellyfish bell
The bell is the focal point of your painting and should appear soft and translucent. Begin by lightly sketching the dome shape with a hard graphite pencil, keeping lines faint so they do not show through the paint. Wet the entire area inside the bell shape with clean water, ensuring an even, glossy sheen without puddles.
Drop in your chosen colors while the paper is still damp, allowing the pigment to bloom and spread naturally. Focus the darkest values toward the center or bottom of the bell to create a sense of depth and volume. As the paint dries, avoid the urge to overwork it, as this will muddy the colors and destroy the delicate, ethereal quality that defines a jellyfish.
- Lightly sketch the bell shape.
- Apply a clean layer of water to the bell area.
- Drop in pigment, concentrating color at the base.
- Allow the paint to dry completely before adding highlights.
How to create realistic jellyfish tentacles
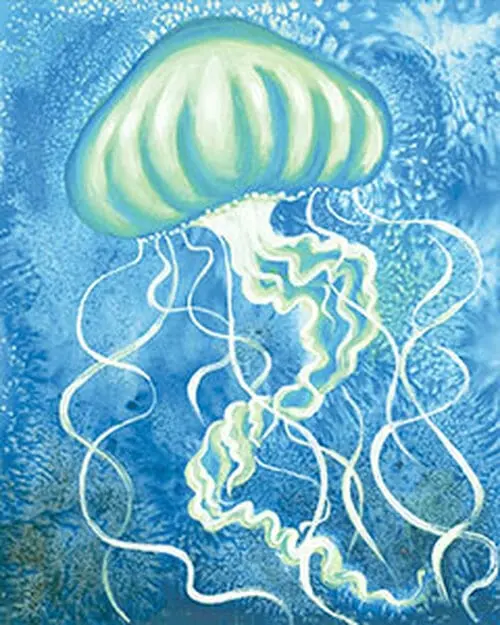
Tentacles provide the movement and grace necessary for a realistic jellyfish painting. Use a rigger brush loaded with a thin, fluid consistency of paint to ensure the lines remain delicate and unbroken. Start from the base of the bell and pull the brush downward in long, sweeping, and irregular curves to suggest the current of the water.
Vary the thickness and opacity of the tentacles by adjusting the amount of water on your brush. Some tentacles should be dark and crisp, while others should be barely visible, suggesting they are further away or deeper in the water column. By overlapping these lines, you create a sense of depth that makes the creature appear as if it is floating in a three-dimensional space.
- Use a rigger brush for long, fluid strokes.
- Vary the pressure to create thick and thin lines.
- Overlap tentacles to add visual complexity.
- Keep the paint consistency thin for distant tentacles.
Common mistakes when painting jellyfish
One of the most frequent errors is using paint that is too opaque or thick, which makes the jellyfish look solid rather than gelatinous. If your paint is too heavy, the subject will lose its characteristic transparency. Always test your paint-to-water ratio on a scrap piece of paper before applying it to your main work, aiming for a consistency similar to tea or light ink.
Another mistake is over-blending the colors on the paper. Watercolor is best left to move on its own; excessive brushing creates "cauliflower" marks or dull, gray tones. Additionally, many beginners forget to leave white space. The white of the paper is your brightest highlight, so intentionally reserving unpainted areas will give your jellyfish a natural, bioluminescent glow that cannot be replicated with white gouache or acrylics.
How to finish and add depth to the painting
Once the bell and tentacles are dry, you can add final details to enhance the lifelike appearance. Use a small, damp brush to gently lift out tiny spots of color from the bell, creating the appearance of internal organs or subtle patterns. If you want to add a sense of environment, use a very diluted wash of blue or indigo to suggest the surrounding ocean water.
Avoid adding too much detail to the background, as this will distract from the jellyfish itself. A simple, soft wash that fades toward the edges of the paper is often enough to ground the subject. Once the entire piece is dry, carefully erase any remaining graphite lines with a soft kneaded eraser. Your finished painting should feel light, airy, and capture the silent, rhythmic motion of the jellyfish in its natural habitat.
Key facts
- Use high-quality cold-press watercolor paper to allow for texture and multiple layers of pigment.
- Apply a "wet-on-wet" technique for the jellyfish bell to achieve soft, diffused edges and translucent color blends.
- Utilize masking fluid to preserve the bright white highlights of the tentacles before applying washes.
- Work from the lightest colors to the darkest, building depth in the bell with concentrated pigments.
- Use a small, round synthetic brush with a fine point to create the delicate, trailing tentacles.
- Allow each layer to dry completely before adding fine details to prevent unwanted muddying or bleeding.
The bottom line
Painting a jellyfish in watercolor relies on mastering transparency and fluid movement. By using the wet-on-wet technique for the bell and a fine liner brush for the tentacles, you can capture the creature's ethereal nature. Remember to preserve your highlights early and build layers slowly. With patience and control over your water-to-pigment ratio, you will create a vibrant, translucent piece that mimics the grace of the sea.
People also ask
What type of watercolor paint is best for beginners?
Pan sets or tube watercolors labeled as "student grade" are ideal for those starting out. They offer a good balance of pigment quality and affordability while you learn to manage water ratios.
How do I prevent my paper from buckling when using lots of water?
Tape your paper down to a rigid board using artist-grade masking tape on all four sides. This keeps the paper flat as it expands and contracts during the painting process.
Can I use salt to create texture on a jellyfish?
Yes, sprinkling table salt onto a damp wash creates a crystalline, organic pattern. This is an excellent way to simulate the natural, bumpy texture of a jellyfish bell.
How do I achieve the translucent effect of a jellyfish?
Keep your paint layers thin and watery, allowing the white of the paper to show through. Avoid using opaque white gouache until the very end, as it can make the painting look heavy.
What is the best way to paint the long, trailing tentacles?
Use a rigger or liner brush, which has long bristles designed for thin, flowing lines. Hold the brush loosely and use your whole arm rather than just your wrist to create fluid, natural curves.
Should I paint the background before or after the jellyfish?
It is generally easier to paint the jellyfish first and then carefully paint the background around it. This prevents the dark background colors from bleeding into the delicate, light-colored bell.
This answer was created with the help of AI research tools and reference sources. Spotted an error? Let us know — we correct mistakes quickly. See our editorial policy.