How do you draw a bird's nest?
Short answer
Drawing a bird’s nest requires layering irregular, overlapping lines to create volume and texture. Begin by sketching a shallow bowl shape as your foundation. Gradually add tangled twigs, straw, and debris using varied line weights. Focus on creating depth through shadows in the interior while maintaining a loose, organic structure throughout the drawing.
On this page
How to structure a bird's nest sketch
The foundation of a realistic nest is a simple, asymmetrical bowl shape. Start by drawing a light, rough oval or a shallow cup to define the overall volume. Avoid perfect symmetry, as natural nests are constructed by birds using whatever materials are available, resulting in organic, slightly lopsided forms. Once the base shape is established, mark the rim to indicate where the nest walls thicken.
Adding structural integrity requires thinking about the nest in three dimensions. Consider the interior cavity where the eggs will rest, as this area is usually smoother and more tightly woven than the outer edges. Use light pencil strokes to map out the general massing before you commit to the detailed texture of individual twigs. This preparatory step ensures that your final drawing maintains a believable sense of space and weight.
Best drawing techniques for nest texture
Texture is the most critical element in making a nest look authentic. Use a variety of line weights to distinguish between thick, sturdy branches and thin, wispy grasses. Short, flicking pen or pencil strokes work best for mimicking the chaotic arrangement of twigs. Varying the pressure of your hand will naturally create shadows and highlights, giving the nest a three-dimensional appearance that pops off the page.
To achieve a professional look, follow these steps for layering your materials:
- Outline the main structural branches that form the primary support of the nest.
- Fill in the gaps with finer lines representing dried grass, moss, or feathers.
- Use cross-hatching in the deepest parts of the bowl to suggest darkness and depth.
- Add a few loose, protruding ends of twigs to break up the silhouette and add realism.
Why nests look chaotic yet organized
A bird's nest is a masterclass in structural engineering, balancing loose debris with a cohesive form. The outer layer is typically composed of coarse materials like sticks and mud, which provide stability and protection from the elements. As you move toward the interior, the materials become finer and softer, often including animal hair, spider silk, or downy feathers. Capturing this transition is essential for a convincing illustration.
When drawing, remember that the "chaos" of a nest is actually a series of interlocking segments. Each twig is woven around another, creating a tension that holds the structure together. If you draw every line as a straight, isolated segment, the nest will look like a pile of sticks rather than a home. Instead, focus on how lines intersect and overlap, creating small pockets of negative space that add visual interest and complexity to your work.
Common mistakes when drawing nests
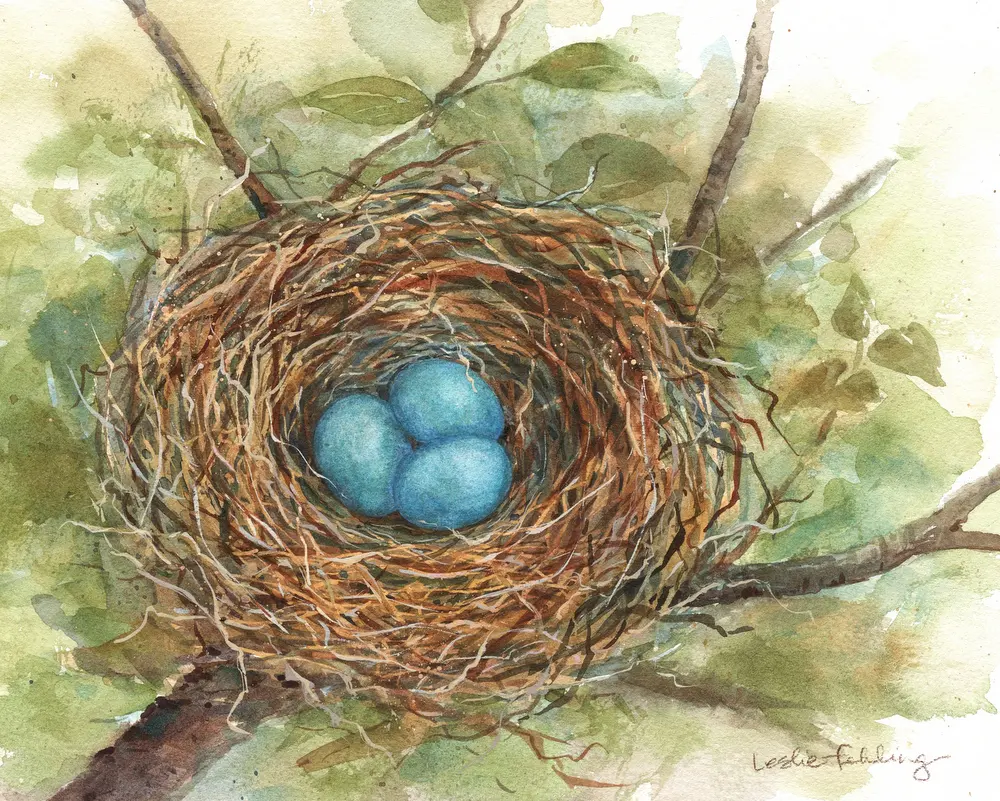
One frequent error is making the nest look too uniform or perfectly circular. Nature rarely produces such precision, and a nest that looks like a manufactured bowl will lack character. Another mistake is failing to account for the weight of the structure. A nest should look like it is resting securely on a branch or in the crook of a tree, not floating in mid-air. Always ensure the base has a clear point of contact with a supporting surface.
Avoid these common pitfalls to improve your drawing quality:
- Using too many parallel lines, which makes the nest look like a woven basket.
- Neglecting the interior shadow, which makes the nest look like a flat shape rather than a container.
- Drawing all twigs with the same thickness, which removes the sense of depth and scale.
- Forgetting to add small debris like leaves or mud clumps, which adds necessary textural variety.
How to add realistic details to your nest
Finalizing your drawing involves adding small, specific details that ground the object in reality. Consider adding a few eggs inside the nest to provide a focal point and a sense of scale. The eggs should be smooth and oval, contrasting sharply with the rough, jagged texture of the surrounding twigs. You might also add a small branch or a few leaves extending from the base to integrate the nest into its natural environment.
Refining the lighting is the final step in bringing your sketch to life. Identify a single light source and ensure that the shadows on the twigs and inside the bowl are consistent with that direction. Darken the areas where twigs overlap and deepen the interior of the nest to create a sense of mystery. By carefully balancing the highlights on the outer twigs with the deep shadows inside, you create a compelling and accurate representation of a bird's nest.
Key facts
- A bird's nest is essentially a collection of overlapping, irregular lines, so avoid drawing perfect, uniform circles.
- Start with a rough, flattened oval shape to define the main cavity where the eggs would rest.
- Use a variety of line weights; thick, dark lines represent sturdy twigs, while thin, wispy lines suggest grass or straw.
- Focus on the "rim" of the nest by layering curved, interlocking strokes to create a sense of depth and density.
- Add small, jagged marks or shadows inside the bowl to simulate the texture of mud, feathers, or loose debris.
- Keep your hand loose and sketchy; rigid, straight lines will make the nest look artificial rather than organic.
The bottom line
Drawing a bird’s nest is an exercise in controlled chaos. By layering irregular, overlapping lines and varying your pencil pressure, you can effectively mimic the messy, organic construction of twigs and grass. Focus on building a dense rim and adding shadows within the bowl to create depth. With a loose hand and attention to natural asymmetry, you will create a convincing, textured home for your avian subjects.
People also ask
What materials are best for sketching a realistic nest?
Graphite pencils ranging from 2B to 6B are ideal for creating both fine details and soft, dark shadows. Using a kneaded eraser allows you to lift graphite to create highlights on the twigs.
How do I make the nest look three-dimensional?
Focus on the lighting source and apply darker shading to the side of the nest opposite the light. Adding "cross-hatching" marks inside the bowl helps ground the structure and suggests depth.
Should I draw individual twigs or a solid mass?
Start with a solid mass to establish the form, then layer individual twigs over the top to define the silhouette. This prevents the drawing from looking like a flat, featureless blob.
How can I make the nest look like it is sitting in a tree?
Draw a few thick branches extending from underneath the nest to provide a stable base. Ensure the nest follows the curve of the branch to make it look naturally integrated.
What is the most common mistake when drawing a nest?
Beginners often draw the nest as a perfectly symmetrical bowl. In nature, nests are asymmetrical, messy, and adapted to the specific branch structure they occupy.
Do I need to include eggs in the nest?
Adding eggs can provide a focal point, but keep them smooth and oval-shaped to contrast with the rough texture of the nest. Ensure the eggs are tucked deep into the center to maintain perspective.
This answer was created with the help of AI research tools and reference sources. Spotted an error? Let us know — we correct mistakes quickly. See our editorial policy.