What is the easiest way to draw wrinkles?
Short answer
The easiest way to draw wrinkles is to treat them as topographical maps of the face rather than individual lines. Focus on the shadows created by skin folds rather than drawing the creases themselves. By mapping the underlying bone structure and muscle movement, you create realistic depth with minimal, strategic shading.
On this page
How to simplify wrinkle shapes
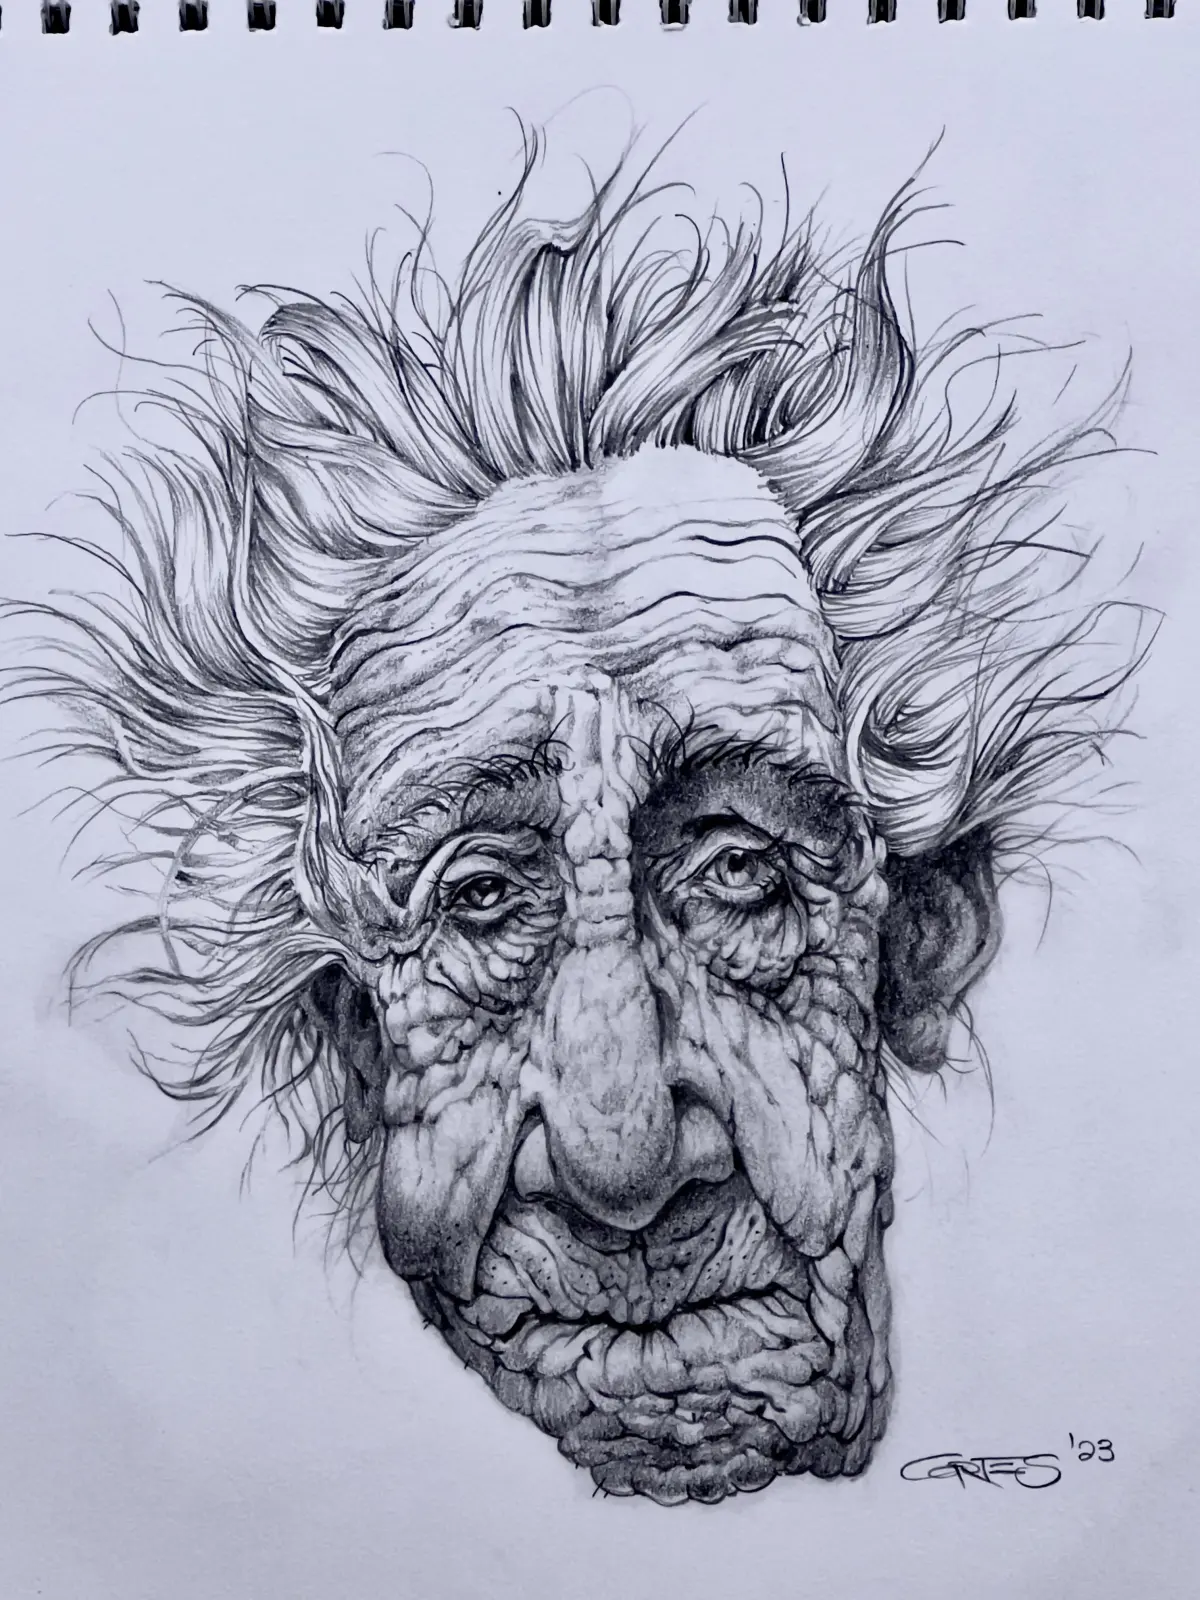
Beginners often make the mistake of drawing every single line they see on a subject's face. This results in a cluttered, aged appearance that lacks volume and realism. Instead, view wrinkles as three-dimensional depressions in the skin. When light hits a face, it casts a shadow on one side of a fold while highlighting the ridge of the skin on the other side.
Focusing on these shadow shapes is the most efficient technique for achieving a natural look. Use a soft graphite pencil, such as a 2B or 4B, to lightly outline the areas where the skin bunches together. By concentrating on the negative space—the shadows—you build the form of the wrinkle naturally. This approach ensures that the face retains its structural integrity without looking like a roadmap of disconnected markings.
Where to place wrinkles on the face
Wrinkles are not random; they occur perpendicular to the direction of the underlying facial muscles. Understanding this anatomical rule is the easiest way to ensure your drawings look authentic. For example, the forehead muscles pull vertically, so the resulting horizontal wrinkles form across the brow. Similarly, the orbicularis oculi muscle around the eye creates "crow's feet" that radiate outward from the corners.
- Identify the primary muscle groups, such as the corrugator supercilii between the eyebrows.
- Observe the natural expression of the subject to see which muscles are currently contracted.
- Lightly sketch the creases that form as a direct result of that specific muscle movement.
- Use subtle transitions to blend the edges of the wrinkle into the surrounding skin.
By following these anatomical patterns, you avoid placing lines in impossible locations, which is a common error that makes a drawing look uncanny or incorrect.
Best tools for drawing realistic skin
You do not need an extensive set of expensive equipment to render convincing skin textures. A standard HB pencil is excellent for initial light mapping, while a 4B or 6B pencil provides the necessary darkness for deep, defined creases. A kneaded eraser is perhaps the most critical tool, as it allows you to lift graphite to create highlights on the ridges of the wrinkles.
- Kneaded eraser: Essential for creating soft, subtle highlights on the skin's surface.
- Blending stump: Useful for smoothing out harsh lines and creating a soft, fleshy appearance.
- Smooth-surface paper: Prevents the paper texture from interfering with the fine details of the skin.
- Graphite pencils (HB to 6B): Provides a full range of values from light grey to deep black.
Using these tools in combination allows you to build layers of graphite. Layering is superior to pressing hard, as it mimics the translucent and multi-layered quality of human skin.
Common mistakes when drawing wrinkles
The most frequent error is applying uniform pressure to every line. If every wrinkle is drawn with the same thickness and darkness, the face will look flat and mask-like. Wrinkles are rarely isolated; they are part of a complex surface that changes in depth and intensity. Vary the width of your lines, making them thicker in the center and tapering them off into nothingness at the ends.
Another common mistake is ignoring the surrounding skin texture. A wrinkle does not exist in a vacuum; it is surrounded by pores, subtle color shifts, and light reflections. If you draw a dark, harsh line across a smooth, unshaded surface, it will look like a scratch rather than a fold. Always ensure that the area around the wrinkle is properly shaded to provide context and depth to the fold.
How to add depth and dimension
To finish your drawing, focus on the contrast between the highlight and the shadow. The ridge of skin directly above a wrinkle should be the lightest part, while the deepest part of the crease should be the darkest. By pushing the contrast between these two points, you create the illusion of a deep, realistic fold that pops off the page. This technique is known as chiaroscuro, and it is the secret to professional-grade portraiture.
Finally, step back from your work frequently to assess the overall balance. When you are too close to the paper, you may lose sight of how the wrinkles contribute to the subject's expression. If a wrinkle looks too prominent, use your kneaded eraser to gently lift some graphite, softening the edge until it integrates seamlessly with the rest of the face. Consistency in your light source is the final key to ensuring that all wrinkles appear to belong to the same three-dimensional structure.
Key facts
- Wrinkles are not lines but shadows created by folds in the skin.
- Focus on the "valley" of the wrinkle by shading the deepest part and leaving the top edge highlighted.
- Use a sharper, harder pencil for the initial crease and a softer lead for the surrounding shadow.
- Study the underlying skull structure to understand where skin naturally bunches, such as around the eyes and mouth.
- Vary the line weight to reflect the depth of the fold, making it thicker in the center and thinner at the ends.
- Avoid drawing uniform, parallel lines, as natural skin creases are irregular, branching, and interconnected.
The bottom line
To draw convincing wrinkles, stop thinking of them as simple lines and start viewing them as three-dimensional topographical features. By focusing on the interplay between deep shadows and highlighted ridges, you create the illusion of volume. Remember that skin is organic and irregular, so avoid rigid, symmetrical patterns. With patient observation of light and shadow, you can effectively convey age and character in any portrait.
People also ask
Should I use a pen or a pencil to draw wrinkles?
Pencils are superior because they allow for the soft gradients and subtle transitions required to mimic skin texture. Pens create harsh, permanent marks that often look like scratches rather than organic folds.
How do I make wrinkles look realistic on a young face?
Focus on fine lines caused by expression rather than deep, sagging folds. Use a light touch to suggest subtle creases that appear only when the subject smiles or frowns.
Why do my wrinkles look like scars?
This usually happens because the lines are too dark and lack a soft shadow transition. To fix this, smudge the edge of the line slightly to create a gradual shift from light to dark.
Do I need to draw every single wrinkle I see?
Over-detailing can make a portrait look cluttered and older than intended. Select the most prominent folds that define the facial structure and suggest the others with light, broken marks.
How does lighting affect how I draw wrinkles?
Lighting dictates where the shadows fall within the fold. Always identify your light source first so that the shadow side of the wrinkle remains consistent across the entire face.
What is the best way to practice drawing skin texture?
Study high-resolution photographs of elderly faces in black and white. Tracing the flow of the lines on a separate sheet can help you understand the natural patterns skin follows.
This answer was created with the help of AI research tools and reference sources. Spotted an error? Let us know — we correct mistakes quickly. See our editorial policy.