How do you draw a face step by step?
Short answer
Drawing a face requires establishing basic proportions using a foundational grid or oval shape. By placing the eyes, nose, and mouth along specific horizontal guidelines, you ensure anatomical accuracy. Consistent practice with these structural landmarks allows artists to build realistic features layer by layer, starting from simple geometric forms toward detailed shading.

On this page
How to draw a face step by step
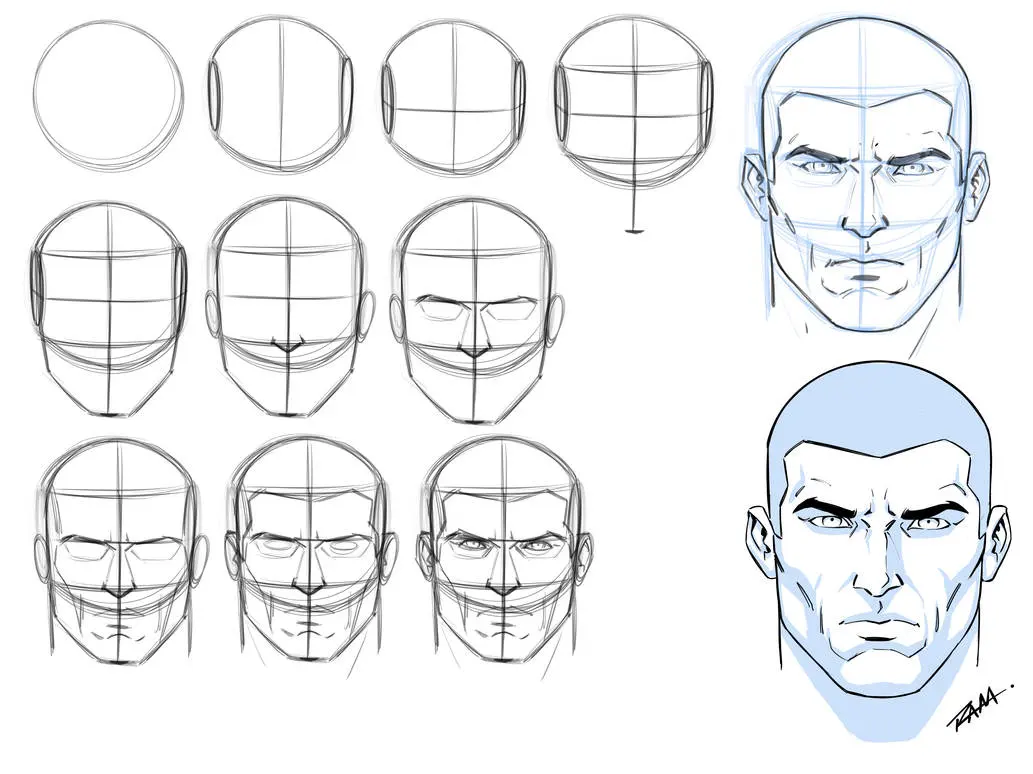
To begin, draw a light, egg-shaped oval with the narrow end pointing downward. Divide this oval in half vertically with a line, then draw a horizontal line across the center to mark the eye level. The space between the eyes should be approximately the width of one eye, while the bottom of the nose generally sits halfway between the eye line and the chin.
- Sketch the head shape and divide it into sections.
- Place the eyes on the horizontal center line.
- Position the nose halfway between the eyes and the chin.
- Locate the mouth halfway between the nose and the chin.
- Add the ears, which typically align between the eye line and the nose line.
Refining these placements is essential for capturing a likeness. Once the basic landmarks are set, you can begin to shape the jawline and hairline. Keep your initial pencil strokes very light so they can be easily erased or adjusted as you add depth and specific facial characteristics.
Best tools for drawing faces
For beginners, a set of graphite pencils ranging from 2H to 6B offers the best versatility for shading and structure. Harder leads like 2H are ideal for the initial light sketching and construction lines, as they do not smudge easily. Softer leads like 4B or 6B are perfect for adding dark, dramatic shadows and defining the pupils or nostrils.
- Graphite pencils (2H, HB, 2B, 4B, 6B)
- A high-quality kneaded eraser for lifting graphite
- Smooth-surface drawing paper or a sketchbook
- A blending stump for softening transitions between tones
Using a kneaded eraser is particularly helpful because it can be molded into precise points to pull out highlights on the skin. Avoid using standard pink erasers, as they can damage the paper surface and leave behind residue that ruins the texture. Investing in a dedicated drawing pad with a medium tooth will also help your graphite adhere better to the page.
How to measure facial proportions
The "rule of thirds" is a fundamental principle in portraiture that helps maintain correct proportions. The face is divided into three equal segments: the hairline to the eyebrows, the eyebrows to the bottom of the nose, and the nose to the chin. If you find your drawings look distorted, it is often because one of these segments is disproportionately large or small.
- Eyebrows: Located at the top third mark.
- Nose: Ends at the middle third mark.
- Mouth: Positioned within the bottom third.
Beyond the vertical thirds, consider the width of the face. A standard adult face is typically five eyes wide. By checking these measurements against your sketch, you can identify where a feature might be misaligned. If the eyes are too close together or the chin is too long, these reference points act as a diagnostic tool to correct your work before adding final details.
Common mistakes when drawing faces
A frequent error is placing the eyes too high on the head. Many beginners forget that the top of the skull occupies a significant portion of the oval, meaning the eyes should sit exactly in the middle of the total head height. Another common mistake is drawing the nose too wide, which can make the face appear flat or masculine regardless of the intended subject.
- Drawing features as isolated shapes rather than part of the whole.
- Using heavy, dark outlines that make the face look like a cartoon.
- Neglecting the tilt of the head, which changes the alignment of the guidelines.
- Ignoring the depth of the eye sockets, which creates a "bug-eyed" appearance.
To avoid these pitfalls, always work on the entire face simultaneously rather than finishing one eye before moving to the next. This holistic approach ensures that all elements remain in proportion to one another. If you focus too long on a single detail, you lose sight of the overall structure, leading to an unbalanced final image.
How to add realistic shading
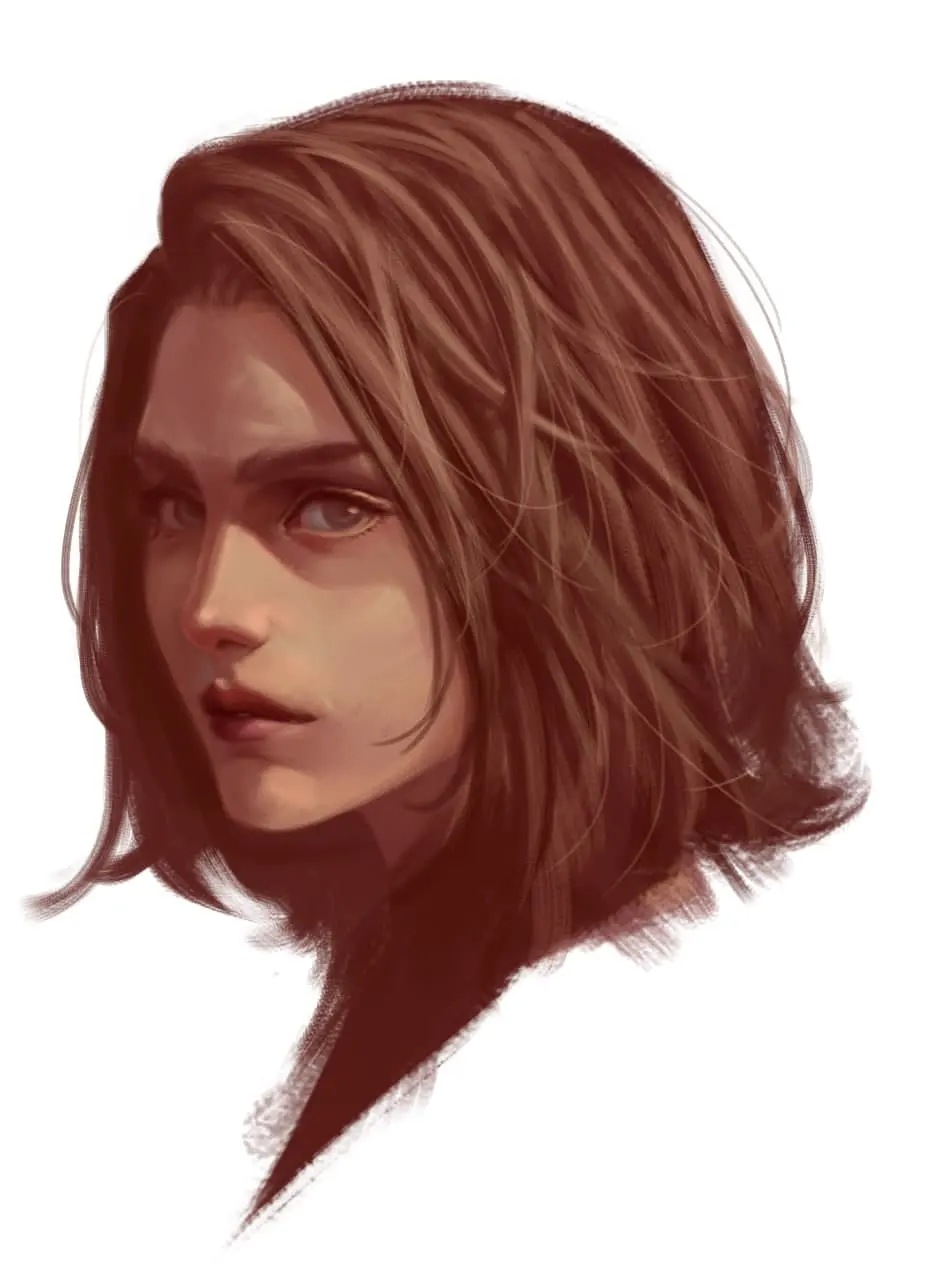
Shading is what transforms a flat, two-dimensional sketch into a three-dimensional form. Start by identifying the light source, which dictates where the shadows will fall. Areas like the underside of the nose, the chin, and the eye sockets usually contain the deepest shadows. Use a light touch to build up layers of graphite, gradually darkening the areas that recede away from the light.
- Identify the primary light source to determine shadow placement.
- Apply a light base tone to the entire face to establish skin volume.
- Deepen the shadows under the nose, lips, and brow bone.
- Use a blending stump to smooth transitions for a natural skin texture.
- Add final highlights with a kneaded eraser to define the bridge of the nose and forehead.
Remember that skin is not perfectly smooth, but it does reflect light in soft gradients. Avoid harsh, abrupt lines between light and shadow unless the lighting is extremely dramatic. By observing how light wraps around the curvature of the cheeks and forehead, you can create a convincing sense of depth that brings your portrait to life.
Key facts
- The human head is roughly an oval shape, often compared to the shape of an egg.
- Eyes are typically positioned halfway down the total height of the head.
- The bottom of the nose usually aligns with the bottom of the ears.
- The mouth is located halfway between the bottom of the nose and the chin.
- Width-wise, the space between the two eyes is equal to the width of one eye.
- Drawing a vertical center line helps ensure symmetry between the left and right sides.
The bottom line
Mastering facial drawing requires a disciplined approach to proportion and structure. By starting with a simple oval and using standard anatomical guidelines, you create a reliable framework for your subject. Avoid the common mistake of rushing into fine details before confirming your basic measurements. With consistent practice of these fundamental ratios, you will develop the spatial awareness necessary to capture accurate and expressive human faces.
People also ask
Why do my drawings look flat?
Drawings often lack depth because they fail to account for the spherical nature of the skull. By using shading to define light and shadow, you can create the illusion of a three-dimensional form rather than a flat surface.
How do I draw ears correctly?
Ears generally span from the level of the eyebrows down to the level of the nose. Focusing on the complex cartilage shapes rather than drawing simple loops will make the ears look more realistic.
What is the best pencil grade for sketching?
An HB or 2B pencil is ideal for initial sketches because it is easy to erase. You can switch to softer leads like 4B or 6B later to add darker, more dramatic shadows.
How do I make the eyes look alive?
Adding a small white highlight within the pupil creates a reflection that suggests moisture. This simple detail prevents the eyes from appearing dull or doll-like.
Should I start with the details or the shape?
Always begin with the basic structure and proportions before adding details like eyelashes or skin texture. If the underlying framework is incorrect, the final details will not fix the structural errors.
How do I draw hair effectively?
Instead of drawing individual strands, treat hair as large, solid masses or shapes. Once the main volumes are established, you can add texture and highlights to suggest the flow of the hair.
This answer was created with the help of AI research tools and reference sources. Spotted an error? Let us know — we correct mistakes quickly. See our editorial policy.