How do you draw gloves?
Short answer
Drawing gloves requires observing the underlying hand structure before adding fabric volume. Focus on the tension points where material stretches over knuckles and gathers in folds near joints. By simplifying the glove into basic geometric shapes—cylinders for fingers and a wedge for the thumb—you can establish accurate proportions before detailing textures.
On this page
How to structure the hand base
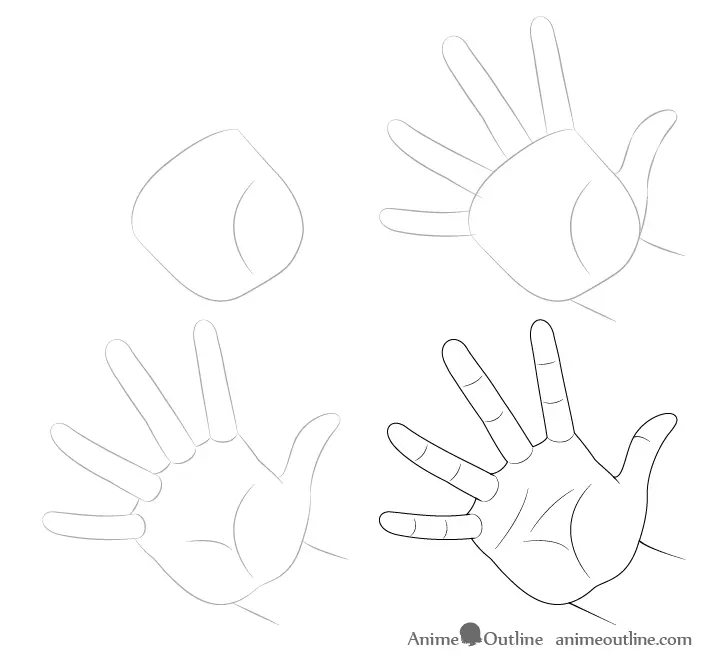
Before drawing the glove itself, you must establish the hand's anatomy. Even the thickest leather or wool glove conforms to the underlying bone structure. Start by sketching a simple pentagon to represent the palm and cylinders for each finger. This foundation prevents the common error of drawing fingers that appear too long or disconnected from the wrist.
Remember that gloves add significant bulk to the hand. When sketching your base, make the finger cylinders slightly wider than you would for a bare hand. Use these steps to build your initial frame:
- Draw a slightly curved trapezoid for the palm.
- Mark the knuckle line with a gentle arc.
- Add cylinders for fingers, ensuring the middle finger is the longest.
- Attach a triangular wedge at the base of the palm for the thumb.
How to draw different glove styles
The style of the glove determines how the fabric interacts with the hand. Tight-fitting gloves, such as latex or thin spandex, will highlight every knuckle and tendon. In contrast, winter mittens or heavy work gloves obscure these details, creating softer, rounded silhouettes. Identify your subject’s material early, as this dictates how much "negative space" exists between the fingers.
For loose-fitting gloves, focus on the silhouette rather than the individual digits. Mittens, for instance, simplify the hand into two main masses: the thumb and the combined four-finger section. When drawing formal dress gloves, pay attention to the seams running along the sides of the fingers. These lines, known as fourchettes, help define the three-dimensional volume of the glove and prevent the fingers from looking like flat, two-dimensional shapes on the page.
How to draw fabric folds and wrinkles
Folds are the most critical element in making a glove look authentic. They occur primarily where the material is compressed, such as the palm side of the wrist or the knuckles when the hand is clenched. Use thin, light lines to suggest these wrinkles, as heavy lines can make the glove look like it is made of rigid plastic rather than flexible fabric.
Follow these guidelines for placing folds effectively:
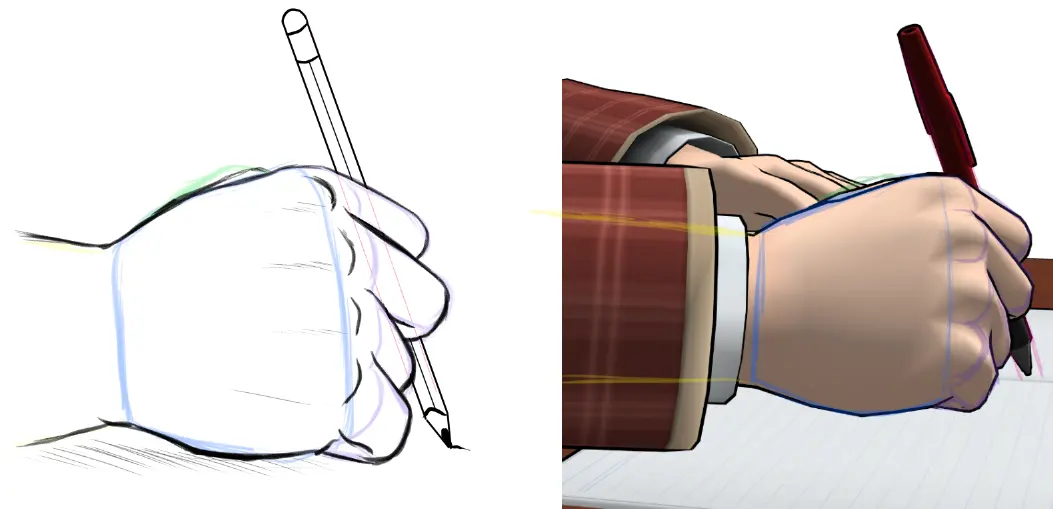
- Place small, crescent-shaped lines over the knuckles when the hand is in a fist.
- Add horizontal lines at the base of the palm where the wrist bends.
- Sketch diagonal tension lines radiating from the thumb base when the thumb is extended.
- Keep folds sparse; too many lines will clutter the drawing and make the glove look overly complex.
How to shade for volume and texture
Shading transforms a flat outline into a solid object. Use a consistent light source to determine where shadows fall on the glove’s surface. For leather gloves, create sharp, high-contrast highlights to suggest a smooth, reflective surface. For wool or knit gloves, use softer, cross-hatched shading to mimic the texture of woven fibers and absorb light.
Pay close attention to the cast shadows between the fingers. These areas are almost always the darkest parts of the drawing because they receive the least amount of ambient light. By darkening the spaces between the fingers and the underside of the wrist, you create a sense of depth. Avoid using pure black for shadows; instead, use a deep gray to allow for subtle variations in tone that give the glove a realistic, tactile quality.
Common mistakes when drawing gloves
A frequent error is forgetting the thickness of the material at the glove's cuff. Beginners often draw the wrist as a simple line, but a real glove has a hem that wraps around the arm. Always draw the cuff as a separate, slightly overlapping shape to show that the material has depth. This detail adds a professional finish and makes the glove look functional.
Another mistake is ignoring the "webbing" between the thumb and index finger. Many artists draw the thumb as if it is floating, but the skin and fabric in that area create a distinct bridge. Ensure the glove material connects smoothly to the palm, following the natural curve of the hand. By observing how the fabric pulls across this bridge when the thumb moves, you can capture the dynamic tension that makes a drawing look truly alive and accurate.
Key facts
- Start by drawing a simple mitten shape to establish the overall volume of the hand before adding finger divisions.
- Use a "U" shape for the wrist opening to create a sense of depth and show that the glove is a hollow object.
- Place the thumb attachment point lower on the side of the hand than you might expect, as it sits near the base of the palm.
- Add small, curved wrinkles at the knuckles and the inside of the wrist to suggest the fabric or leather is bunching.
- Keep the fingers slightly rounded at the tips rather than pointed to mimic the natural, padded shape of human fingers.
- Draw a slightly flared cuff at the bottom to indicate the thickness of the material and provide a realistic silhouette.
The bottom line
Drawing convincing gloves requires balancing the underlying anatomy of the hand with the specific properties of the material. By starting with a basic mitten shape and gradually adding structural details like seams, wrist cuffs, and fabric folds, you can create a realistic appearance. Focus on how the material reacts to movement, using creases to suggest flexibility and highlights to define the texture of the chosen fabric.
People also ask
How do I make gloves look like leather instead of cloth?
To depict leather, use sharp, angular highlights and deep, high-contrast shadows. Leather is stiff and reflective, so focus on creating distinct creases and shiny patches rather than soft, rounded folds.
Should I draw the fingers individually or as a block?
For most styles, drawing the fingers as a single block first helps maintain correct proportions. Once the block is established, you can refine the individual finger divisions and add the specific seams between them.
How can I show that a glove is thick or insulated?
Increase the overall bulk of the hand shape and minimize the appearance of individual finger joints. Thick gloves, like winter mittens, hide the anatomy of the hand, so focus on smooth, pillowy contours.
What is the best way to draw the seams on a glove?
Draw thin, parallel lines along the sides of the fingers and across the back of the hand. These lines represent the stitching and immediately signal to the viewer that the object is a constructed garment.
How do I draw a glove that is being taken off?
Draw the glove pulled halfway down the fingers, with the empty fabric of the fingertips collapsing inward. This creates a realistic "slumping" effect that shows the hand is no longer filling the space.
Why do my gloves look like they are floating?
Ensure the wrist opening overlaps with the arm or sleeve you have drawn. If the glove does not physically connect to the limb, it will appear detached; always anchor the base of the glove to the wrist.
This answer was created with the help of AI research tools and reference sources. Spotted an error? Let us know — we correct mistakes quickly. See our editorial policy.