What is wood carving?
Short answer
Wood carving is the subtractive art of shaping wood into decorative or functional objects using sharp handheld tools. By removing material through cutting, gouging, or whittling, artisans transform raw timber into intricate sculptures, furniture, or relief panels. It is a foundational craft practiced globally for thousands of years across diverse cultural traditions.
On this page
What are the different types of wood carving?
Wood carving is generally categorized by the technique used and the final form of the object. Relief carving involves sculpting figures or patterns onto a flat wooden surface, where the design remains attached to the background. This style is frequently used for wall panels, furniture ornamentation, and architectural details. In contrast, whittling is a casual form of carving that typically uses only a small knife to shape a piece of wood into a figurine or utensil.
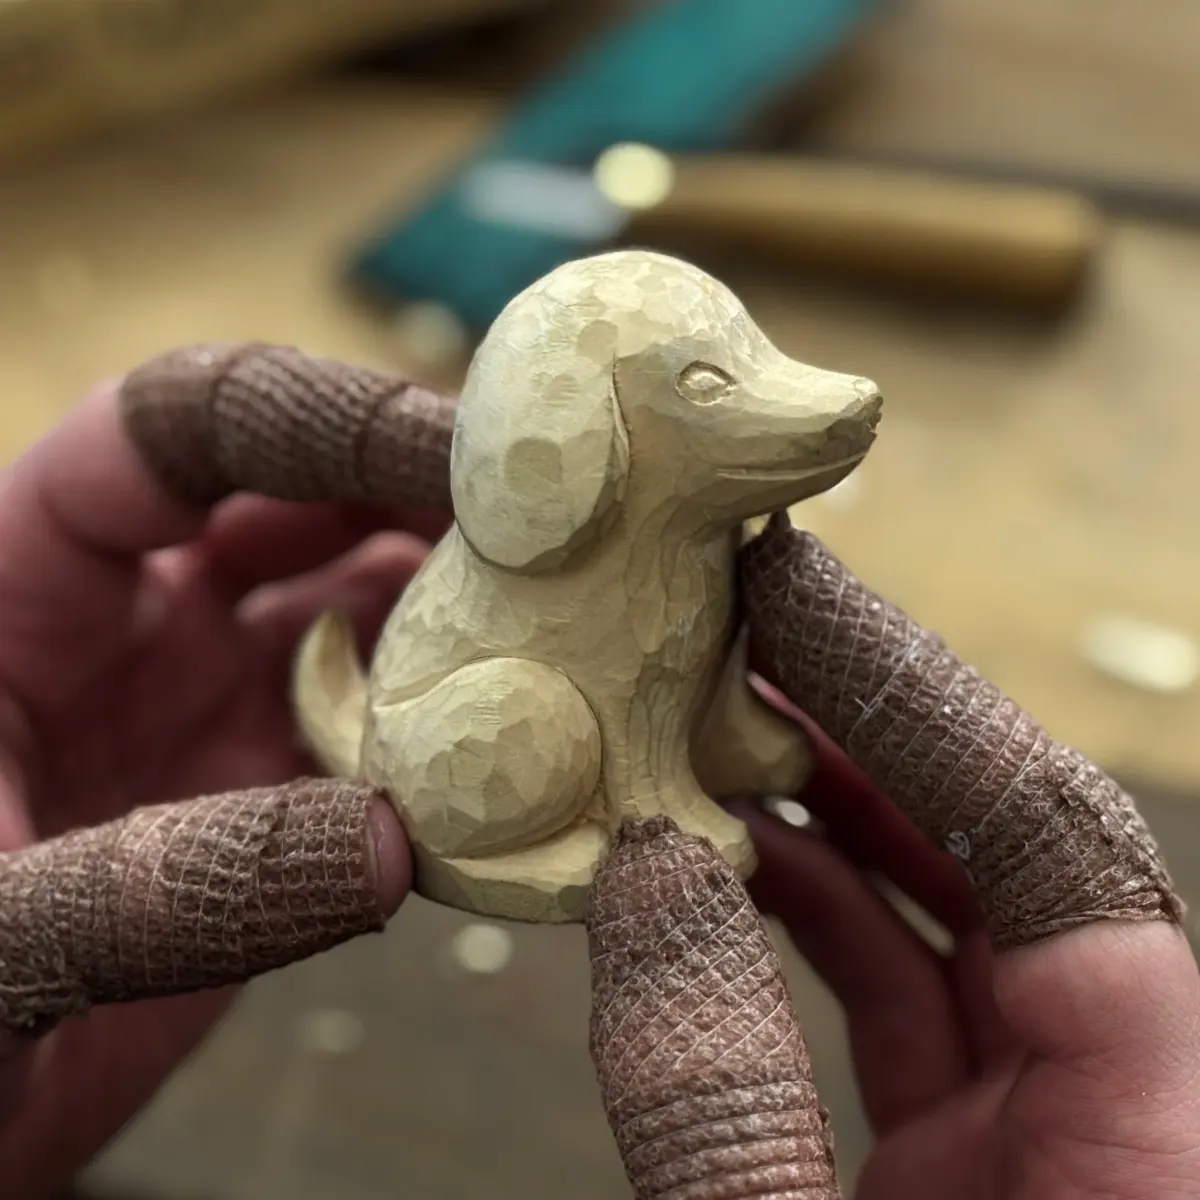
Statuary or "in-the-round" carving is the process of creating a three-dimensional object that can be viewed from any angle. This requires the artist to remove wood from all sides of the block, often beginning with a rough silhouette. Chip carving involves removing small, geometric shapes from the surface of a flat board to create intricate patterns. Finally, woodturning uses a lathe to spin the wood while the artist applies tools to create symmetrical, cylindrical shapes like bowls or spindles.
Best wood carving tools for beginners
A beginner does not need a massive workshop to start carving. A basic kit should include a few essential items that allow for precision and control. Most experts recommend starting with a small set of high-quality tools rather than a large, cheap collection that will quickly lose its edge.
- A fixed-blade carving knife with a short, sturdy blade for general shaping.
- A V-tool, which is a gouge with a V-shaped cutting edge used for outlining and detailing.
- A U-gouge, essential for removing larger amounts of wood quickly and creating curved textures.
- A sharpening stone or strop to maintain a razor-sharp edge, which is safer than a dull one.
- A thumb guard or cut-resistant glove to protect your hands during the carving process.
Always ensure your tools are kept sharp. A dull blade requires more force, which increases the likelihood of the tool slipping and causing injury.
How to choose the right wood for carving
The choice of wood significantly impacts the ease and quality of the carving. Beginners should prioritize softwoods that have a consistent grain structure, as these are easier to cut and less prone to splitting. Hardwoods are beautiful and durable but require much more physical effort and sharper, more robust tools to shape effectively.
- Basswood: The gold standard for beginners due to its soft, even grain and lack of distinct growth rings.
- Butternut: Similar to basswood but with a slightly richer color and more pronounced grain texture.
- Pine: Widely available and inexpensive, though it can be resinous and prone to splintering if the grain is not respected.
- Cherry: A popular hardwood choice that is relatively easy to carve once the artist has gained some experience.
- Walnut: Prized for its deep color and hardness, making it ideal for finished pieces that require fine detail.
Avoid woods with high moisture content or irregular knots, as these can cause the wood to crack as it dries or force the blade to deflect unexpectedly.
Common mistakes when starting wood carving
The most frequent error beginners make is carving toward their own body or fingers. Always carve away from yourself and keep your hands behind the path of the blade. Another major mistake is attempting to remove too much material in a single pass. This often leads to "tear-out," where the wood fibers rip instead of cutting cleanly, potentially ruining the piece.
Patience is the most important tool in a carver's kit. Many novices rush the process, leading to frustration when the wood splits or the design does not emerge as planned. Always work in thin, controlled layers, especially when carving against the grain. If you feel the blade catching or struggling, stop and re-evaluate your angle. Often, simply turning the piece of wood to carve in the opposite direction will solve the problem and result in a much smoother surface finish.
How to finish a wood carving project
Once the carving is complete, the final step is to refine the surface and protect the wood. Start by sanding the piece with progressively finer grits of sandpaper, typically ranging from 120 to 400 grit. This removes the marks left by the gouges and prepares the wood for a finish. Ensure all dust is wiped away with a tack cloth before applying any oils or waxes.
For a natural look, use food-safe mineral oil or beeswax, which enhances the grain without creating a thick, plastic-like film. If you prefer more durability, a polyurethane or varnish finish provides a protective barrier against moisture and wear. Apply your chosen finish in thin, even coats, allowing for adequate drying time between applications. Proper finishing not only protects your work from environmental damage but also deepens the natural color and beauty of the wood, ensuring your project remains a lasting testament to your craftsmanship.
Key facts
- Wood carving is the process of shaping wood into decorative or functional objects using cutting tools like gouges, chisels, and knives.
- Basswood is the most popular choice for beginners because it has a soft, uniform grain that is easy to cut without splintering.
- Always carve away from your body to prevent deep lacerations if the tool slips unexpectedly.
- A basic starter kit typically includes a whittling knife, a V-tool for detailing, and a U-shaped gouge for removing bulk material.
- Sharpening tools regularly is essential, as dull blades require more force and are significantly more dangerous than sharp ones.
- Sanding the finished piece with progressively finer grits, starting at 120 and ending at 400, creates a smooth surface for staining or sealing.
The bottom line
Wood carving is a rewarding craft that combines artistic expression with manual skill. By starting with soft woods like basswood and mastering basic tool safety, you can transform simple blocks into intricate sculptures. Whether you prefer the meditative pace of hand whittling or the efficiency of power tools, consistent practice and blade maintenance are the keys to developing your technique and creating lasting, beautiful wooden objects.
People also ask
What is the difference between whittling and wood carving?
Whittling is a specific type of wood carving that primarily uses a single knife to shape wood, often while sitting. Wood carving is a broader term that encompasses a wider variety of techniques, such as relief carving, chip carving, and the use of power tools.
How do I choose the right wood for my project?
Select wood based on your skill level and the intended use of the object. Softwoods like basswood or pine are ideal for beginners, while hardwoods like walnut, cherry, or mahogany are preferred for detailed, durable projects that require a fine finish.
What safety gear is necessary for a beginner?
At a minimum, you should wear a cut-resistant glove on the hand holding the wood to protect against slips. A thumb guard is also recommended, and wearing safety glasses prevents wood chips from causing eye injuries.
How do I keep my carving tools sharp?
Use a sharpening stone or a diamond plate to hone the edge of your blades regularly. Finish the process by stropping the blade on a leather strip coated with polishing compound to remove microscopic burrs and achieve a razor-sharp edge.
Can I use power tools for wood carving?
Yes, many carvers use rotary tools like a Dremel to remove material quickly and add intricate textures. Power carving is efficient for large-scale sculptures but requires practice to maintain control and avoid damaging the wood.
What is the best way to finish a wood carving?
Apply a finish to protect the wood from moisture and enhance its natural color. Common options include tung oil, linseed oil, or polyurethane, which can be applied with a soft cloth or brush once the wood is sanded smooth.
This answer was created with the help of AI research tools and reference sources. Spotted an error? Let us know — we correct mistakes quickly. See our editorial policy.