How do you draw wood grain?
Short answer
Drawing wood grain requires mimicking the organic, non-repeating patterns of tree growth. Focus on creating elongated, wavy lines that follow the direction of the wood's fibers. Incorporate knots, subtle color variations, and interlocking rings to achieve a realistic appearance. With practice, these rhythmic, fluid shapes transform flat surfaces into convincing timber textures.
On this page
How to draw realistic wood grain patterns
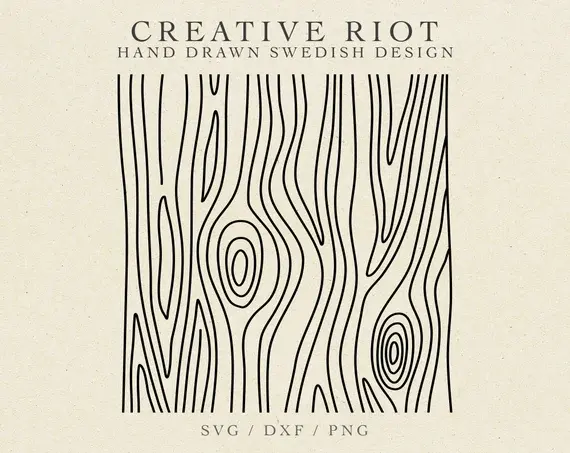
To draw realistic wood grain, you must understand the anatomy of a tree. Wood grain is essentially the longitudinal arrangement of wood fibers, which appear as lines or patterns when cut. Begin by establishing the direction of the grain, as this dictates the flow of your entire drawing. Use a light pencil to sketch long, sweeping lines that curve slightly, mimicking the growth rings of a tree.
The key to realism lies in variety. Avoid drawing perfectly parallel or straight lines, as natural wood is inherently irregular. Instead, introduce gentle undulations and slight shifts in the density of your lines. By varying the pressure of your pencil, you can create the illusion of depth and texture. Remember that grain patterns often tighten near the center of a board and expand toward the edges.
- Lay down a light base tone using a wide, soft-lead pencil.
- Sketch elongated, irregular ovals or "cathedrals" to represent the center of the log.
- Add wavy, parallel lines moving outward from these central shapes.
- Vary the spacing between lines to simulate the difference between earlywood and latewood.
What tools are best for drawing wood grain
Selecting the right tools significantly impacts the quality of your texture. Graphite pencils are the standard choice, specifically a range from 2H to 4B. Harder leads like 2H are excellent for faint, initial guide lines, while softer leads like 4B allow for deep, rich shadows that define the texture. A kneaded eraser is essential, as it allows you to lift graphite to create highlights and "glowing" grain effects.
For those working with ink or markers, fine-liner pens offer the precision needed for tight grain patterns. Alcohol-based markers are particularly effective for blending, as they allow you to layer colors to simulate the warm, earthy tones of oak, pine, or mahogany. Regardless of the medium, ensure your tools are sharp to maintain the crispness of the grain lines. Using a blending stump or a soft cloth can also help soften harsh transitions between light and dark areas.
- 2H pencil for light, structural sketching.
- HB pencil for mid-tone grain definition.
- 4B or 6B pencil for deep, dark knots and shadows.
- Kneaded eraser for creating highlights and removing excess graphite.
- Blending stump to smooth out harsh lines and create a polished wood finish.
Why wood grain looks different in various species
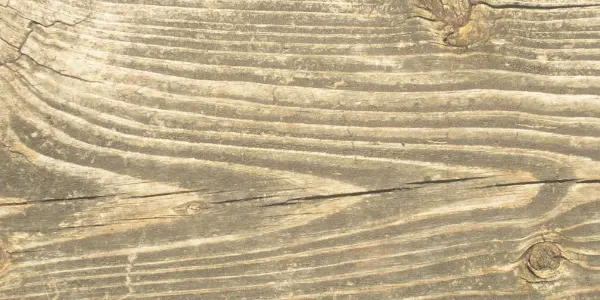
Different tree species possess unique grain structures based on their growth rates and environmental conditions. Hardwoods like oak and walnut often feature prominent, open pores and complex, swirling patterns. Conifers like pine or spruce typically have a more uniform, linear grain with distinct, darker rings. Understanding these differences helps you decide which patterns to emphasize in your artwork to achieve a specific look.
Environmental factors such as wind, slope, and soil quality influence the way trees grow, leading to "figured" wood. Features like burl, curly grain, and bird’s-eye patterns occur when the fibers grow in twisted or irregular directions. When drawing these, you must abandon standard parallel lines in favor of tight, swirling clusters. Researching reference photos of specific wood types will provide the necessary visual data to replicate these intricate, natural phenomena accurately.
Common mistakes when drawing wood grain
A frequent error is drawing lines that are too uniform or symmetrical. Nature rarely creates perfect patterns, so overly consistent lines often look mechanical or artificial. If your drawing feels stiff, try breaking up the rhythm by adding a knot or a subtle change in the direction of the grain. Another common mistake is neglecting the shadows that occur around knots, which are essential for creating a three-dimensional effect.
Another pitfall is using too much contrast in the wrong places. While wood has dark and light areas, the transitions are usually gradual rather than abrupt. Avoid using harsh, black outlines for every grain line, as this flattens the drawing and removes the organic feel of the wood. Instead, use soft shading to suggest the transition between the lighter, porous parts of the wood and the denser, darker rings.
How to add knots and imperfections to wood
Knots are the most distinctive features in wood, representing where a branch once grew from the trunk. To draw a knot, start with a small, dark, irregular circle or oval. Surround this center with tight, swirling lines that mimic the way the wood fibers bend around the obstruction. These lines should become less distorted as they move further away from the knot, eventually returning to the standard grain flow.
Beyond knots, consider adding small cracks or "checks" to heighten the sense of age and authenticity. These are thin, dark lines that break through the grain, usually running parallel to the fibers. Adding a few subtle, dark spots or mineral streaks can also break up the monotony of long, continuous lines. By incorporating these small, deliberate imperfections, you transform a generic texture into a realistic representation of aged, weathered timber that tells a visual story.
Key facts
- Wood grain is defined by the vascular structure of a tree, specifically the annual growth rings that appear as concentric circles or elongated lines.
- To mimic natural grain, draw long, flowing, and slightly wavy lines rather than perfectly straight or parallel strokes.
- Use a variety of line weights; thinner lines suggest dense wood, while thicker, bolder lines represent wider growth rings.
- Incorporate "cathedrals" or "flame" patterns by drawing nested, elongated V-shapes to represent where a branch once met the trunk.
- Add small, irregular ovals or "knots" to break up the pattern, as perfectly uniform grain looks artificial and machine-made.
- Vary the spacing between lines to reflect the tree's growth history, with tighter lines indicating slower growth years or harder wood.
The bottom line
Drawing convincing wood grain requires observing the organic, non-linear nature of tree growth. By prioritizing flowing, irregular lines over rigid geometric patterns and incorporating features like knots and varying line weights, you can create a professional, natural look. Avoid the common mistake of making lines too parallel; instead, embrace the subtle imperfections that define real timber and give your artistic work a sense of authentic depth.
People also ask
What tools are best for drawing wood grain?
Fine-liner pens are excellent for crisp, detailed grain, while graphite pencils allow for softer, smudged shading. Using a brush pen can help create the thicker, fluid strokes found in larger wood patterns.
How do I draw realistic wood knots?
Draw a dark, irregular circle or oval, then wrap your grain lines around it as if they are flowing past an obstacle. Adding a few small, darker marks inside the knot creates depth and texture.
Should wood grain lines ever intersect?
Natural wood grain lines rarely cross each other, as they represent continuous growth layers. Keep them flowing in the same general direction to maintain a realistic, organic appearance.
How do I represent the end grain of a piece of wood?
End grain is drawn using tight, dense concentric circles or semicircles. These should look like the cross-section of a log rather than the long, sweeping lines of a board's surface.
Why does my wood grain look like a cartoon?
This usually happens when lines are too uniform or perfectly parallel. Introduce slight variations in curvature and thickness to mimic the unpredictable nature of biological growth.
Can I use color to enhance wood grain?
Yes, using layered earth tones like burnt sienna, raw umber, and ochre adds significant realism. Apply a light base coat first, then draw your grain lines in a slightly darker shade on top.
This answer was created with the help of AI research tools and reference sources. Spotted an error? Let us know — we correct mistakes quickly. See our editorial policy.