How do you draw a beard step by step?
Short answer
Drawing a realistic beard requires layering textures, beginning with a light outline of the jawline and building volume through varied stroke directions. By focusing on hair growth patterns, shadow density, and individual stray hairs, you can create depth. Consistency in pressure and careful observation of light sources are essential for professional results.
On this page
How to prepare the face shape for a beard
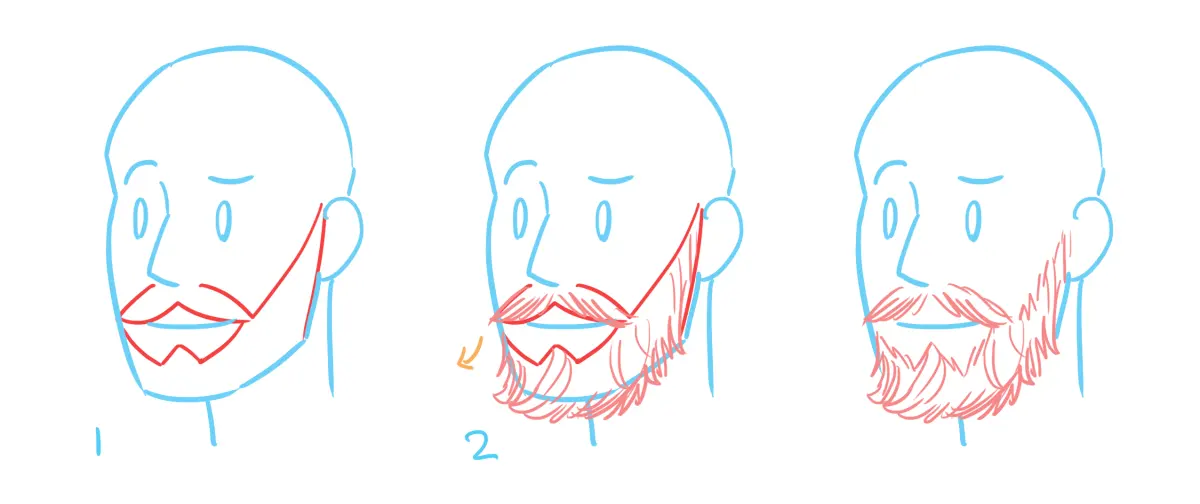
Before adding hair, you must establish the underlying structure of the jaw and chin. A common error is drawing facial hair as a flat mask attached to the skin, which ignores the three-dimensional form of the skull. Start by sketching the jawline and the area under the lower lip, as these anchor the beard’s overall shape. Use a light graphite pencil, such as an HB, to map out the perimeter where the hair will grow.
Focus on the transition between the cheekbones and the neckline. A beard follows the contours of the face, meaning it should appear to wrap around the jaw rather than sitting on top of it. Consider these anatomical markers:
- The sideburns connect to the hairline near the ears.
- The jawline dictates the lower boundary of the beard.
- The chin area usually requires more density than the cheek patches.
By establishing these boundaries first, you ensure the beard looks integrated with the subject's face rather than like an afterthought.
How to layer beard texture effectively
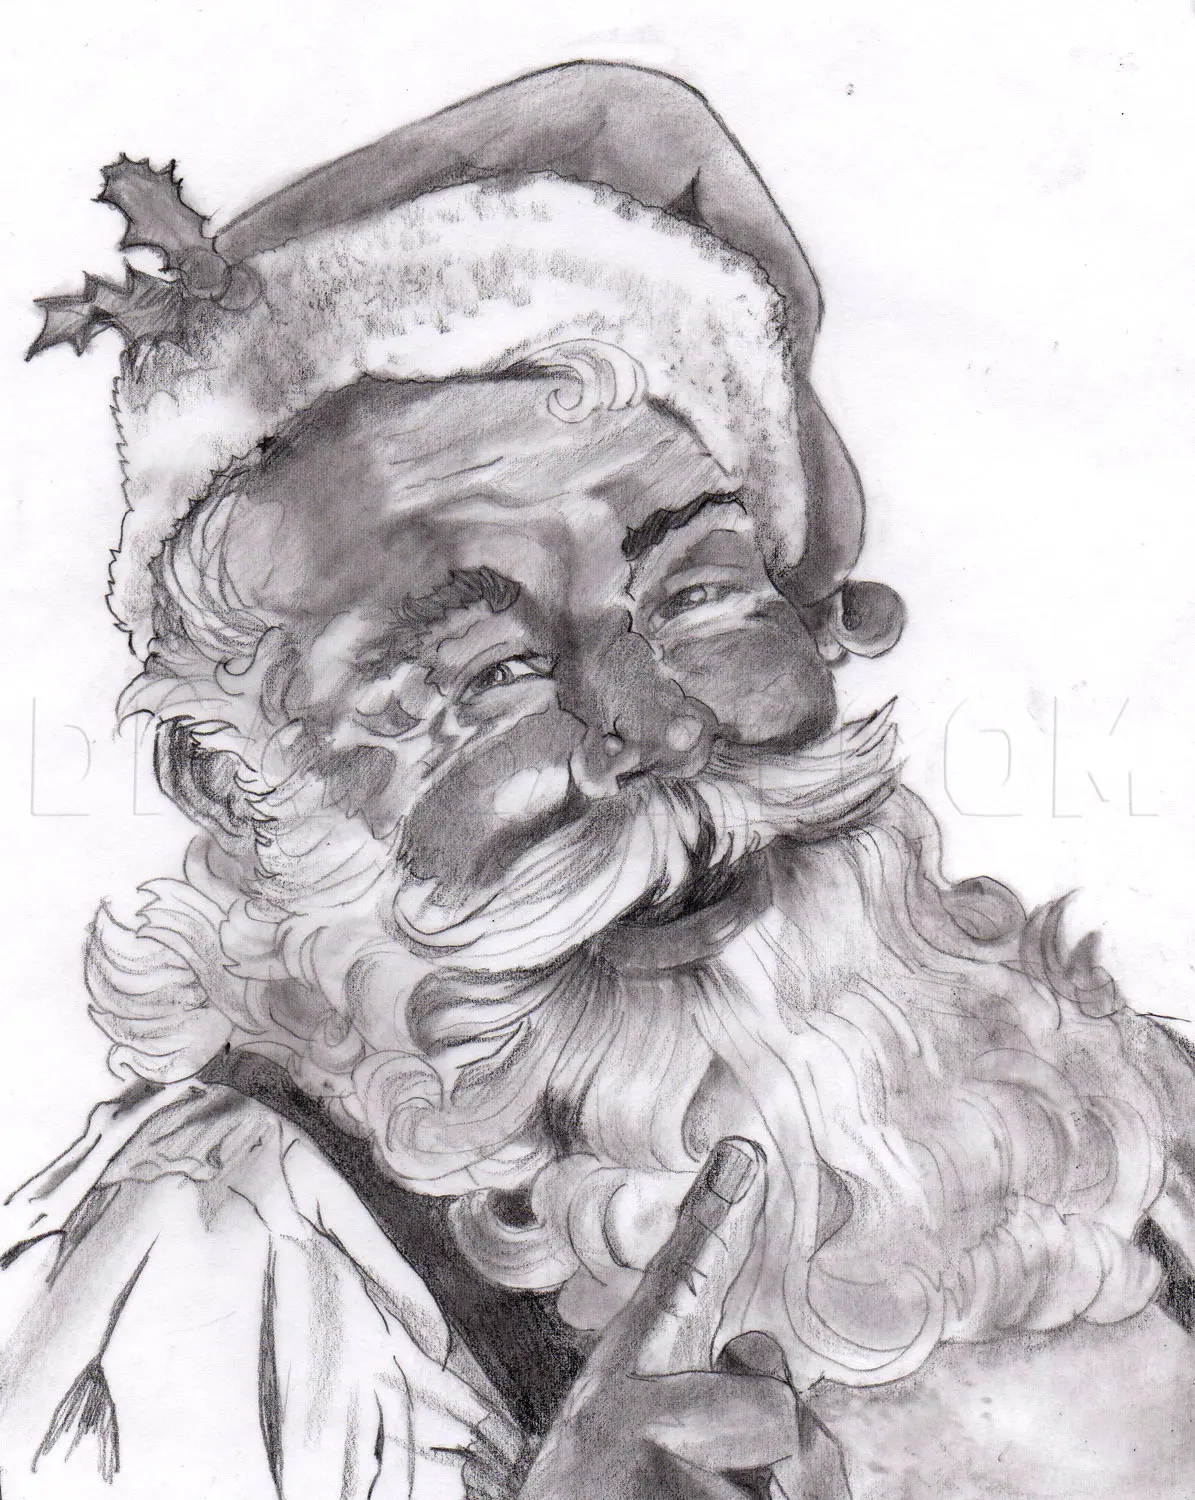
Layering is the secret to achieving a realistic, thick appearance. Beginners often try to draw every individual hair at once, which leads to a messy, flat-looking result. Instead, start by shading the entire beard area with a medium-soft pencil like a 2B to establish a base tone. This creates the illusion of depth, representing the dense undergrowth of hair that sits closest to the skin.
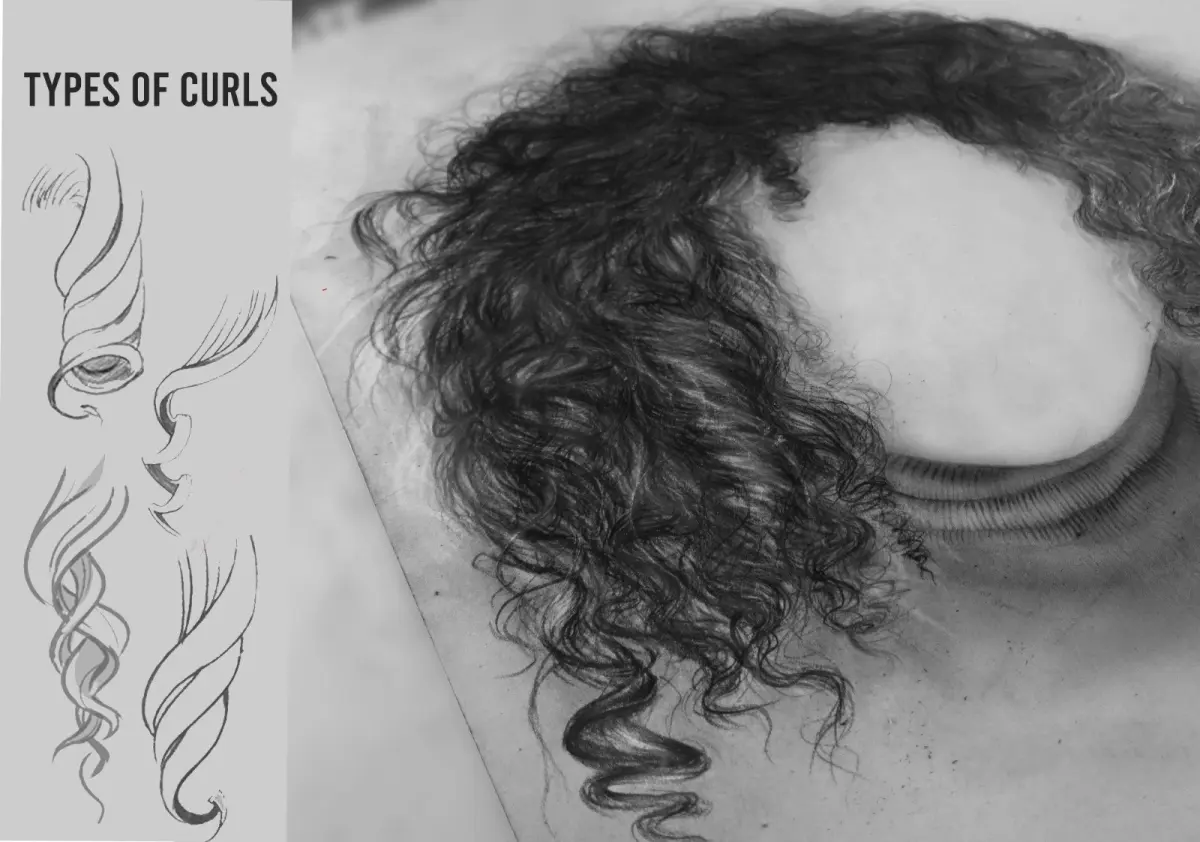
Once the base tone is established, use a sharper pencil to add strokes that mimic the direction of hair growth. Hair rarely grows in a single straight line; it follows the curve of the jaw and chin. Follow this systematic approach for better texture:
- Apply a light base layer of graphite to define the shadow areas.
- Use short, flicking motions to draw hair strands, lifting the pencil at the end of each stroke.
- Vary the length and thickness of your strokes to avoid a uniform, artificial look.
- Add darker, thicker lines in areas of deep shadow, such as under the chin or along the neckline.

How to create realistic hair flow and direction
Understanding hair growth patterns is essential for capturing the natural look of a beard. Hair typically flows downward from the cheeks, while hair on the chin often grows in multiple directions, radiating outward. If you draw all the lines perfectly parallel, the beard will look like a solid block of wood. To achieve realism, you must introduce slight variations and cross-hatching in areas where the hair is thicker or tangled.
Pay close attention to how light hits the beard. The edges of the beard, especially near the cheeks, should be softer and less defined than the dense center. Use a kneaded eraser to lift thin, light-colored hairs from the darker base layer, which adds a sense of volume and highlights. By focusing on the "flow" rather than individual strands, you create a dynamic image that looks like it belongs to a living person.

Common mistakes when drawing beards
One of the most frequent mistakes is using a uniform line weight throughout the entire drawing. When every hair is drawn with the same pressure, the beard loses its sense of depth and appears flat. Another common error is neglecting the "stray hairs" that naturally occur at the edges of a beard. These small, wispy lines are what make the drawing look organic and human.
Avoid these pitfalls to improve your technique:
- Do not outline the entire beard with a single, dark, continuous line, as this makes it look like a cutout.
- Avoid making the beard too symmetrical, as natural facial hair growth is rarely perfectly balanced on both sides.
- Do not forget to shade the skin beneath the beard, as the lack of skin tone makes the hair look like it is floating.
- Avoid using a dull pencil, as sharp points are necessary for creating fine, realistic hair details.
Best tools for drawing facial hair
Choosing the right equipment significantly impacts the quality of your work. While a standard HB pencil is sufficient for sketching, you will need a range of leads to achieve the necessary contrast. A 4B or 6B pencil is ideal for the darkest shadows under the chin, while a 2H pencil is perfect for drawing the fine, light hairs along the cheekbones. Using a mechanical pencil can also be helpful for those who struggle with keeping a sharp point for fine details.
In addition to pencils, a high-quality eraser is indispensable. A kneaded eraser can be molded into a fine point, allowing you to "draw" highlights by removing graphite from the page. This technique is particularly effective for creating the appearance of light catching the edges of individual hairs. Finally, use a blending stump sparingly, as over-blending can turn your detailed hair strokes into a muddy, grey blur. Always prioritize sharp, deliberate strokes over smudging to maintain the crispness of the beard's texture.
Key facts
- Start by sketching the jawline and chin area to define the beard's overall boundaries.
- Use short, flicking pencil strokes to mimic the direction of natural hair growth.
- Apply heavier pressure at the jawline and neck to create depth and shadow.
- Vary the length and thickness of individual strokes to avoid a uniform, artificial appearance.
- Add "stray" hairs outside the main shape to make the beard look realistic and organic.
- Use a kneaded eraser to lift graphite and create highlights, adding volume to the texture.
The bottom line
Drawing a realistic beard requires careful observation of hair growth patterns and light logic. By using flicking strokes that follow the face's anatomy and layering different pencil grades, you can create depth and texture. Focus on varying the density of your lines to avoid a flat appearance. With patience and attention to the transition between skin and hair, you will achieve a professional, lifelike result.
People also ask
Should I draw the beard before or after the face shape?
Always draw the underlying jaw and chin structure first to ensure the beard follows the anatomy of the face. If you draw the beard first, you risk making the head shape look distorted or unnatural.
How do I make a beard look thick rather than patchy?
Layer your strokes by starting with a light base tone and adding darker, overlapping hair lines on top. Increasing the density of your marks toward the chin and jawline creates the illusion of a fuller, thicker beard.
What pencil grade is best for drawing facial hair?
An HB pencil is ideal for initial outlines, while a 2B or 4B pencil works best for adding dark, textured details. Softer leads allow you to achieve the deep blacks necessary for realistic shadows under the chin.
How do I draw a transition from the skin to the beard?
Use very light, sparse strokes at the edges of the beard to create a soft, natural fade. Avoid drawing a hard, solid line around the perimeter, as this makes the beard look like a glued-on mask.
How do I represent a mustache versus a full beard?
A mustache requires shorter, tighter strokes that follow the curve of the upper lip. A full beard involves longer, more varied strokes that flow downward and outward from the chin and cheeks.
Why does my beard drawing look flat?
Flatness usually occurs when you fail to account for the contours of the face. You must darken the areas underneath the chin and along the sides of the jaw to give the beard three-dimensional volume.
This answer was created with the help of AI research tools and reference sources. Spotted an error? Let us know — we correct mistakes quickly. See our editorial policy.