How do you draw curly hair?
Short answer
Drawing curly hair requires focusing on volume and rhythmic patterns rather than individual strands. By treating hair as interconnected ribbons or clumps, you create a sense of weight and movement. Use varied line weights to define shadow and light, ensuring the curls follow the underlying structure of the skull’s shape.
On this page
How to structure curly hair shapes
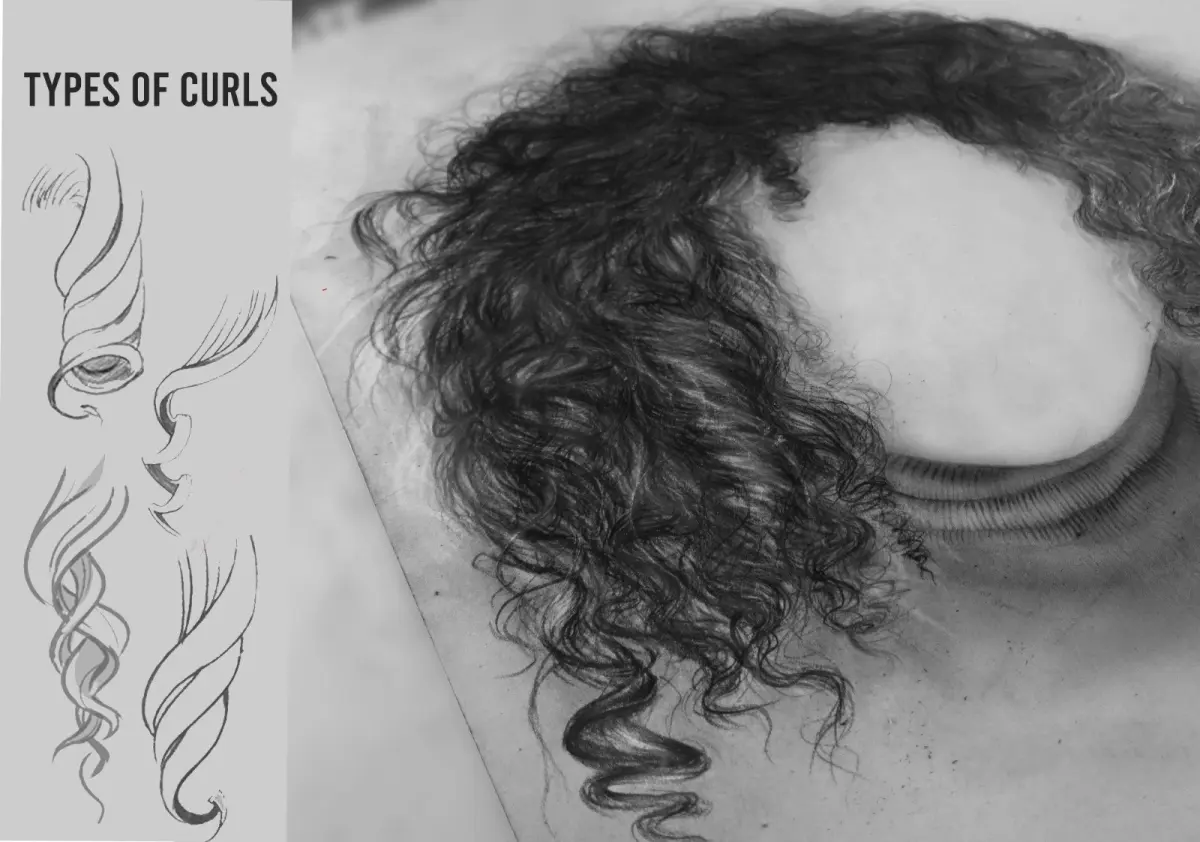
Curly hair is defined by its volume and the way it sits away from the scalp. Instead of drawing every single strand, visualize the hair as a series of interconnected ribbons or overlapping "S" and "C" shapes. Start by sketching the general silhouette or the "cloud" of the hair to establish how much space it occupies around the head. This prevents the hair from looking like it is glued flat against the skull.
Once you have the outer boundary, map out the flow of the curls using loose, gestural lines. Think of these lines as paths that travel from the roots to the ends. By establishing the direction of the curls early, you create a sense of consistency. Use these steps to build your foundation:
- Draw the head shape to determine where the hairline begins.
- Sketch the overall volume as a large, soft mass.
- Divide the mass into smaller, ribbon-like segments.
- Use light pressure to mark the direction of the curls.
Best techniques for drawing texture
Texture in curly hair comes from the interplay of light and shadow within the clumps. Because curls are three-dimensional, they create small pockets of shade where the hair bends or overlaps. Focus your shading on the undersides of these curves to give the hair depth. Keep your highlights on the convex parts of the curls where light naturally hits the surface.
To achieve a realistic look, vary the thickness of your lines. Thicker, darker lines should be used in the deep recesses of the curls, while thinner, lighter lines define the edges. Avoid making every curl identical, as natural hair is rarely perfectly symmetrical. Incorporate these elements to enhance your texture:
- Vary the size of the curls to create visual interest.
- Add "flyaways" or stray hairs to soften the edges of the hair mass.
- Use cross-hatching in shadowed areas to suggest density.
- Leave white space for highlights to simulate shine and health.
How to manage volume and weight
A common challenge is making curly hair look heavy rather than like a weightless wig. Hair has mass, and gravity pulls it downward, causing curls to stretch slightly as they get longer. Near the roots, curls are often tighter and more compressed, while toward the ends, they may loosen or become more defined. Always consider the length of the hair, as longer curls will naturally have more tension and weight at the bottom.
When drawing, ensure the hair follows the anatomy of the neck and shoulders. If the hair is long, it should drape over the body rather than floating in the air. Use darker values near the neck to show where the hair mass sits against the body. This interaction between the hair and the figure provides a sense of realism and grounds the drawing in physical space, making the volume feel authentic and substantial.
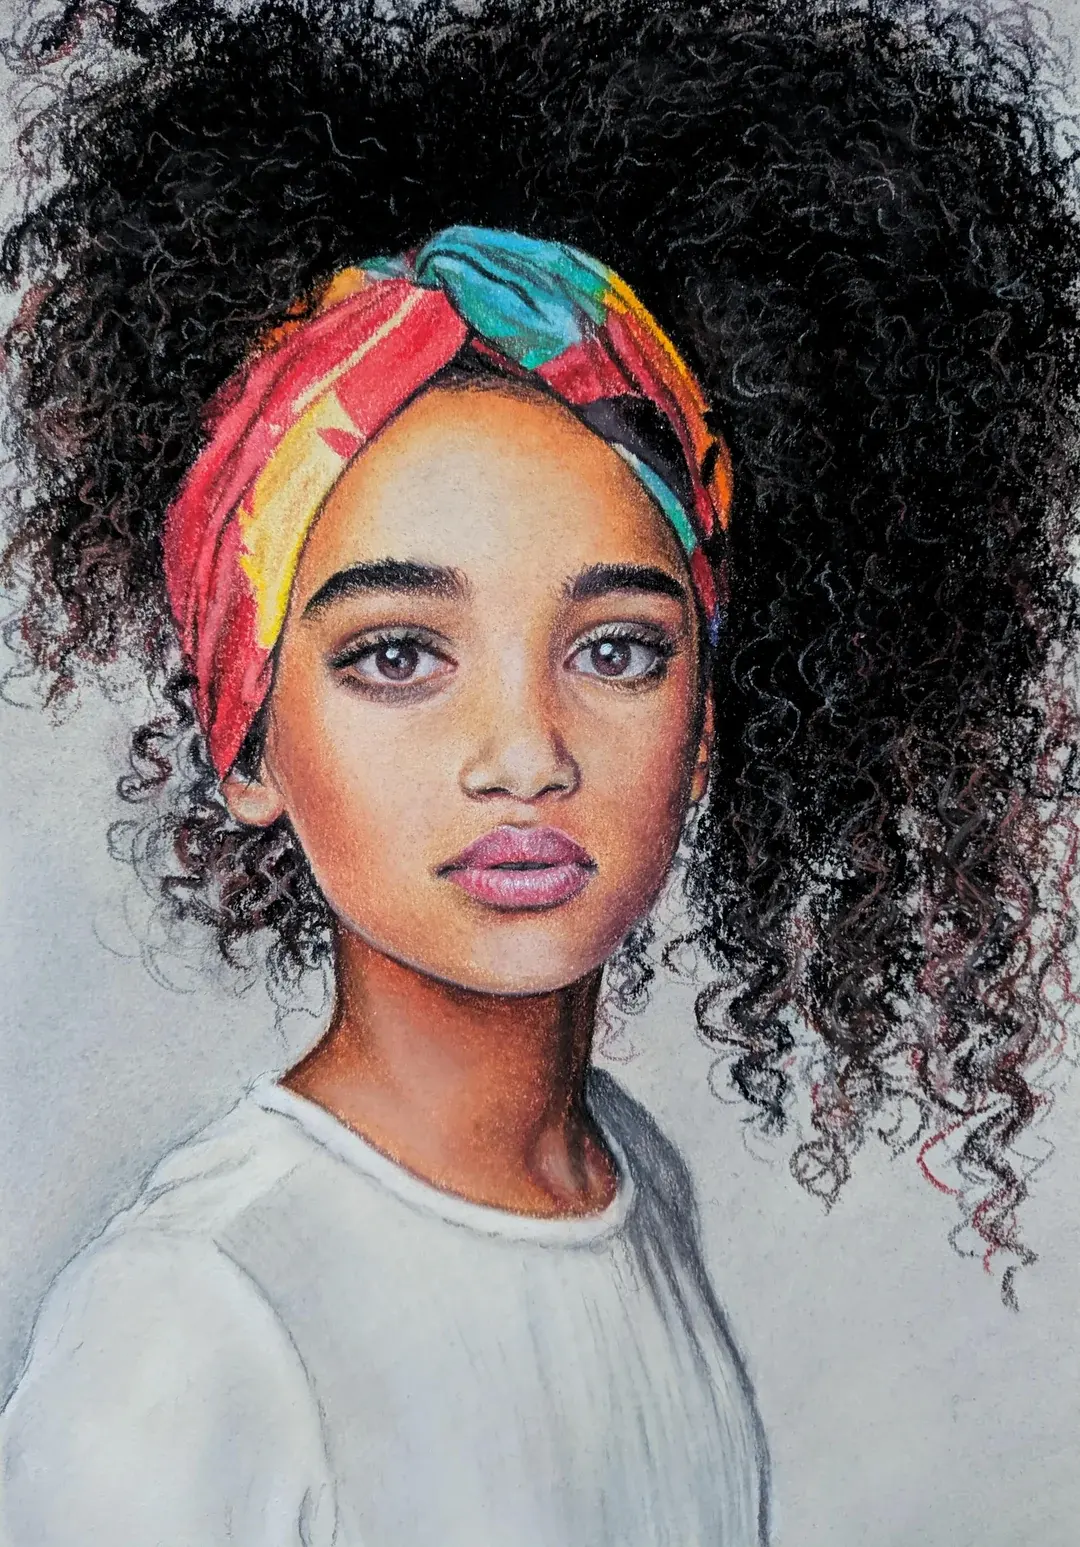
Common mistakes when drawing curls
Many beginners make the mistake of drawing individual strands from root to tip. This often results in a messy, chaotic look that lacks structure and definition. Another frequent error is ignoring the "clumping" effect; hair naturally gathers into groups, and drawing every single strand breaks this cohesion. If you try to draw every detail, the hair will lose its sense of volume and become visually overwhelming.
Another issue is failing to maintain a consistent light source. If your highlights are scattered randomly, the hair will appear flat or fuzzy. Ensure that your light source dictates where the highlights and shadows fall across the entire mass. To avoid these common pitfalls, remember these rules:
- Do not draw every strand; focus on the clumps.
- Avoid perfectly uniform curls, which look artificial.
- Never ignore the shadow cast by the hair onto the face or neck.
- Keep your lines fluid rather than stiff or jagged.
Tips for adding detail and finish
The final stage of drawing curly hair involves refining the transitions between light and dark. Use a blending stump or a soft pencil to smooth out the shadows in the deepest parts of the curls. This creates a soft, realistic transition that mimics the way light diffuses through hair. Add a few sharp, dark accents in the deepest crevices to make the curls pop and give the drawing a professional, polished appearance.
Finally, look at the edges of the hair mass. Curly hair is rarely a perfectly smooth line; it has a fuzzy, irregular perimeter. Adding a few individual, wispy hairs that break away from the main mass will make the drawing feel more organic and alive. By focusing on the interplay of light, shadow, and irregular edges, you complete the illusion of a full, vibrant head of curly hair that looks natural and well-defined.
Key facts
- Treat curly hair as a collection of overlapping ribbons or "S" and "C" shaped curves rather than individual strands.
- Use a "massing" technique by drawing the overall silhouette of the hair volume before adding internal details.
- Vary the tightness of the coils to create a natural appearance, as real hair is rarely perfectly uniform.
- Focus on the shadows within the curls, as the depth and volume are defined by the contrast between light and dark areas.
- Draw the hair in sections or clumps to avoid the common mistake of over-detailing every single strand.
- Use directional lines that follow the flow of the curl to maintain a sense of movement and weight.
The bottom line
Drawing curly hair effectively requires moving away from individual strands and toward understanding the volume of hair clumps. By mapping out the general silhouette, defining the "S" and "C" curves, and applying high-contrast shading to the internal folds, you create a realistic sense of depth. Practice observing how light interacts with hair textures, focusing on the overall flow rather than the microscopic details of every strand.
People also ask
How do I make curly hair look realistic rather than like a cartoon?
Focus on the volume and the way the hair clumps together into distinct shapes. Avoid drawing every individual hair, as this creates a stiff, unnatural look that lacks the soft, flowing quality of real curls.
What is the best pencil technique for shading curls?
Use a soft lead pencil to build up layers of shadow within the crevices of the curls. Keep your strokes consistent with the direction of the hair's curve to emphasize its three-dimensional form.
Should I draw the outline of the head first?
Yes, establishing the skull shape is essential to determine where the hair sits. Hair has weight and volume, so it should sit slightly above the actual scalp line to look natural.
How do I represent highlights in curly hair?
Identify the areas where light hits the outermost curve of each clump and leave those sections white or very lightly shaded. High contrast between these highlights and the deep shadows in the folds creates the illusion of texture.
How do I draw different types of curls, like ringlets versus waves?
Use tighter, more frequent "S" curves for ringlets and elongated, softer "C" curves for waves. The tighter the curl, the more compressed and shadowed the internal sections will appear.
What is the most common mistake when drawing curly hair?
The most common error is drawing hair as a flat, uniform texture across the head. Instead, think of hair as a series of overlapping shapes that create depth, shadow, and distinct layers.
This answer was created with the help of AI research tools and reference sources. Spotted an error? Let us know — we correct mistakes quickly. See our editorial policy.