What is the difference between one-point and two-point perspective?
Short answer
One-point perspective uses a single vanishing point on the horizon line, making objects appear as if you are looking directly at a flat face. Two-point perspective utilizes two vanishing points, typically placed at the edges of the horizon, to depict objects angled toward the viewer, revealing two sides simultaneously.
On this page
What is one-point perspective?
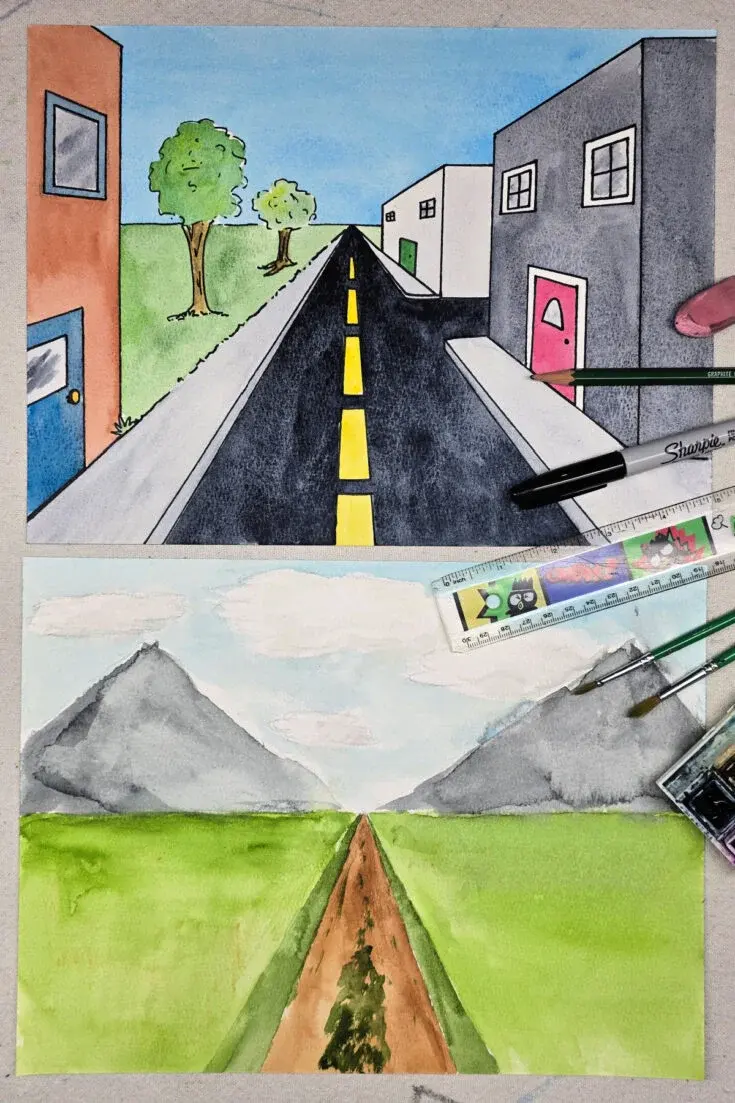
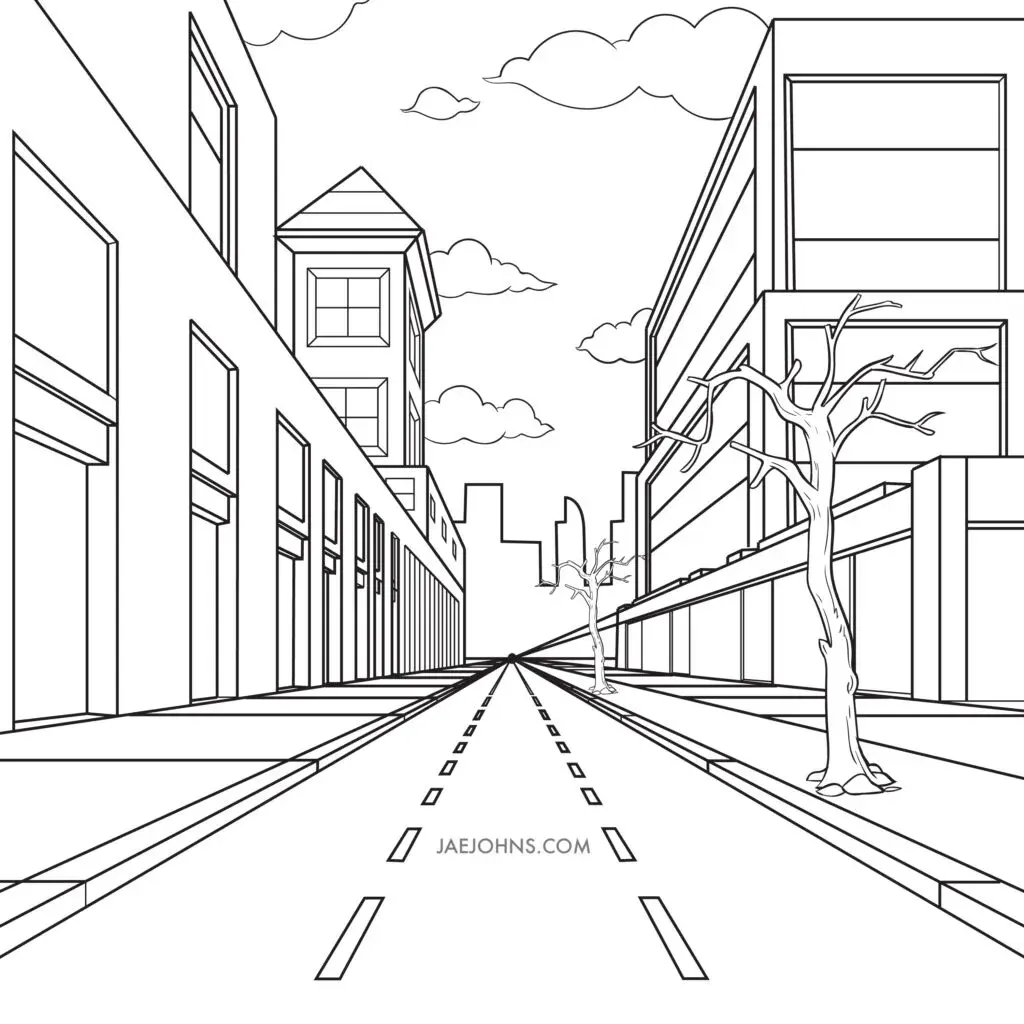
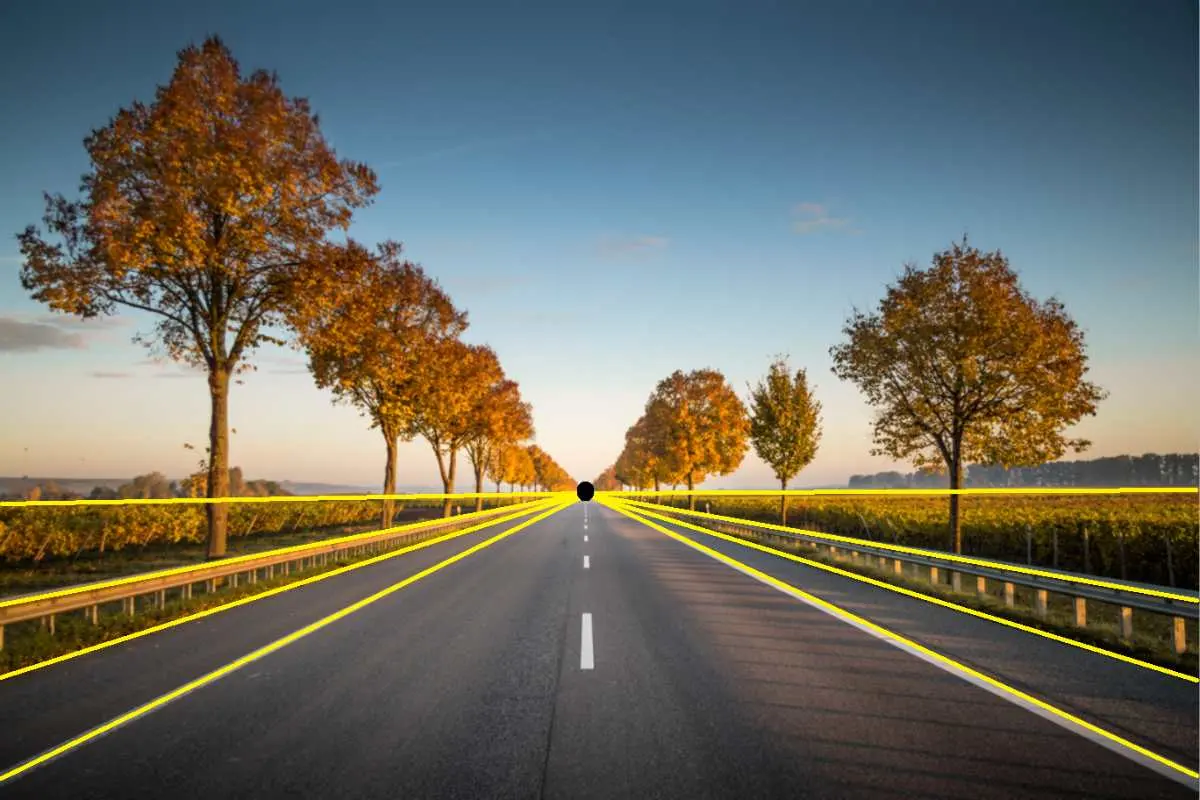
One-point perspective is the simplest form of linear perspective, a mathematical system developed during the Italian Renaissance to create the illusion of depth on a flat surface. In this method, all parallel lines that recede into the distance converge at a single point on the horizon line, known as the vanishing point. This technique is most effective when the viewer is positioned directly in front of a flat plane, such as the front wall of a building or the end of a long hallway.
Artists use this method to draw subjects that feel stable, symmetrical, and grounded. Because the viewer’s line of sight is perpendicular to the object’s face, the vertical and horizontal lines remain parallel to the edges of the paper, while only the depth lines—or orthogonals—angle toward the center. This creates a clear sense of distance and scale, often used in architectural renderings or interior design sketches to emphasize the length of a space.
How to draw in two-point perspective
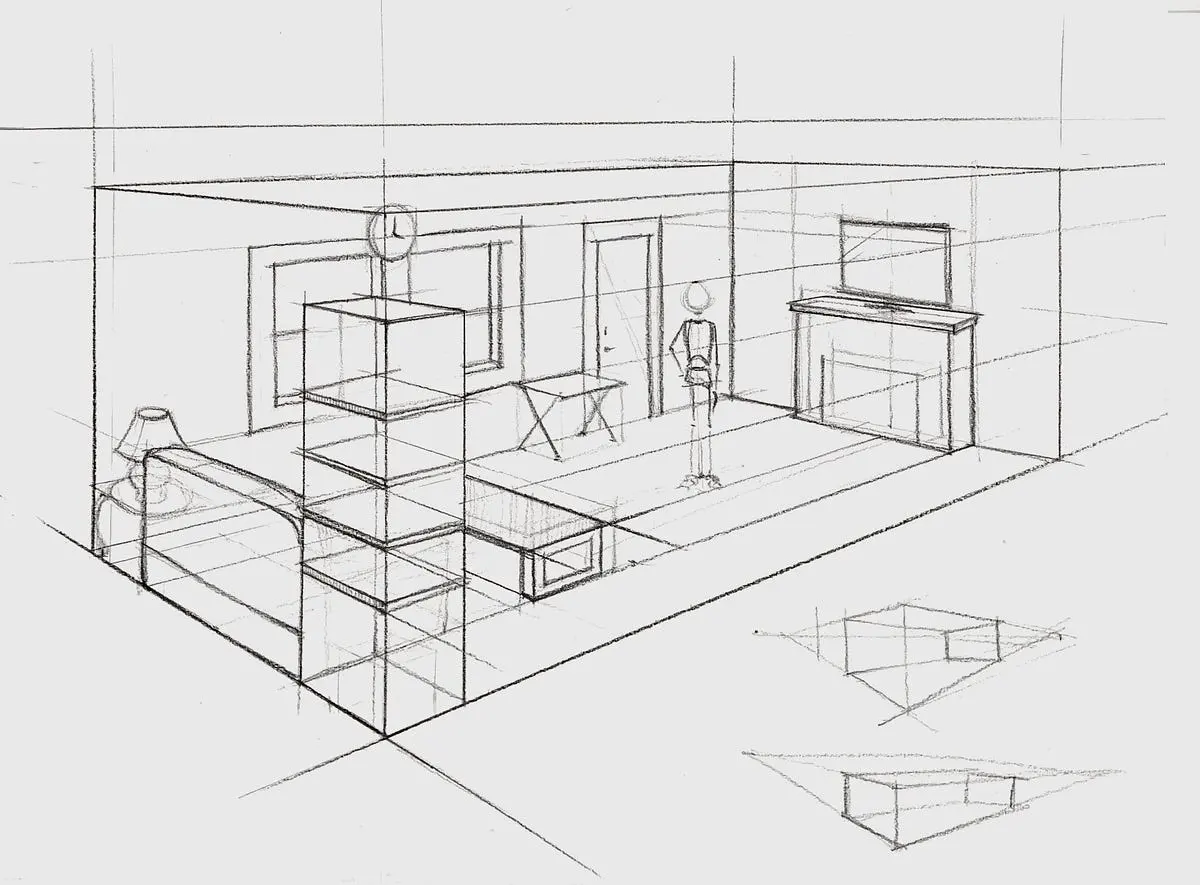
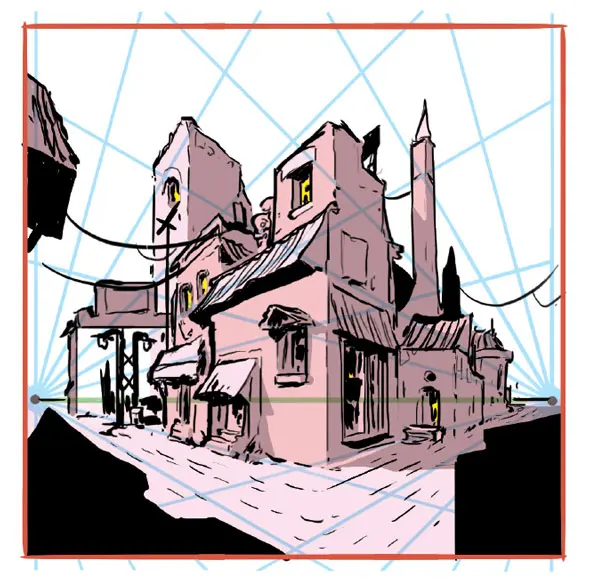
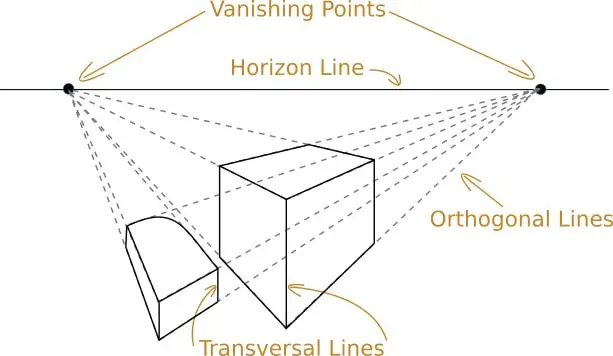
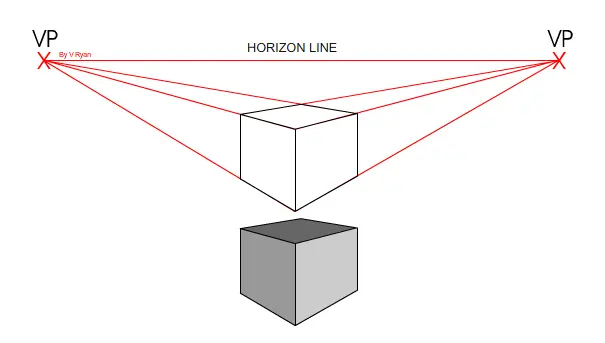
Two-point perspective is used when an object is rotated so that a corner, rather than a flat face, is closest to the viewer. Instead of one central point, you place two vanishing points on the horizon line, usually far apart to avoid distortion. All vertical lines remain perfectly perpendicular to the ground, but all horizontal edges recede toward one of the two vanishing points depending on which side of the object they define.
To construct a basic two-point perspective drawing, follow these steps:
- Draw a horizontal line across your page to represent the horizon.
- Place two vanishing points at opposite ends of this line.
- Draw a single vertical line between the vanishing points to represent the closest corner of your object.
- Connect the top and bottom of this vertical line to both vanishing points.
- Draw two additional vertical lines to define the outer edges of the two visible sides.
- Connect the tops and bottoms of these new lines back to the opposite vanishing points to complete the box.
Why perspective distortion happens
Distortion in perspective drawing occurs when the vanishing points are placed too close together on the horizon line. When points are crowded toward the center of the frame, the angles of the receding lines become too steep, making objects appear unnaturally stretched or warped. This effect is similar to using a wide-angle lens on a camera, which captures a broad field of view but bends the straight lines at the periphery of the image.
To maintain a natural look, artists often place their vanishing points well outside the boundaries of the actual drawing area. By extending the horizon line onto the surface surrounding the paper or canvas, you create a more realistic, subtle transition of depth. If you find your drawings look "off" or overly dramatic, try moving your vanishing points further apart to flatten the angles and create a more comfortable viewing experience for the observer.
Common mistakes when using perspective
Many beginners struggle with the consistency of their vertical lines, which is a frequent source of error in both one-point and two-point systems. In both methods, vertical lines must remain strictly parallel to the sides of the paper; if they tilt even slightly, the object will appear to be falling over. Another common mistake is failing to keep the horizon line level, which can make the entire scene feel unstable or tilted, regardless of how accurate the vanishing points are.
Consider these common pitfalls to improve your accuracy:
- Placing the horizon line too high or too low, which forces the viewer into an extreme bird’s-eye or worm’s-eye view.
- Forgetting that all lines, even those representing the top or bottom of a window or door, must align with a vanishing point.
- Drawing objects that are too large, causing them to extend past the vanishing points and break the illusion of depth.
- Using a ruler for the horizon but freehanding the receding lines, which leads to wobbly, inconsistent depth.
Best applications for different perspectives
Choosing between one-point and two-point perspective depends on the narrative goal of your image. One-point perspective is ideal for compositions that require a sense of focus, such as a road leading to a distant mountain or a symmetrical room where the viewer is meant to feel centered. It provides a clear, logical path for the eye to follow, making it a standard choice for technical illustrations and formal architectural plans.
Two-point perspective is better suited for dynamic, three-dimensional subjects like buildings seen from a street corner or furniture placed at an angle. It provides a more realistic representation of how we perceive objects in the real world, where we rarely view things perfectly head-on. By showing two sides of an object, you add complexity and volume to the composition, making the scene feel more active and immersive. Mastering both allows you to control the viewer's experience, choosing between the calm stability of one-point and the engaging depth of two-point.
Key facts
- One-point perspective uses a single vanishing point on the horizon line where all parallel lines converge.
- Two-point perspective utilizes two separate vanishing points placed on the horizon line to create depth.
- Use one-point perspective when drawing objects viewed head-on, such as a road stretching into the distance.
- Use two-point perspective when viewing an object from an angle, such as the corner of a building.
- A common mistake is placing vanishing points too close together, which causes extreme, unnatural distortion.
- Always keep your horizon line at eye level to ensure your perspective remains grounded and realistic.
The bottom line
The primary difference between these techniques lies in the viewer's orientation toward the subject. One-point perspective is ideal for frontal views where one side of an object faces you directly, while two-point perspective captures objects viewed from a corner, adding dynamic depth. Mastering these two methods allows artists to create convincing three-dimensional spaces, provided they keep their vanishing points wide and their horizon lines consistent.
People also ask
What is a vanishing point?
A vanishing point is a specific spot on the horizon line where parallel lines appear to meet and disappear. It acts as the anchor for your perspective grid, dictating the direction and depth of all receding edges.
Read the full answer →Can I use three-point perspective?
Yes, three-point perspective adds a third vanishing point above or below the horizon line to depict extreme height or depth. This technique is commonly used in architectural drawings to show a "bird's-eye" or "worm's-eye" view of tall structures.
How do I find the horizon line?
The horizon line is always positioned exactly at the viewer's eye level. If you are drawing a landscape, it is the line where the earth meets the sky; if you are indoors, it is the height of your own eyes from the floor.
Does perspective apply to organic shapes?
Perspective principles apply to all objects, though organic shapes like trees or people are more complex to map. You can simplify these forms into basic geometric boxes to determine their placement and scale before adding final details.
Why do my drawings look distorted?
Distortion usually occurs when vanishing points are placed too close to the edges of the drawing area. To fix this, move your vanishing points further apart or even off the physical page to create a more natural field of vision.
What tools do I need to draw in perspective?
You only need a pencil, an eraser, and a long straightedge or ruler to maintain accurate lines. A light-colored charcoal or graphite pencil is best for sketching initial guidelines that can be easily erased after the final lines are inked.
This answer was created with the help of AI research tools and reference sources. Spotted an error? Let us know — we correct mistakes quickly. See our editorial policy.