How do you draw interiors?
Short answer
Drawing interiors requires mastering linear perspective to create the illusion of three-dimensional depth on a two-dimensional surface. By establishing a horizon line and vanishing points, you can accurately map the scale and spatial relationships of furniture, walls, and architectural features. Consistent practice with geometric shapes and structural grids ensures professional results.
On this page
How to use one-point perspective for interiors
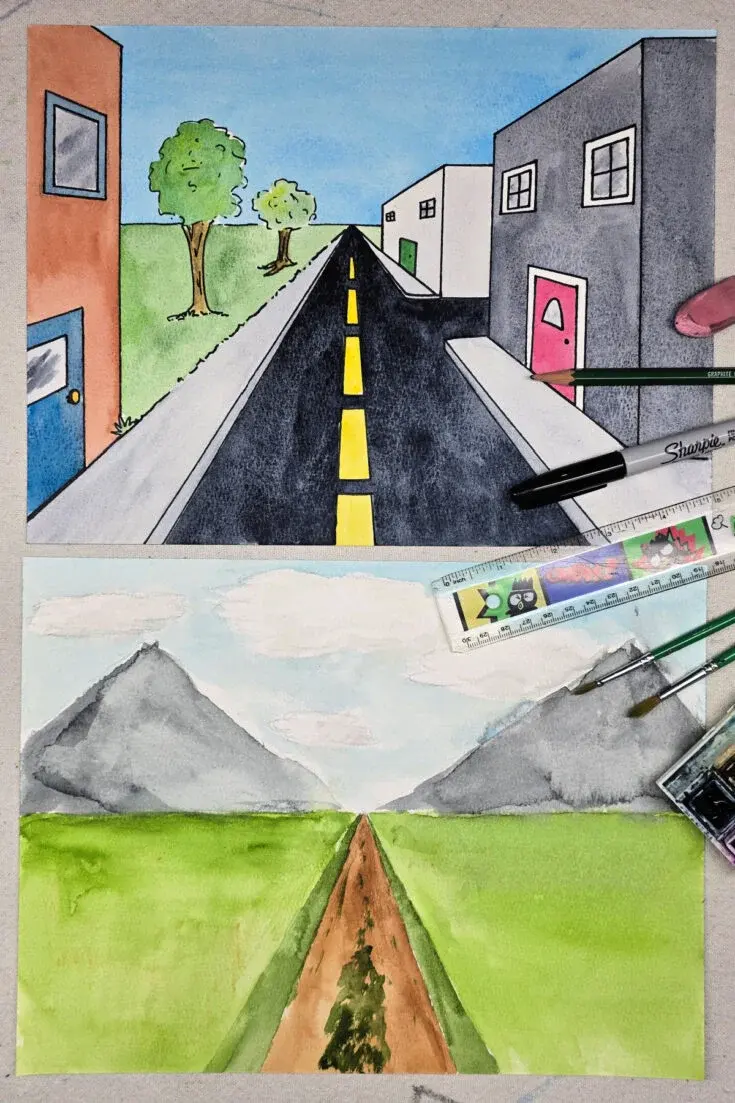
One-point perspective is the most common technique for drawing rooms, as it focuses on a single vanishing point located on the horizon line. To begin, draw a rectangle to represent the back wall of the room. Place a small dot anywhere within this rectangle to serve as your vanishing point. All lines representing the depth of the floor, ceiling, and side walls must converge at this specific point.
This method is ideal for symmetrical views where the viewer looks directly at a wall. By drawing diagonal lines from the corners of your paper toward the vanishing point, you create the receding edges of the space. Objects placed within this grid will naturally appear to shrink as they approach the center, maintaining correct proportions.
- Draw a light horizon line across your paper.
- Mark a central vanishing point on that line.
- Use a ruler to connect the corners of your paper to the vanishing point.
- Add horizontal and vertical lines to define furniture edges.
How to measure scale and proportion
Maintaining consistent scale is essential for making a room look believable. A common rule is to establish a "human scale" by placing a figure roughly five to six feet tall within the scene. If a doorway is drawn too small compared to the furniture, the entire perspective will feel distorted and claustrophobic.
Use a grid system to ensure that objects remain proportional as they recede into the distance. If you are drawing a tiled floor, each tile should get progressively thinner and shorter as it nears the vanishing point. This mathematical approach prevents the common error of making objects in the background appear too large or floating above the floor plane.
- Use a standard scale, such as 1/4 inch equals one foot, if working on a floor plan.
- Keep a sketchbook nearby to practice drawing basic cubes before adding complex details.
- Always check that vertical lines remain perfectly perpendicular to the bottom edge of the paper.
Best tools for interior sketching
Professional interior designers and artists rely on a specific set of tools to ensure precision. A high-quality mechanical pencil with 0.5mm lead is preferred for fine lines, while a softer 2B pencil helps with shading. A clear plastic ruler or a T-square is indispensable for maintaining the rigid, straight lines required for architectural structures.
For those adding depth and volume, alcohol-based markers or graphite pencils are excellent for rendering shadows. Light sources are critical; decide where your window or lamp is located before you begin shading. Surfaces facing away from the light source should be rendered with darker tones to create a sense of weight and physical presence in the room.
- Architectural scale ruler for accurate measurements.
- Eraser shield to clean up lines near furniture edges.
- Smooth-surface bristol board to prevent graphite smudging.
- Fine-liner pens for finalizing outlines after the initial construction lines are erased.
Why perspective distortion happens
Perspective distortion occurs when the vanishing point is placed too close to the edge of the paper or when the field of view is too wide. If you try to include too much of a room in a single frame, the objects at the periphery will appear stretched or warped. This is known as the "wide-angle effect," which can make furniture look elongated.
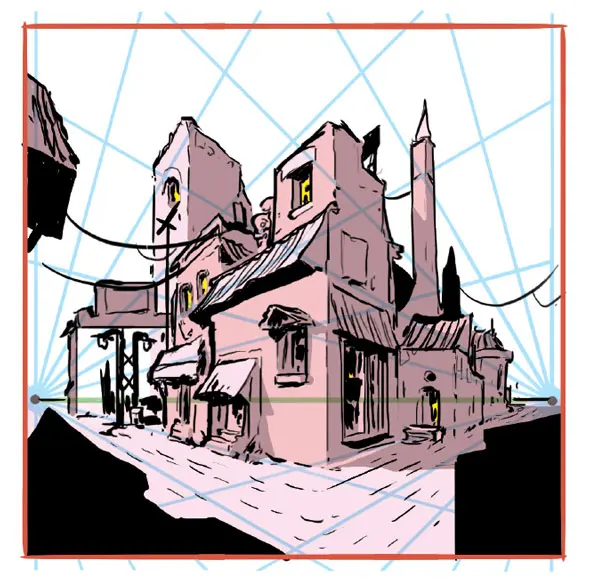
To fix this, limit your field of view by focusing on a specific corner or a single wall. If you must capture a large space, consider using two-point perspective, which utilizes two vanishing points on the horizon line. This technique is better suited for viewing a room from an angle, such as looking into a corner, and reduces the unnatural stretching of side walls.
- Avoid placing the vanishing point too close to the center if you want a dynamic composition.
- Check for "foreshortening," where an object appears shorter than it actually is because it is angled toward the viewer.
- Use a light touch with your pencil during the early stages to make corrections easier.
Common mistakes when drawing rooms
One of the most frequent errors is failing to align furniture with the floor plane. Beginners often draw chairs or tables that look like they are sliding or floating because the legs do not touch the floor at the correct perspective angle. Always ensure that the base of every object follows the receding lines of your floor grid.
Another mistake is ignoring the importance of overlapping. When objects overlap, the eye naturally understands which items are closer to the viewer. Without this, the room looks flat and like a collection of disjointed shapes. Ensure that rugs, tables, and chairs partially cover one another to build a cohesive, layered environment that feels lived-in and structurally sound.
- Neglecting to draw the thickness of walls, which makes the room look like a paper model.
- Over-detailing the background while leaving the foreground empty, which confuses the viewer's depth perception.
- Forgetting to account for the thickness of furniture legs, which should also follow the vanishing point.
Key facts
- Use one-point perspective by placing a single vanishing point on the horizon line to create depth in a room.
- Maintain consistent scale by ensuring furniture height aligns with the horizon line, which typically represents eye level at 5 feet.
- Establish a grid on the floor plane first to accurately place objects and measure distances within the space.
- Apply atmospheric perspective by using lighter lines and less detail for objects further away from the viewer.
- Use a T-square and triangle to ensure all vertical lines remain perfectly perpendicular to the bottom of the page.
- Sketch light, "ghost" lines initially to map out proportions before committing to darker, final contours.
The bottom line
Drawing interiors requires a disciplined approach to perspective and spatial geometry. By mastering the horizon line and vanishing points, you provide a stable foundation for any room design. Focus on maintaining vertical alignment and consistent scale to ensure your space feels realistic. With practice, these technical constraints become second nature, allowing you to focus on the creative arrangement of furniture, lighting, and decorative details within your composition.
People also ask
What is the most common mistake when drawing interiors?
The most frequent error is failing to keep vertical lines perfectly upright. If walls or door frames tilt, the entire room will appear to be collapsing or floating.
How do I choose the right vanishing point?
Place the vanishing point directly in front of your intended focal point, such as a window or a fireplace. This naturally draws the viewer's eye toward the most important feature of the room.
Should I draw furniture before or after the room structure?
Always establish the room's shell, including walls, floor, and ceiling, before adding furniture. This ensures that the scale of the objects matches the architectural dimensions of the space.
How do I represent curves in a room?
Curves are best drawn by placing them within a rectangular box that follows the perspective grid. Once the box is correctly angled, you can sketch the curve inside the defined boundaries.
Why do my drawings look flat?
Drawings often lack depth if they do not utilize overlapping shapes or varying line weights. Darker, thicker lines in the foreground combined with thinner lines in the background create a sense of three-dimensional space.
Is it necessary to use a ruler for every line?
While a ruler is essential for structural lines and perspective, freehand sketching is preferred for textures and organic items. Mixing precise architectural lines with fluid, hand-drawn details adds character to the work.
This answer was created with the help of AI research tools and reference sources. Spotted an error? Let us know — we correct mistakes quickly. See our editorial policy.