How do you draw in perspective?
Short answer
Drawing in perspective is the technique of representing three-dimensional objects on a two-dimensional surface to create the illusion of depth. It relies on a horizon line, vanishing points, and converging orthogonal lines. By aligning edges toward these points, artists can accurately simulate how space recedes as it moves away from the viewer.
On this page
How does linear perspective work?
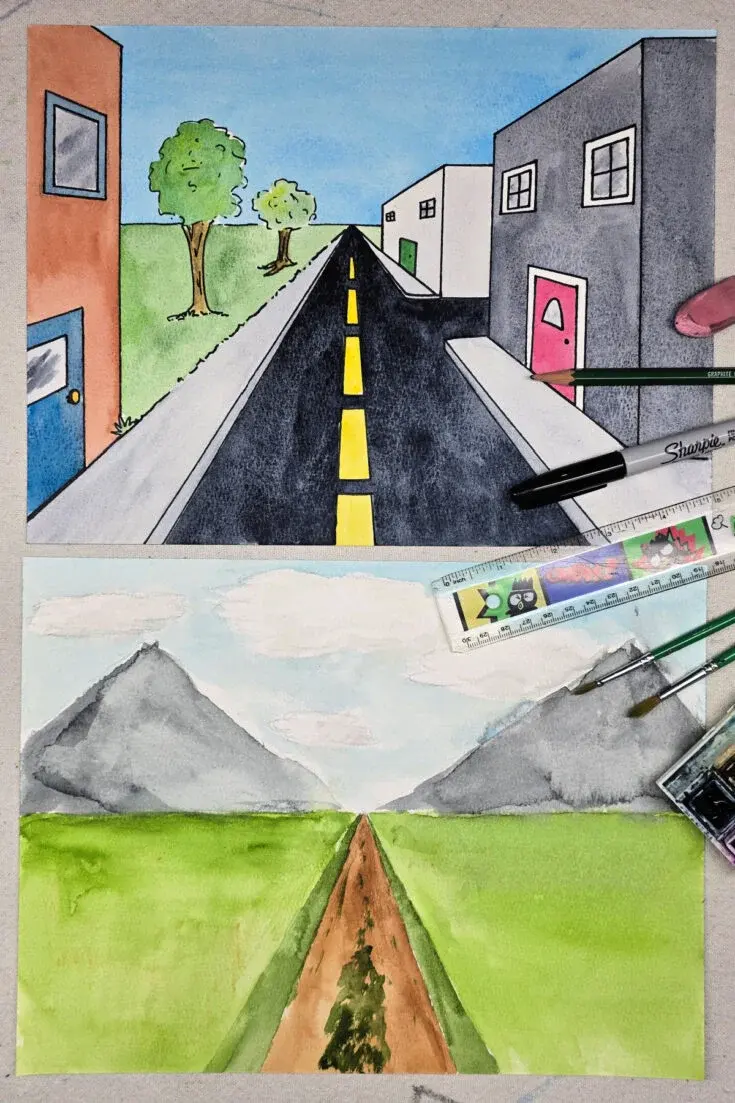
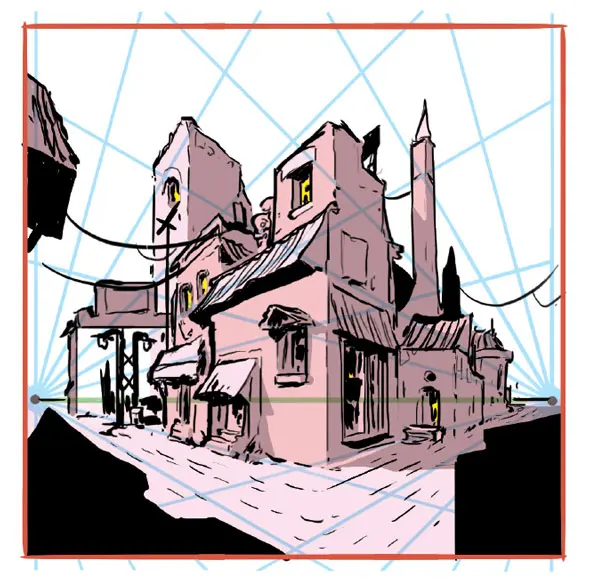
Linear perspective is a mathematical system developed during the Italian Renaissance, most notably by the architect Filippo Brunelleschi around 1415. The core principle involves the horizon line, which represents the viewer's eye level, and vanishing points, which are locations on the horizon where parallel lines appear to converge. When you draw a road or a building, the lines that run away from you are called orthogonals. These lines must lead toward the vanishing point to create a realistic sense of distance.
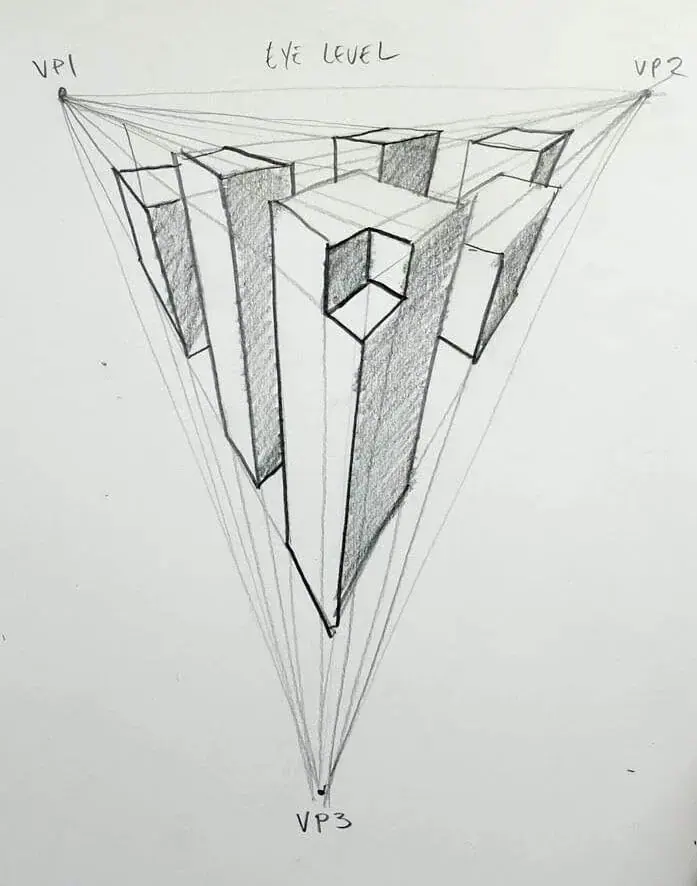
The complexity of the drawing depends on how many vanishing points you choose to employ. One-point perspective is typically used for interior scenes or roads where the viewer is looking straight down a path. Two-point perspective is common for viewing objects like buildings from a corner, where two sides recede at different angles. Three-point perspective adds a vertical vanishing point, either above or below the horizon, to capture extreme high or low angles, often called bird’s-eye or worm’s-eye views.
How to set up a perspective drawing
To begin a drawing, you must establish your spatial framework before adding any details. A consistent structure ensures that your objects do not look distorted or "float" in an unnatural way. Follow these steps to build your initial guide:
- Draw a horizontal line across your paper to represent the horizon line.
- Mark one or more dots on this line to serve as your vanishing points.
- Lightly sketch the front-facing corner or edge of your object.
- Use a ruler to draw faint lines from the corners of your object to the vanishing points.
- Define the back edges of your object by drawing parallel lines that connect these orthogonals.
By keeping these construction lines very light, you can easily erase them once the primary forms are established. Using a straightedge is essential for beginners, as even slight wobbles in your lines can break the illusion of depth and make the perspective appear incorrect.
What are the most common mistakes when drawing in perspective?
The most frequent error is the "distorted angle," which occurs when lines do not meet exactly at the designated vanishing point. If your lines miss the point by even a few millimeters, the object will appear warped or structurally unsound. Another common mistake is ignoring the horizon line entirely, which results in objects that seem to be tilted or falling over. Always verify that your vertical lines remain perfectly perpendicular to the bottom edge of your paper, unless you are using three-point perspective.
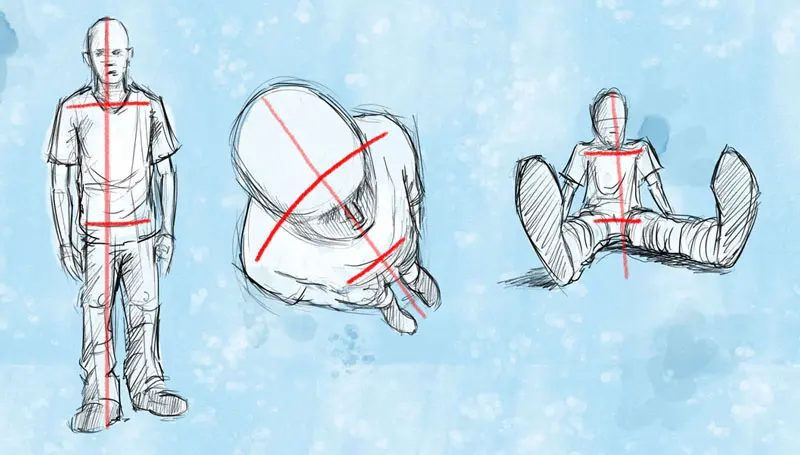
Artists also often struggle with scale, failing to shrink objects appropriately as they move toward the vanishing point. To avoid this, remember that as an object gets closer to the vanishing point, it must appear smaller and closer to the horizon line. If you draw a person in the foreground and another in the distance, the distant figure’s head should align with the eye level of the foreground figure, assuming they are standing on the same plane.
Which tools are best for perspective drawing?
While you can draw in perspective with any pencil, certain tools significantly improve accuracy and speed. A long, clear plastic ruler is the most important item, as it allows you to see the drawing beneath the edge while aligning your points. Mechanical pencils are preferred over traditional wooden ones because they maintain a consistent, sharp point, which is crucial for precision work. A kneaded eraser is also helpful, as it can lift light graphite marks without damaging the paper’s surface.
For those practicing advanced techniques, a T-square or an adjustable drafting triangle can help maintain perfectly vertical and horizontal lines. Some artists also use a "vanishing point template," which is a piece of cardboard with holes punched at specific intervals to help guide lines toward a fixed point. While these tools are helpful, the most important asset is a steady hand and the patience to measure every line before committing to a dark, final stroke.
Why does perspective look wrong sometimes?
Even when the math is correct, a drawing can look "off" if the field of view is too wide. This is known as perspective distortion, which happens when you try to fit too much visual information into a single frame. If your vanishing points are too close together on the paper, the objects at the edges of your drawing will appear stretched or unnaturally elongated. To fix this, move your vanishing points further apart, even if they fall off the edge of your actual drawing paper.
Another reason for a "wrong" look is the failure to account for atmospheric perspective. In reality, objects that are far away lose contrast and color intensity due to the air and moisture between the viewer and the subject. If you draw distant objects with the same sharp, dark lines as those in the foreground, the image will appear flat. By softening the edges and lightening the values of distant objects, you can reinforce the linear perspective with subtle visual cues that make the depth feel much more authentic.
Key facts
- The horizon line represents the viewer's eye level and determines where objects meet the sky.
- Vanishing points are specific spots on the horizon line where parallel lines appear to converge.
- One-point perspective uses a single vanishing point, typically used for scenes looking directly at a flat surface.
- Two-point perspective uses two vanishing points, creating a sense of depth for objects viewed at an angle.
- Foreshortening is the technique of shortening lines in a drawing to create the illusion of depth.
- Objects appear smaller and less detailed as they move closer to the vanishing point.
The bottom line
Mastering perspective is the fundamental bridge between drawing flat shapes and creating believable three-dimensional space. By consistently anchoring your lines to a horizon and specific vanishing points, you control how the viewer perceives depth and scale. Practice these geometric rules with simple cubes before tackling complex scenes. With patience, you will learn to manipulate spatial relationships to bring professional-grade realism to your artistic compositions.
People also ask
What is the difference between one-point and two-point perspective?
One-point perspective centers on a single vanishing point, making it ideal for drawing objects like long hallways or roads. Two-point perspective requires two vanishing points on the horizon, which is necessary for drawing objects like the corner of a building.
How do I find the horizon line in a scene?
The horizon line is always at your exact eye level, regardless of whether you are standing or sitting. If you are drawing from life, hold your pencil horizontally at eye level to identify where the horizon sits in your field of vision.
What is the most common mistake beginners make?
Beginners often place the horizon line too high or too low, which distorts the spatial relationship of the objects. Another common error is failing to ensure all receding lines meet exactly at the designated vanishing points.
Do I need a ruler to draw in perspective?
While a ruler helps maintain precision, it is not strictly required for artistic sketching. Using a straightedge is highly recommended for beginners to train the eye to see how lines converge toward a single point.
How does three-point perspective differ from others?
Three-point perspective adds a vertical vanishing point above or below the horizon line. This technique creates a dramatic "bird's-eye" or "worm's-eye" view, making objects appear to loom over or shrink away from the viewer.
Can I have more than three vanishing points?
Yes, multi-point perspective exists and is often used in wide-angle photography or complex architectural illustrations. However, these systems are significantly more difficult to calculate and are rarely used in standard drawing practice.
This answer was created with the help of AI research tools and reference sources. Spotted an error? Let us know — we correct mistakes quickly. See our editorial policy.