How do you make a drawing look 3D?
Short answer
Making a drawing look 3D involves simulating depth on a flat surface through linear perspective, light, and shadow. By establishing a horizon line and vanishing points, artists create spatial recession. Furthermore, applying consistent light sources and value gradients gives objects volume, transforming simple two-dimensional shapes into convincing, solid, three-dimensional forms.
On this page
How to use linear perspective to create depth
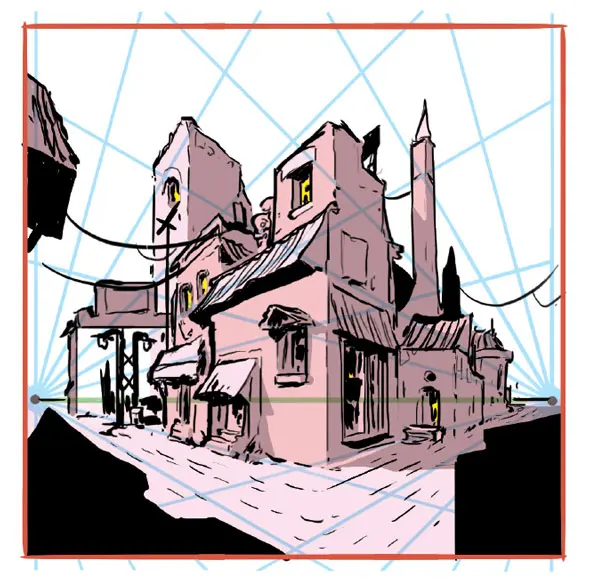
Linear perspective is a mathematical system used to create the illusion of space and distance on a flat surface. Developed during the Italian Renaissance by architects like Filippo Brunelleschi around 1415, this technique relies on the principle that parallel lines appear to converge at a single point on the horizon line. By using a ruler to guide these lines toward a specific vanishing point, artists can accurately map out the scale and placement of objects as they recede into the distance.
To master this technique, follow these foundational steps:
- Draw a horizontal line across your page to represent the eye level or horizon.
- Place one or more dots on this line to serve as your vanishing points.
- Connect the corners of your shapes to these points using light guidelines.
- Erase the excess lines once the structural framework of your 3D object is established.
This method is essential for drawing architecture, roads, or any scene requiring a realistic sense of scale. Without these converging lines, objects often appear to float or tilt incorrectly, breaking the viewer's immersion in the depicted space.
How to shade for 3D volume
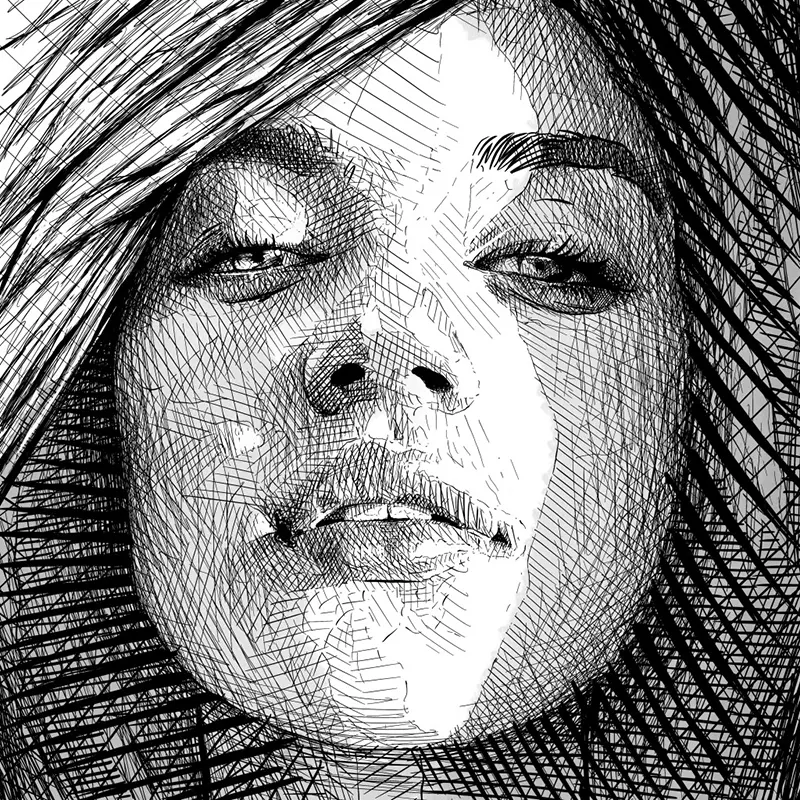
Shading is the process of using varying degrees of darkness to simulate the way light interacts with a physical object. When light hits a form, it creates a range of values, including highlights, midtones, core shadows, and reflected light. By transitioning smoothly between these values, you convince the human eye that a shape has mass and occupies physical space, rather than existing merely as a flat silhouette on the paper.
To achieve a professional look, consider the following elements of light:
- Highlight: The brightest spot where light hits the surface directly.
- Midtone: The true color or value of the object under normal light.
- Core Shadow: The darkest area on the object, located away from the light source.
- Cast Shadow: The dark shape projected onto the ground or nearby surfaces.
- Reflected Light: Subtle illumination bouncing back into the shadow area from the environment.
Consistency is the most critical factor when shading. If your light source is positioned in the top-right corner, every object in your drawing must reflect that same logic. If shadows fall in different directions for different objects, the brain immediately recognizes the inconsistency, and the illusion of a unified, 3D environment fails.
Why overlap and scale matter in drawing
Overlap and scale are intuitive cues that the brain uses to interpret depth without the need for complex mathematical grids. Overlapping occurs when one object partially obscures another, forcing the eye to perceive the obscured object as being further away. Similarly, the principle of scale dictates that objects of the same size will appear smaller as they move toward the horizon, a phenomenon known as foreshortening.
These techniques are particularly useful for creating atmospheric depth in landscapes or busy compositions. By placing larger, more detailed objects in the foreground and smaller, less defined objects in the background, you establish a clear hierarchy of space. This layering effect mimics how human vision functions in the real world, where the eyes naturally focus on closer objects while the background becomes slightly less distinct. Using these simple visual cues allows you to build complex scenes that feel expansive and deep, even when you are working on a small piece of paper.
Common mistakes when drawing 3D forms
Many beginners struggle with 3D drawing because they rely too heavily on outlines rather than value. An outline defines the edge of a shape, but in reality, objects are defined by the contrast between light and shadow. Relying solely on hard, dark outlines makes objects appear like cardboard cutouts. To fix this, try to "lose" your edges by softening the transition between the object and the background, which helps the form integrate into the surrounding space.
Another frequent error is using a limited range of values. Beginners often stick to a narrow spectrum of light grays, which results in drawings that look flat or "washed out." To create a truly 3D effect, you must push your values to the extreme ends of the spectrum. Use a soft lead pencil to achieve deep, rich blacks and leave the white of the paper untouched for the brightest highlights. This high contrast is what gives a drawing its punch and makes the subject matter look solid and tangible.
Best tools for beginners to learn 3D drawing
You do not need expensive equipment to start mastering 3D techniques; in fact, simplicity is often better for learning. A set of graphite pencils ranging from 2H (hard and light) to 6B (soft and dark) is essential for creating a full range of values. A kneaded eraser is also vital, as it allows you to lift graphite off the page to create highlights or soften shadows, which is a key step in modeling form.
When practicing, use a smooth, high-quality drawing paper that can handle multiple layers of shading without tearing. Avoid using standard printer paper, as it is often too thin and textured to allow for the smooth blending required for realistic shading. By focusing on the relationship between your light source and the object's form, you will gradually develop the spatial awareness needed to make any drawing look 3D. Consistent practice with basic geometric shapes—like spheres, cubes, and cylinders—will eventually allow you to render complex, lifelike subjects with ease and confidence.
Key facts
- Use linear perspective by drawing a horizon line and a vanishing point to guide parallel lines toward a single distant spot.
- Apply a consistent light source to determine where highlights, mid-tones, and shadows fall on an object.
- Create depth through overlapping, where objects placed in front partially obscure those behind them.
- Use atmospheric perspective by making distant objects lighter, less detailed, and slightly bluer in tone.
- Utilize foreshortening to distort the proportions of an object as it angles toward the viewer to simulate depth.
- Vary line weight by using thicker, darker lines for foreground objects and thinner, lighter lines for background elements.
The bottom line
Creating a 3D effect requires mastering the interplay of light, shadow, and perspective. By establishing a clear horizon line, maintaining a consistent light source, and utilizing techniques like overlapping and atmospheric perspective, you can transform a flat surface into a convincing spatial environment. Focus on building a full range of values and proper proportions to ensure your subjects possess the weight and depth of real-world objects.
People also ask
What is the difference between one-point and two-point perspective?
One-point perspective uses a single vanishing point on the horizon line, typically used for objects facing the viewer directly. Two-point perspective uses two vanishing points, which is necessary for drawing objects at an angle where two sides are visible.
How do I choose where to place the light source?
Pick a fixed point outside your drawing area and imagine rays of light hitting your subject from that direction. Everything on the side facing the light should be bright, while the opposite side should contain your shadows and reflected light.
Why do my drawings look flat even when I add shading?
You may be using a narrow range of values, meaning your lights and darks are too similar. Ensure you have a full spectrum of tones, including deep, dark shadows and bright, crisp highlights to create contrast.
What is the purpose of a horizon line?
The horizon line represents the viewer's eye level in the composition. It serves as the anchor for all perspective lines and dictates whether the viewer is looking down at, up at, or directly at an object.
How does overlapping help with 3D effects?
Overlapping provides the brain with a clear visual cue regarding spatial hierarchy. When one shape cuts across another, the eye automatically perceives the obscured shape as being further away in the scene.
Can I use color to make a drawing look 3D?
Yes, warm colors like red and orange tend to advance toward the viewer, while cool colors like blue and violet tend to recede. Using warmer tones in the foreground and cooler, muted tones in the background enhances the illusion of distance.
This answer was created with the help of AI research tools and reference sources. Spotted an error? Let us know — we correct mistakes quickly. See our editorial policy.