How do you draw a room in perspective?
Short answer
Drawing a room in perspective requires establishing a horizon line and a vanishing point to create the illusion of depth. By drawing orthogonal lines from the edges of your paper toward this central point, you define the walls, floor, and ceiling, allowing you to place furniture accurately within the three-dimensional space.
On this page
How to set up one-point perspective
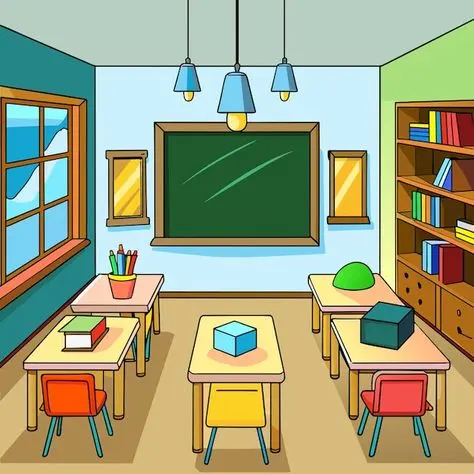
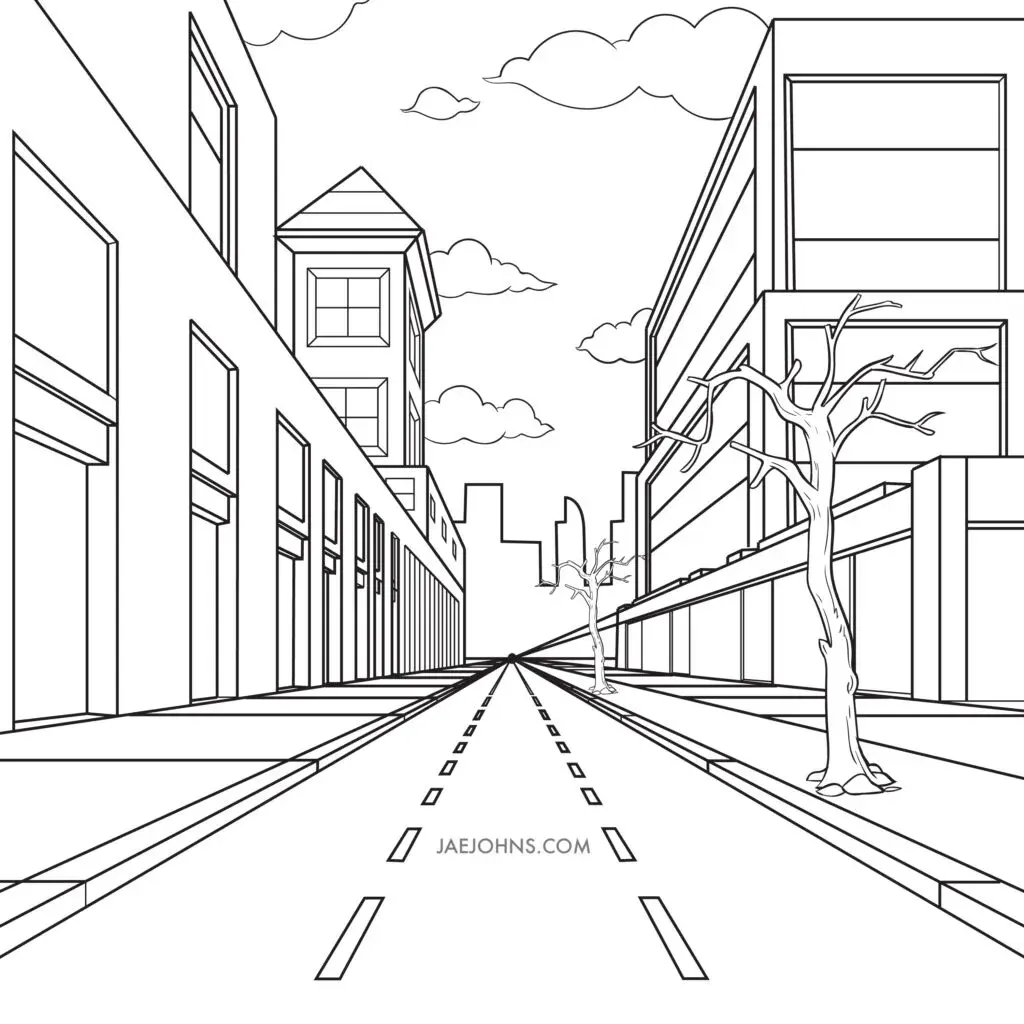
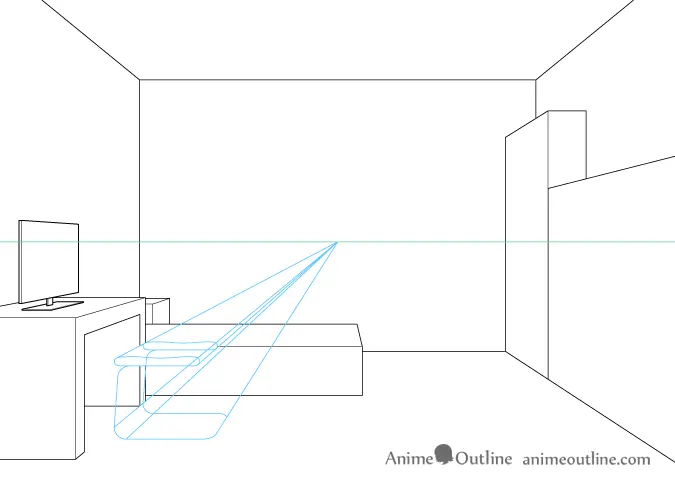
One-point perspective is the most common technique for drawing a room, as it creates a natural focal point on the back wall. Begin by drawing a horizon line horizontally across your paper, which represents the viewer's eye level. Place a single dot, known as the vanishing point, somewhere near the center of this line. This point acts as the anchor for all lines that recede into the distance.
Once your vanishing point is set, draw a large rectangle that encompasses most of your drawing area. This rectangle represents the back wall of the room. From each of the four corners of this rectangle, draw light, straight lines—called orthogonals—that extend outward to the edges of your paper, passing through the vanishing point. These lines act as the structural guides for the ceiling, floor, and side walls.
- Draw the horizon line across the center of your page.
- Place a vanishing point on the horizon line.
- Sketch a rectangle to define the back wall.
- Draw diagonal lines from the rectangle corners to the vanishing point.
How to draw furniture in perspective
Placing objects like tables or chairs requires consistency with your vanishing point. To draw a square object, such as a rug or a box, draw the front face as a flat shape parallel to the edges of your paper. Connect the corners of this shape to the vanishing point using light pencil strokes. The depth of the object is determined by where you choose to draw the back edges between these receding lines.
When drawing furniture, keep in mind that any line parallel to the floor or ceiling must eventually align with the vanishing point. If you are drawing a chair, the legs closer to the viewer should be taller than the legs further away. This difference in scale creates the necessary visual cues for the brain to perceive depth. Always use a ruler for these lines to ensure that the geometric integrity of the room remains intact.
- Keep the front faces of objects flat and parallel to the paper edges.
- Use the vanishing point to determine the length of receding sides.
- Ensure all horizontal surfaces taper toward the center point.
- Adjust the vertical height of objects based on their distance from the viewer.
Why perspective distortion happens
Perspective distortion occurs when the vanishing point is placed too close to the edge of the paper or when the field of view is too wide. If you attempt to draw a room that is too large or wide, the lines near the edges of the paper will appear unnaturally stretched or skewed. This is known as "wide-angle distortion," a phenomenon often seen in photography when using a lens with a short focal length.
To avoid this, keep your vanishing point centered and do not extend your room boundaries too far toward the corners of the page. If you find your lines looking warped, try moving the vanishing point closer to the center of your composition. Additionally, ensure that your vertical lines remain perfectly perpendicular to the bottom edge of the paper. Even a slight tilt in these vertical lines can make the entire room look like it is collapsing or leaning dangerously.
Best tools for perspective drawing
For beginners, the most essential tool is a long, sturdy ruler or a transparent T-square. These tools ensure that your orthogonal lines are perfectly straight, which is critical for maintaining the illusion of a realistic space. A mechanical pencil with an HB or 2B lead is recommended because it allows for precise, thin lines that are easy to erase without damaging the paper surface.
Drafting paper with a light grid can also be incredibly helpful for maintaining alignment. If you prefer working digitally, software like Adobe Photoshop or Procreate offers "perspective grids" that automatically snap your lines to a vanishing point. Regardless of the medium, keep an eraser handy to clean up the construction lines once the main furniture and walls are defined. By keeping your initial marks light, you can easily remove the scaffolding lines to reveal a clean, professional-looking room layout.
Common mistakes when drawing rooms
One of the most frequent errors is failing to keep vertical lines truly vertical. In one-point perspective, all vertical edges of walls and furniture must remain parallel to the sides of your paper. If these lines tilt even slightly, the room will lose its sense of stability. Another common mistake is inconsistent scaling, where furniture placed in the foreground appears smaller than items in the background, which contradicts the rules of depth.
Avoid drawing too many complex objects before establishing the room's basic structure. If the underlying perspective grid is flawed, no amount of detail will make the room look correct. Finally, do not forget to account for the thickness of walls and objects. Adding a slight double-line to the edges of tables or door frames creates a sense of mass and weight. By focusing on these foundational principles, you can create a compelling and accurate representation of any interior space.
Key facts
- Perspective drawing relies on a vanishing point where all parallel lines appear to converge at the horizon.
- One-point perspective is best for rooms where you are facing a flat wall directly.
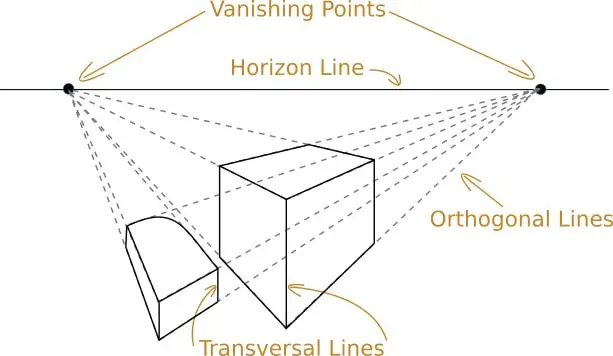
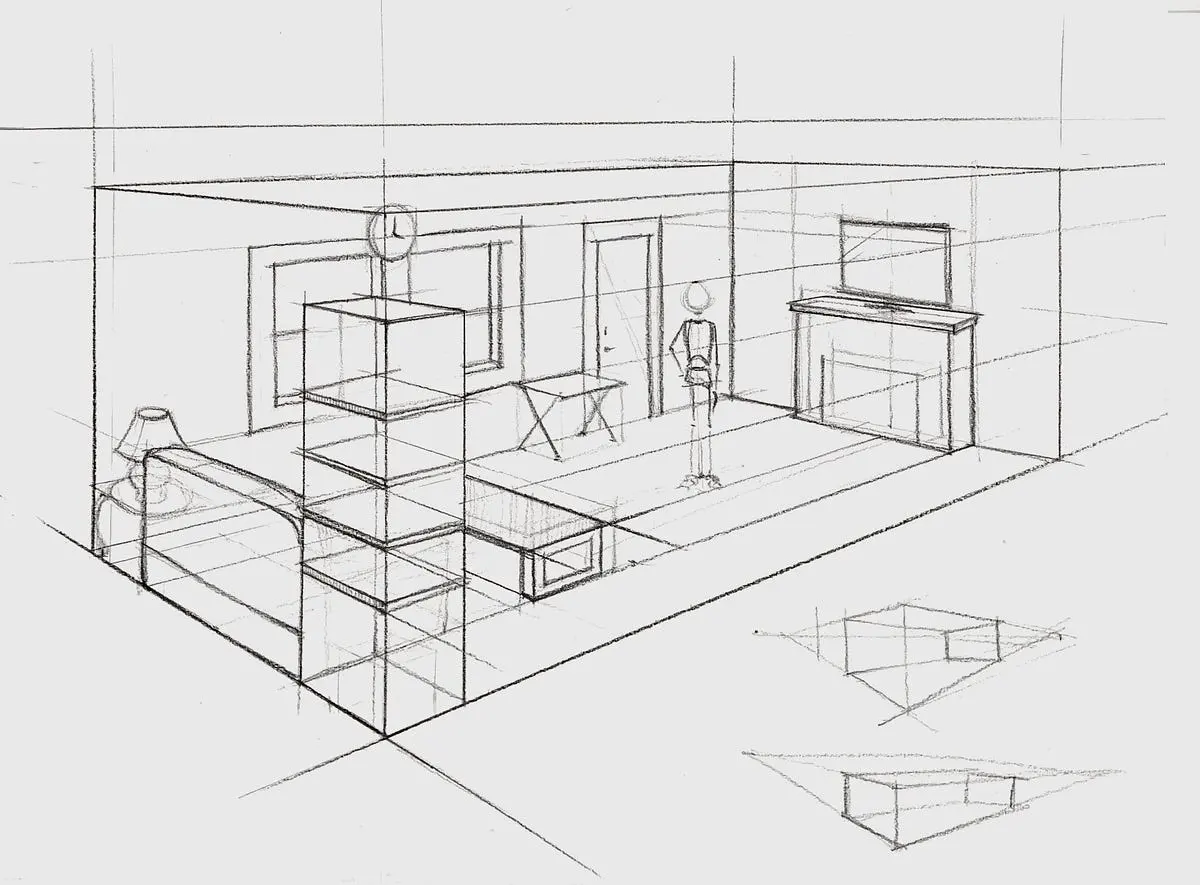
- Two-point perspective is used when looking at a corner, requiring two distinct vanishing points on the horizon line.
- Always draw a light horizon line across your paper at eye level to establish the viewer's height.
- Use a ruler to ensure all orthogonal lines—those receding into the distance—connect precisely to the vanishing point.
- Vertical lines must remain perfectly perpendicular to the bottom edge of the paper to avoid a distorted, "leaning" room.
The bottom line
Drawing a room in perspective requires a disciplined approach to geometry and spatial awareness. By establishing a horizon line and identifying your vanishing points, you create a framework that mimics human vision. Mastering the alignment of orthogonal and vertical lines allows you to construct convincing, three-dimensional interiors. With consistent practice using a ruler and a steady hand, you can transform flat sketches into deep, immersive architectural spaces.
People also ask
What is the difference between one-point and two-point perspective?
One-point perspective uses a single vanishing point for all receding lines, creating a symmetrical view. Two-point perspective uses two vanishing points, which adds depth and realism when viewing objects or spaces from an angle.
Read the full answer →How do I know where to place the vanishing point?
Place the vanishing point on the horizon line at the exact spot where the viewer’s eye is focused. If you want to draw a room from a standing position, place the horizon line roughly two-thirds of the way up the page.
Why do my drawings look distorted?
Distortion often occurs when objects are drawn too far away from the vanishing point or when vertical lines are slanted. Ensure your vertical lines are parallel to the sides of your paper to maintain structural integrity.
How do I draw furniture in a perspective room?
Draw the front face of the furniture as a flat shape, then extend lines from each corner toward the vanishing point. Connect these lines with parallel horizontal and vertical lines to define the depth and back edges.
Should I use a grid to help with perspective?
Perspective grids are excellent tools for beginners to maintain consistent proportions. They provide a visual guide for spacing objects correctly as they recede into the distance, preventing common errors in scale.
What is the most common mistake when drawing interiors?
The most frequent error is failing to keep horizontal lines perfectly level. Even a slight tilt in a floor or ceiling line will make the entire room appear to be collapsing or sliding off the page.
This answer was created with the help of AI research tools and reference sources. Spotted an error? Let us know — we correct mistakes quickly. See our editorial policy.