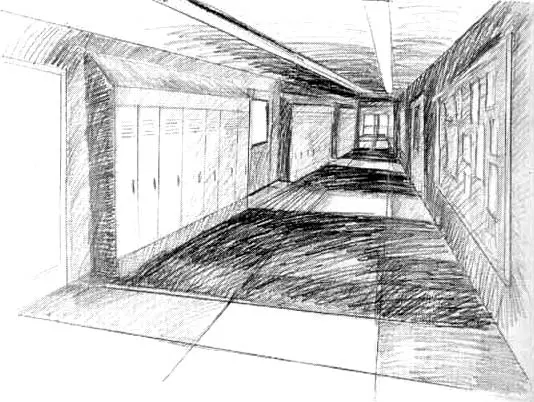
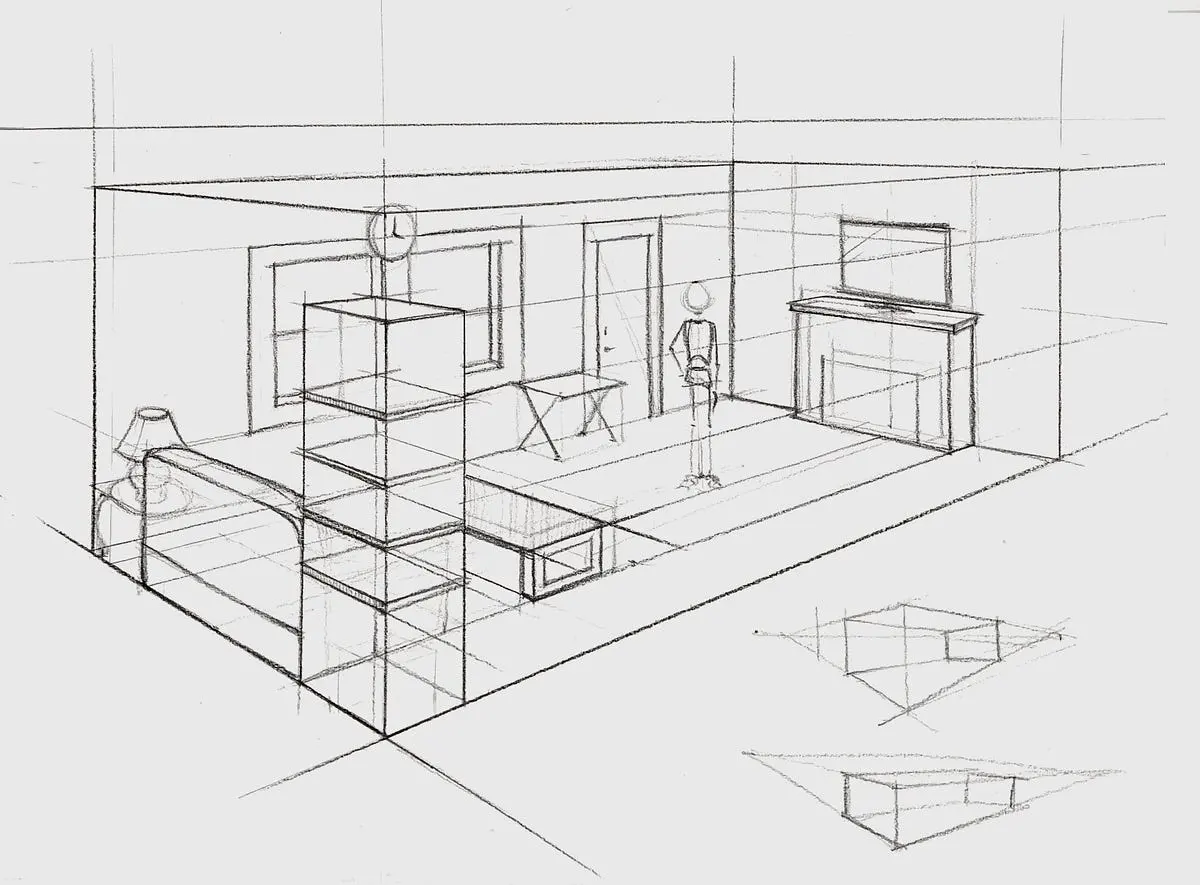
What is a vanishing point?
Short answer
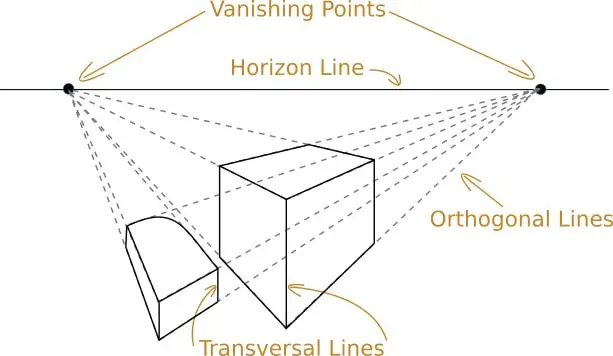
A vanishing point is a specific spot on the horizon line in a perspective drawing where parallel lines appear to converge and disappear. It serves as the primary anchor for creating the illusion of three-dimensional depth on a two-dimensional surface, allowing artists to represent spatial recession accurately within a realistic composition.

On this page
What is a vanishing point in drawing?
The vanishing point is a geometric concept derived from linear perspective, a system developed during the Italian Renaissance to mimic human vision. When you look down a long, straight road, the sides of the street seem to lean toward each other until they meet at a single point in the distance. This visual phenomenon occurs because objects that are further away appear smaller to the human eye. By placing a vanishing point on your horizon line, you establish a consistent reference for how every object in your scene should shrink as it recedes into the background.
Artists use this point to guide the placement of "orthogonal lines," which are the diagonal lines that connect the corners of objects to the vanishing point. If you are drawing a building, the lines representing the top and bottom edges of the walls must track back to this central location. Without a defined vanishing point, structures often look distorted or "flat," failing to convey the sense of physical space that defines realistic art. Mastering this point is the fundamental step for anyone moving from simple sketching to complex architectural or landscape rendering.
How to find the vanishing point
Finding the vanishing point in a scene requires careful observation of the lines that define the edges of objects. In a photograph or a real-world view, look for parallel lines that seem to move away from you, such as the edges of a sidewalk, the rafters of a ceiling, or the frame of a window. If you were to trace these lines with a ruler, they would eventually intersect at a single coordinate. That intersection is your vanishing point.
To identify it effectively, follow these steps:
- Locate the horizon line, which is always at the viewer's eye level.
- Identify two or more parallel lines in your subject that appear to be receding.
- Use a straightedge or ruler to draw light, extended lines along these edges.
- Mark the exact spot where these lines cross as your vanishing point.
Once you have identified this point, you can use it to construct the rest of your drawing. Every object that shares the same orientation must align with this specific spot to maintain the internal logic of your perspective.
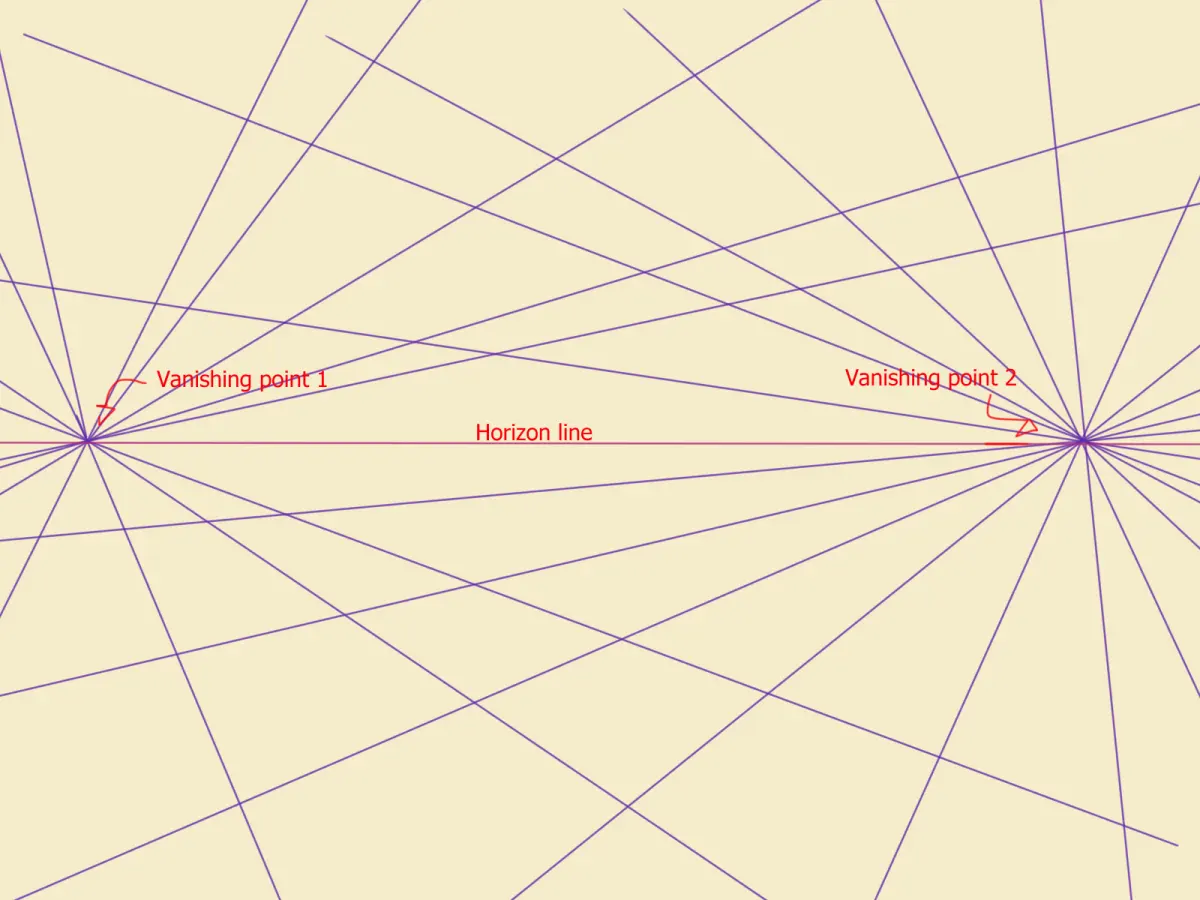
Why vanishing points create depth
The human brain interprets depth based on how objects relate to one another and the horizon. When you draw objects that grow smaller and converge toward a vanishing point, you are replicating the way light hits the retina. This technique provides the viewer with a sense of "scale," allowing them to understand how far away an object is simply by comparing its size to other elements in the frame. It transforms a flat piece of paper into a window looking out onto a three-dimensional world.
Different types of perspective use varying numbers of vanishing points to achieve specific effects:
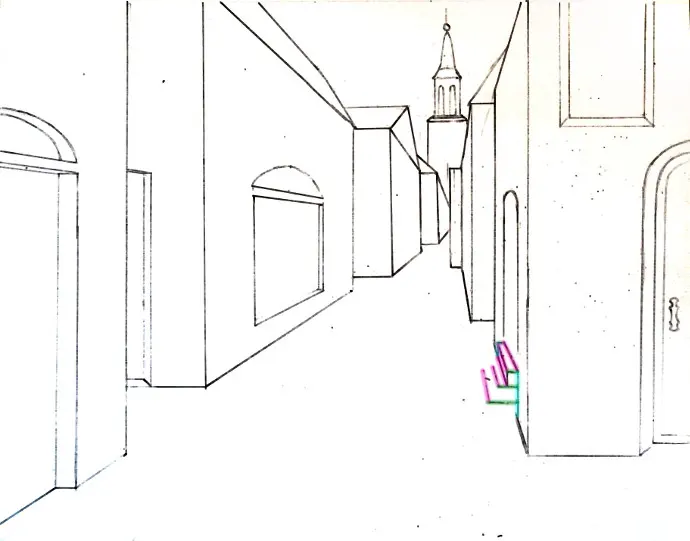
- One-point perspective: Uses a single point, usually for looking directly down a corridor or street.
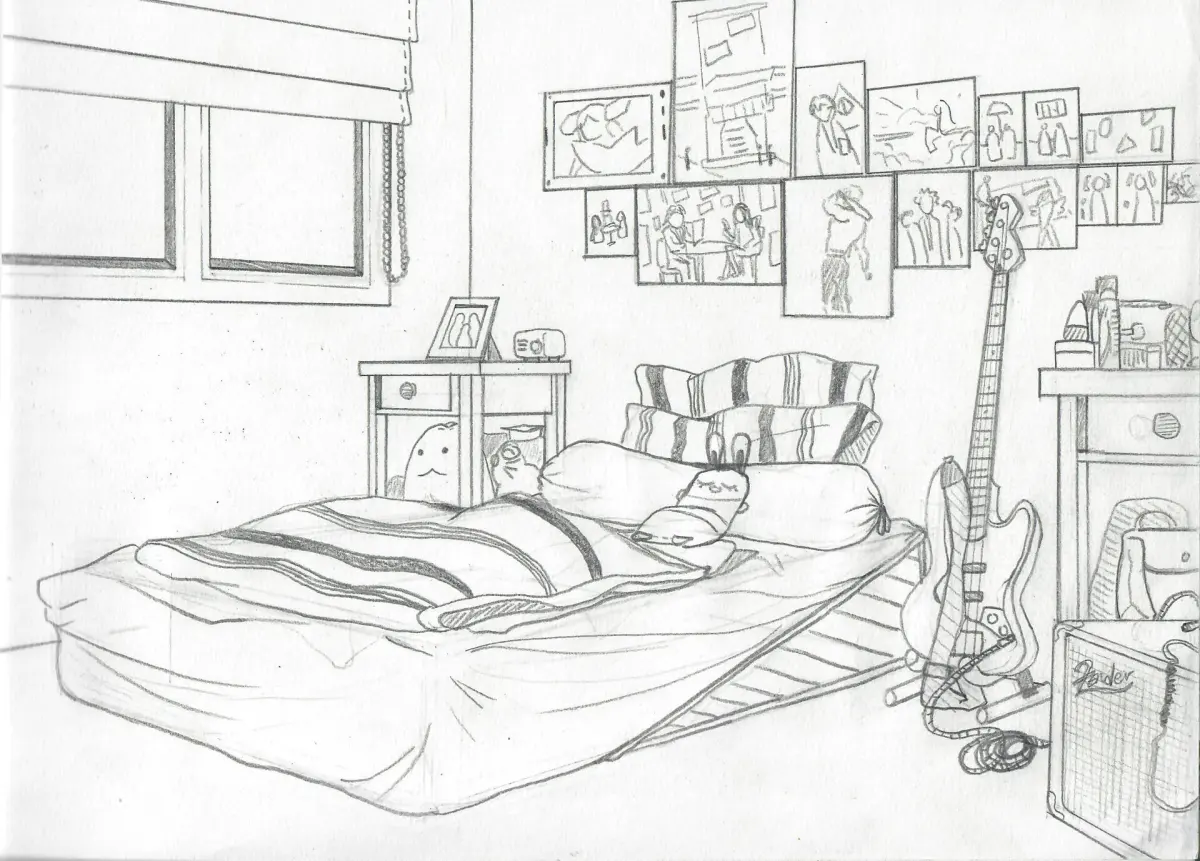
- Two-point perspective: Uses two points on the horizon, typically used for drawing the corner of a building.
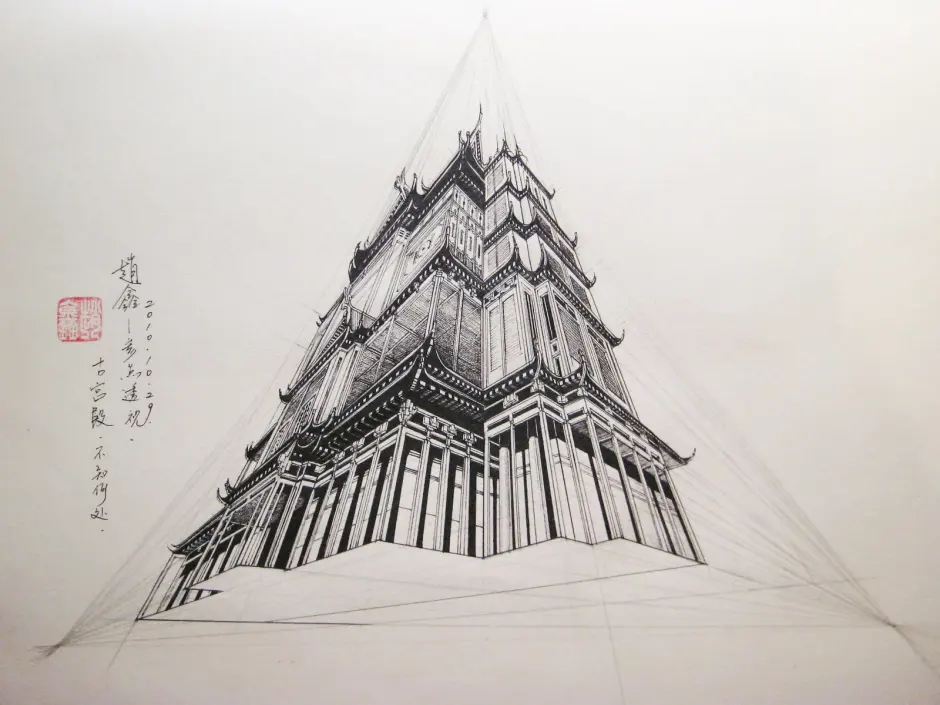
- Three-point perspective: Adds a third point above or below the horizon to create a sense of height or depth, often used in "bird's-eye" or "worm's-eye" views.
By manipulating these points, artists can control whether a scene feels intimate, vast, or dizzyingly tall.
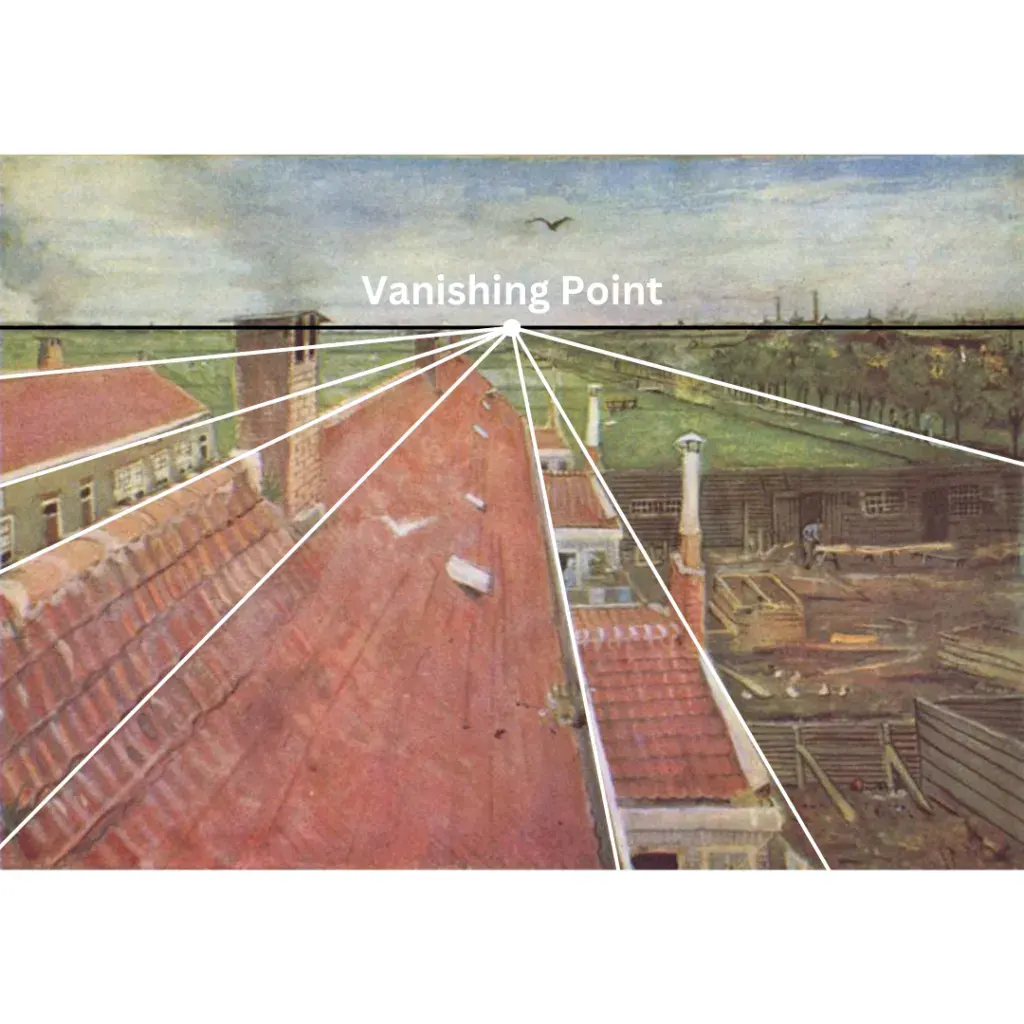
Common mistakes when using vanishing points
One of the most frequent errors beginners make is placing the vanishing point too close to the center of the paper, which can create a cramped or distorted composition. If the vanishing point is positioned too near the edges of the frame, the lines may become too steep, making the objects appear unnaturally elongated or "stretched." It is essential to experiment with the placement of the point to ensure the proportions of your subject remain balanced and visually pleasing.
Another common mistake involves ignoring the horizon line entirely. If your vanishing point does not sit on a consistent horizon line, your drawing will look disjointed, as if the objects are floating or falling over. Always draw your horizon line first, ensuring it is perfectly level across the page. Additionally, beginners often forget to align every parallel edge to the point, leading to "wobbly" structures. To avoid this, always keep a ruler handy and double-check that your orthogonal lines are perfectly straight and meet exactly at the designated point before finalizing your work.
Best practices for perspective drawing
To improve your skill, practice drawing simple geometric shapes like cubes and rectangular prisms in different positions relative to the vanishing point. Start by placing the cube directly in front of the point, then move it to the side or above the horizon line to see how the visible sides of the cube change. This exercise builds an intuitive understanding of how perspective shifts as an object moves through space. Consistency is key, so keep your initial construction lines light so they can be easily erased later.
When you are ready to advance, try these tips:
- Use a long ruler to ensure your lines remain perfectly straight across large surfaces.
- Always establish the horizon line as the very first step of your composition.
- Vary the distance between your vanishing points to change the "field of view" of your drawing.
- Practice drawing from life, using a clear plastic sheet over a window to trace the lines of buildings to see how they truly converge.
By consistently applying these principles, you will develop the ability to render complex environments with confidence and precision.
Key facts
- A vanishing point is the specific spot on the horizon line where parallel lines appear to converge in a perspective drawing.
- Linear perspective was formalized during the Italian Renaissance, most notably by architect Filippo Brunelleschi around 1415.
- You can determine the vanishing point by tracing the edges of receding objects, such as building corners or road sides, until they meet.
- Drawings can feature one, two, or three vanishing points depending on the angle at which the viewer observes the scene.
- Always draw your horizon line at the viewer's eye level to maintain geometric consistency throughout your composition.
- A common mistake is placing vanishing points too close together, which causes extreme distortion and makes objects appear unnaturally stretched.
The bottom line
The vanishing point is the essential anchor for creating the illusion of depth on a two-dimensional surface. By understanding how parallel lines converge at eye level, artists can construct realistic spaces that mimic human vision. Mastering this technique requires careful placement of points along the horizon, ensuring that lines remain consistent. With practice, you can manipulate these geometric principles to guide the viewer’s eye through any composition.
People also ask
How does a one-point perspective differ from a two-point perspective?
One-point perspective uses a single vanishing point directly in front of the viewer, typically used for scenes like a road disappearing into the distance. Two-point perspective uses two separate points on the horizon, which is necessary when drawing an object like a building viewed from a corner angle.
Can a drawing have more than three vanishing points?
Yes, drawings with four or more points are used to create complex, distorted, or wide-angle views known as curvilinear perspective. These are rarely used in standard drawing but appear in fisheye lens photography or specialized architectural renderings.
Does the vanishing point always have to be on the paper?
No, the vanishing point often falls outside the physical borders of your drawing surface. You can use a long ruler or a piece of tape on your desk to mark the point even if it is not on the page.
Why do my drawings look warped or distorted?
Distortion usually occurs when the vanishing points are placed too close to the center of the object. To fix this, move your vanishing points further apart or further toward the edges of your workspace to create a more natural field of view.
What is the horizon line in relation to the vanishing point?
The horizon line represents the eye level of the observer and acts as the anchor for all vanishing points in a linear perspective system. All lines that are parallel to the ground plane will converge on this specific horizontal line.
Can vanishing points move if the viewer moves?
Yes, the vanishing point is entirely dependent on the position of the observer relative to the subject. If the viewer shifts their position or rotates their head, the convergence points must be recalculated to maintain correct spatial accuracy.
This answer was created with the help of AI research tools and reference sources. Spotted an error? Let us know — we correct mistakes quickly. See our editorial policy.