How do you paint a whale with watercolor?
Short answer
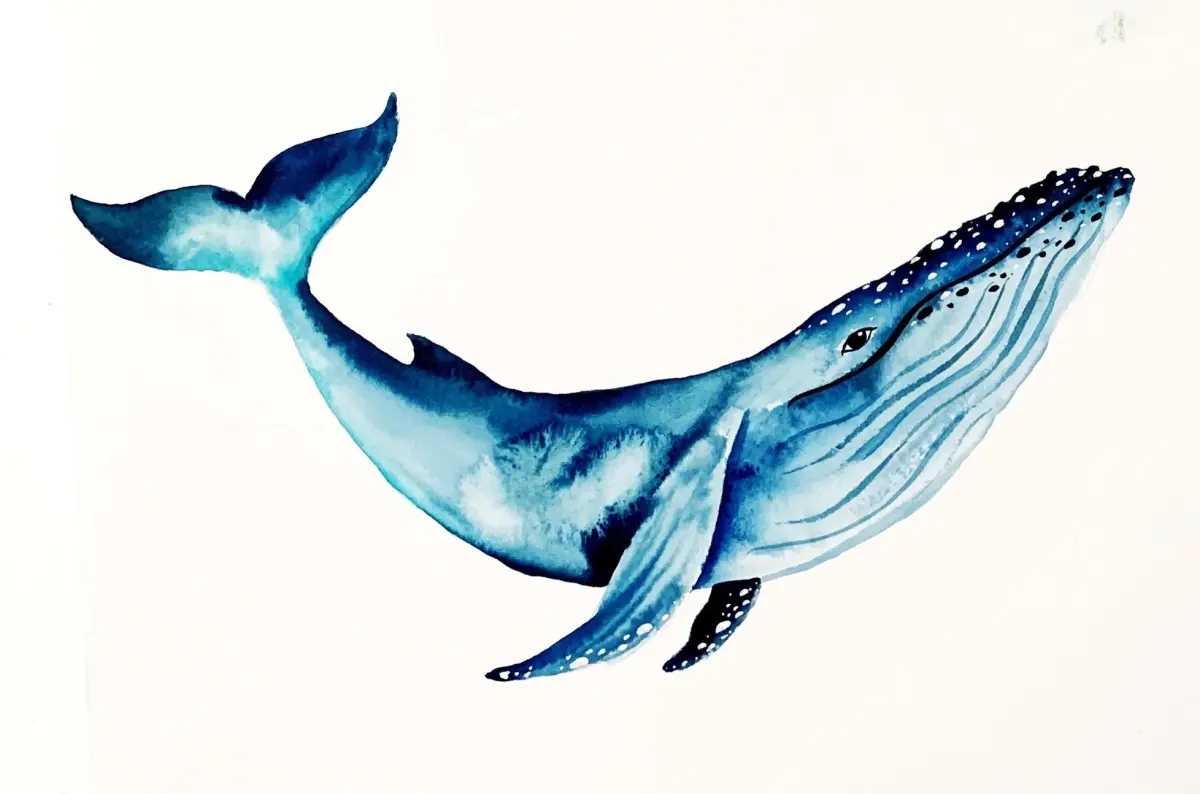
Painting a whale in watercolor requires layering washes to capture the animal's massive, fluid form. Begin by sketching the silhouette, then apply light blue and gray glazes to build depth. Use wet-on-wet techniques for the skin’s texture and finish with fine details like the eye and barnacles using a small round brush.
On this page
What supplies do I need for watercolor whales?
To achieve professional results, you need high-quality materials that handle water effectively. Choose cold-press watercolor paper with a 140-pound (300 gsm) weight, as it provides enough texture to hold pigments while resisting buckling under heavy washes. For brushes, a large mop brush is essential for covering the whale's expansive body, while a size 4 or 6 round brush allows for precise work on the fins and eye.
Select a professional-grade palette containing a range of blues and grays. Essential pigments include:
- Payne’s Gray for deep shadows and skin texture.
- Ultramarine Blue for cool, oceanic undertones.
- Cerulean Blue for bright highlights on the whale's back.
- Burnt Umber for adding subtle, earthy depth to barnacles.
- Titanium White gouache for final, opaque highlights on the water surface.
How do I sketch a whale for painting?
A successful watercolor begins with a light, accurate pencil sketch. Use an HB or 2H pencil to draw the whale’s silhouette, keeping lines faint so they do not show through the transparent paint. Focus on the graceful curve of the back and the specific shape of the fluke, as these define the whale's movement through the water. Avoid heavy pressure, as graphite can smear when it interacts with wet watercolor washes.
Consider the whale's anatomy to ensure your proportions look natural. Most whales, like the Humpback, have a distinct head shape and large pectoral fins that dictate their balance. If you are a beginner, follow these steps to establish your composition:
- Draw a long, slightly curved oval for the main body.
- Add a smaller, triangular shape for the tail fluke.
- Sketch the pectoral fin extending from the underside.
- Lightly mark the eye position and the line of the mouth.
How do I paint the whale's skin?
The wet-on-wet technique is the best way to capture the smooth, mottled skin of a whale. Start by lightly dampening the paper inside your pencil lines with clean water. While the surface is glistening, drop in diluted Payne’s Gray or Ultramarine. Allow the pigment to flow naturally, creating soft edges that mimic the way light reflects off wet skin. If the paint pools too much, use a damp, clean brush to lift the excess moisture.
As the first layer dries, you can add darker glazes to define the whale’s volume. Focus the darkest tones on the underside of the body to create a sense of weight. To add texture, such as the bumps found on Humpback whales, use a "dry brush" technique. Load your brush with concentrated pigment, dab off the excess on a paper towel, and lightly drag the bristles across the dry paper to create broken, textured marks.
How do I add details and highlights?
Once the main body is dry, focus on the finer anatomical features that bring the painting to life. Use a small, pointed round brush to paint the eye, which is typically a dark, glossy circle. Add a tiny dot of white gouache or leave a small sliver of unpainted paper within the eye to represent the glint of light. This simple step provides the focal point that makes the animal appear alert and alive.
For the water surrounding the whale, use varying shades of blue to create movement. You can flick droplets of clean water onto the damp paint to create "blooms" that resemble splashing waves. If you want to add barnacles or scars, use a fine liner brush with a thicker consistency of gray or white paint. Remember to keep these details subtle, as overworking the surface can make the painting look cluttered rather than fluid and natural.
Common mistakes when painting whales?
One of the most frequent errors is overworking the paper, which leads to muddy colors and damaged fibers. If you continue to scrub the surface while the paint is damp, the paper will begin to pill, ruining the smooth finish required for skin. Always allow each layer to dry completely before adding new colors. Patience is the most important tool in your kit, so avoid the urge to rush the drying process with excessive brush strokes.
Another common issue is using too much pigment too early, resulting in a flat, dark shape that lacks dimension. To avoid this, always start with the lightest washes and gradually build up to the deepest shadows. If you find your whale looks like a flat cutout, re-evaluate your contrast. Ensure that the shadow side of the whale is significantly darker than the side catching the light. By maintaining a clear light source, you ensure your whale looks three-dimensional and majestic rather than static.
Key facts
- Use heavy-weight watercolor paper, ideally 300 GSM (140 lb) cold-press, to prevent buckling from water saturation.
- Mix a base of Payne’s Gray or Indigo to capture the deep, moody tones typical of whale skin.
- Apply a "wet-on-wet" technique for the initial layers to achieve the soft, blended gradients of a whale’s underbelly.
- Use a round brush size 8 or 10 to maintain control over the large, sweeping curves of the whale's body.
- Reserve the brightest highlights by using masking fluid or simply leaving the white of the paper untouched.
- Add texture to the skin by flicking clean water onto damp paint to create "blooms" that mimic barnacles or scarring.
The bottom line
Painting a whale in watercolor requires a balance between controlled brushwork and the fluid nature of the medium. By utilizing wet-on-wet techniques for the body and adding texture with water blooms, you can capture the majestic, organic form of these marine giants. Focus on maintaining paper integrity and preserving highlights to ensure your final piece conveys the depth and light of the vast ocean environment.
People also ask
How do I prevent the paper from warping while painting?
Tape the edges of your paper to a rigid board using artist-grade masking tape. Keep the paper secured until the paint is completely dry to ensure it remains flat.
What is the best way to paint the whale's eye?
Use a small, pointed detail brush with concentrated, dark pigment. Leave a tiny speck of white paper visible to create a realistic glint of light.
How do I create the look of water splashing around the whale?
Load a stiff-bristled brush with white gouache or diluted white watercolor. Gently flick the bristles with your finger to create fine, organic droplets across the surface.
Can I fix a mistake if the paint is already dry?
You can gently lift some pigment by dabbing the area with a clean, damp brush. However, watercolor is transparent, so it is often better to incorporate dark mistakes into the shadows.
How do I achieve smooth transitions between colors?
Work quickly while the paper is still moist. Apply your pigment and then use a clean, damp brush to soften the edges before the paint sets.
Should I paint the background before or after the whale?
It is usually easier to paint the whale first, allowing it to dry, and then carefully paint the surrounding water. This prevents the background colors from bleeding into your subject.
This answer was created with the help of AI research tools and reference sources. Spotted an error? Let us know — we correct mistakes quickly. See our editorial policy.