How do you draw a whale step by step?
Short answer
Drawing a whale involves capturing its massive, streamlined silhouette through basic geometric shapes. Start by sketching a large, elongated oval for the body, then add a triangular tail and side fins. Refine the outline to create a smooth, curved shape, adding details like the eye, blowhole, and baleen or teeth.
On this page
How to draw a whale step by step
To begin your drawing, focus on the fundamental proportions of the whale’s anatomy. Start by sketching a long, horizontal oval that occupies most of your paper, which will serve as the main body mass. On the left side of this oval, draw a small, slightly curved triangle to represent the head, and on the right, add a wider, split triangle for the tail fluke. Use light pencil strokes so you can easily erase or adjust the lines as you refine the shape.
Once the basic skeleton is in place, you can connect these shapes with smooth, flowing lines to create a cohesive silhouette. Whales are known for their graceful, curved bodies, so avoid sharp angles except at the tips of the fins. Add two pectoral fins along the bottom of the body, angling them slightly backward to suggest movement. Finally, draw a small, curved line near the top of the head for the blowhole and a small circle for the eye.
Best drawing tools for beginners
For those just starting, graphite pencils are the most forgiving medium because they allow for easy corrections. Use an HB pencil for initial sketching and a 2B or 4B pencil for adding darker shadows and final outlines. A high-quality kneaded eraser is essential, as it can be molded into precise shapes to remove small mistakes or create highlights on the whale's skin. Avoid using heavy pressure early on, as this can leave indentations on the paper.
If you prefer working with ink or markers, start with a light pencil sketch first. Once you are satisfied with the proportions, go over your lines with a fine-tip archival pen. After the ink has dried completely, use your eraser to remove the underlying pencil marks. This technique ensures clean, professional-looking lines. For shading, consider using grey-toned markers or charcoal, which help define the rounded volume of the whale’s belly and back.
How to add realistic whale details
Adding texture and anatomical features transforms a basic sketch into a recognizable species. If you are drawing a humpback whale, include small, circular bumps called tubercles along the jawline and head. For blue whales or fin whales, draw long, parallel lines running from the chin down to the belly to represent the ventral pleats. These details provide depth and indicate the specific type of whale you are portraying.
Pay close attention to the tail flukes, which are powerful muscles used for propulsion. Ensure the flukes are wide and have a distinct notch in the center. You can also add a sense of environment by drawing small bubbles rising from the blowhole or light waves around the fins. These subtle additions provide context and make the drawing feel more dynamic. Remember that whales are massive creatures, so emphasizing the scale of the tail compared to the body is crucial.
Common mistakes when drawing whales
One frequent error is making the whale look too rigid or boxy. Whales possess thick layers of blubber, which give them a soft, rounded appearance. Avoid drawing straight, stiff lines; instead, use gentle curves that suggest a flexible spine. Another mistake is placing the eye too far back on the head. In most species, the eye is located relatively low and close to the corner of the mouth, which helps maintain the correct facial proportions.
- Avoid drawing the tail flukes perfectly flat; they should have a slight curve or angle to suggest they are cutting through water.
- Do not forget the blowhole, as it is a defining characteristic that distinguishes whales from fish.
- Ensure the pectoral fins are proportional to the body size, as they are essential for steering and stability.
- Refrain from over-detailing the skin, as whales generally have smooth, sleek surfaces rather than scales or heavy wrinkles.
Why whale proportions matter
Understanding the scale of different whale species helps in creating a more accurate representation. A blue whale, for instance, has a very long, slender body, while a right whale is much stouter and rounder. When planning your drawing, decide which species you want to depict before you start your initial oval. Researching reference photos of specific whales will help you understand how their body length compares to the size of their head and tail.
- Blue Whale: Characterized by a very elongated, streamlined body and small dorsal fin.
- Humpback Whale: Known for exceptionally long pectoral fins and a knobby head.
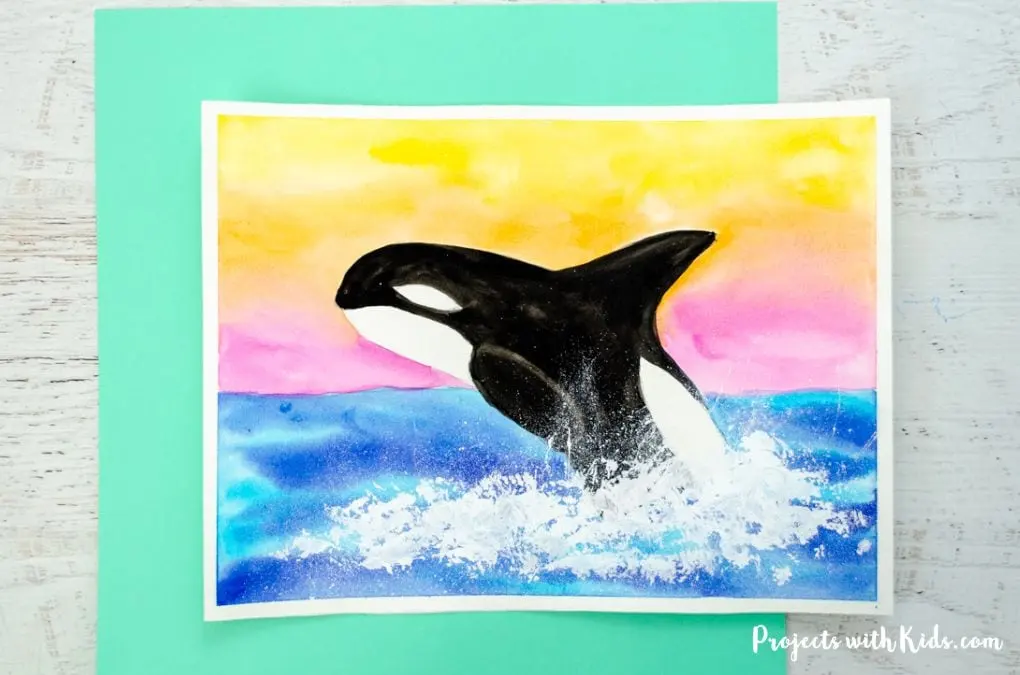
- Orca (Killer Whale): Features a distinct, tall dorsal fin and a high-contrast black-and-white color pattern.
- Sperm Whale: Notable for its massive, box-shaped head and wrinkled, dark skin texture.
By focusing on these distinct physical traits, you can ensure your drawing is not only aesthetically pleasing but also scientifically grounded. Consistent practice with these proportions will eventually allow you to draw various whale species from memory with greater confidence and ease.
Key facts
- Whales are mammals, so they feature a blowhole on top of the head rather than gills.
- Most whale species possess a streamlined, fusiform body shape that tapers at both ends.
- The dorsal fin is typically triangular or sickle-shaped, positioned roughly two-thirds down the back.
- Pectoral flippers are located on the sides of the body, acting as rudders for steering.
- A whale's tail, known as a fluke, is horizontal and moves up and down to propel the animal.
- Start by sketching a large oval for the body to ensure proper proportions before adding details.
The bottom line
Drawing a whale requires focusing on its distinct, streamlined silhouette and horizontal tail fluke. By starting with a basic oval shape and adding anatomical features like the dorsal fin and blowhole, you can create a realistic representation. Remember to keep the skin texture smooth and the proportions balanced. Mastering these simple structural steps allows you to capture the majestic essence of these giant marine mammals effectively.
People also ask
Why do whales have blowholes?
Blowholes are modified nostrils that allow whales to breathe air at the surface of the water. They are positioned on top of the head so the whale does not need to lift its entire face out of the water to inhale.
How do I draw a whale's tail accurately?
Draw the fluke as two distinct lobes shaped like wide triangles. Ensure the fluke is oriented horizontally, as this is a defining anatomical feature that distinguishes whales from fish.
What is the best way to sketch the eye of a whale?
Place the eye slightly above and behind the corner of the mouth. Keep the eye small and dark, as whale eyes are relatively tiny compared to their massive body size.
Should I draw teeth or baleen for a whale?
This depends on the species. Toothed whales like orcas have visible, conical teeth, while baleen whales like humpbacks have fringed plates inside their mouths that are usually hidden when the mouth is closed.
How do I add texture to a whale drawing?
Use light shading to indicate the curve of the belly and the sleekness of the skin. Avoid drawing scales, as whales have smooth, hairless skin that often appears shiny when wet.
What is a common mistake when drawing a whale?
A frequent error is drawing the tail fin vertically like a fish. Always remember that a whale’s tail fluke must be horizontal to reflect its status as a marine mammal.
This answer was created with the help of AI research tools and reference sources. Spotted an error? Let us know — we correct mistakes quickly. See our editorial policy.