How do you draw a compass for beginners?
Short answer
Drawing a compass requires basic geometric tools: a compass, a ruler, and a pencil. You begin by marking a center point, drawing a perfect circle, and then using a straightedge to intersect the center with horizontal and vertical lines. Labeling the cardinal directions completes this essential tool for navigation and map-making.
On this page
What tools do you need to draw a compass?
To draw a professional-looking compass, you need a few fundamental drafting tools. The most important is a drawing compass, which is a V-shaped tool with a needle point on one side and a pencil lead on the other. You also need a sharp pencil, a ruler or straightedge, and a clean sheet of paper. Using a hard-lead pencil, such as an H or HB grade, ensures that your lines remain crisp and thin, which is essential for accuracy.
A protractor is also highly recommended if you want to include secondary directions like northeast or southwest. While you can draw a basic four-point compass by eye, a protractor allows you to measure precise angles, ensuring your lines are exactly 90 degrees apart. Keep an eraser handy to remove construction lines once your final compass design is complete. Having a flat, stable surface to work on will prevent your compass needle from slipping while you draw your circle.
How to draw a basic compass step by step
Creating a standard four-point compass is a straightforward process that relies on geometry. By following these steps, you can ensure your cardinal points are perfectly aligned.
- Place a small dot in the center of your paper to serve as the anchor point for your compass needle.
- Set your drawing compass to your desired radius and place the needle point on the center dot.
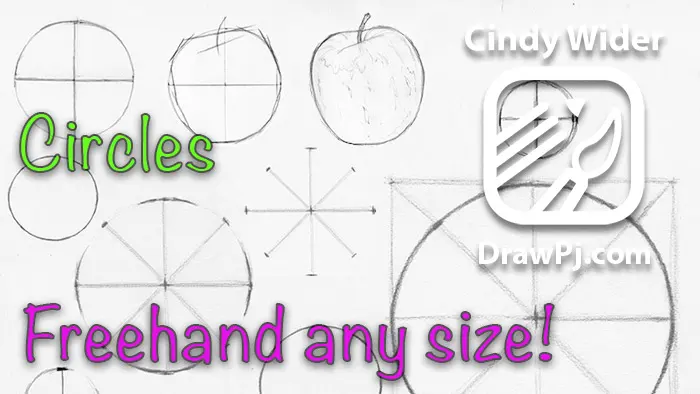
- Rotate the compass steadily to draw a complete, light circle.
- Using a ruler, draw a straight vertical line passing through the center dot, extending slightly beyond the circle.
- Draw a horizontal line through the center dot, ensuring it meets the vertical line at a perfect 90-degree angle.
- Label the top "N" for North, the bottom "S" for South, the right "E" for East, and the left "W" for West.
Once these lines are drawn, you can thicken them or add arrowheads to the ends of the lines to give the compass a more traditional, nautical appearance.
How to add intermediate directions to a compass
Once you have established the four cardinal points, you can add intermediate directions, known as intercardinal points. These include Northeast (NE), Southeast (SE), Southwest (SW), and Northwest (NW). To place these accurately, you must divide the 90-degree angles between your cardinal lines into two equal 45-degree segments.
If you are using a protractor, align the center hole with your center dot and the baseline with your North-South line. Mark the 45, 135, 225, and 315-degree positions. Use your ruler to draw lines from the center point through these marks, extending them to the edge of your circle. If you do not have a protractor, you can use a compass to bisect the angles by drawing small arcs at the intersections of your cardinal lines and then connecting those arcs to the center. This adds professional detail and navigational precision to your drawing.
Common mistakes when drawing a compass
One of the most frequent errors beginners make is failing to keep the compass needle firmly planted in the center. If the needle slips, your circle will become lopsided, which ruins the symmetry of the entire design. Always ensure your paper is taped down or held firmly to prevent movement. Another common mistake is applying too much pressure to the pencil lead. This results in thick, dark construction lines that are difficult to erase later, making the final compass look messy.
- Using a dull pencil lead that creates fuzzy, imprecise lines.
- Forgetting to align the ruler exactly with the center point, which makes the directions appear crooked.
- Drawing the circle too large for the paper, leaving no room for labels or decorative borders.
- Mislabeling the cardinal directions, which traditionally follow a clockwise order starting with North at the top.
- Rushing the process, which often leads to shaky lines and uneven spacing between the points.
How to decorate and finish your compass
After the geometric structure is complete, you can customize your compass to reflect different artistic styles. Many historical maps feature a "compass rose," which uses ornate, diamond-shaped points instead of simple straight lines. You can achieve this by drawing small triangles on the ends of your directional lines. Adding color is another way to enhance your work; traditionally, North is often highlighted in a distinct color like red to signify its importance in orientation.
You may also choose to add secondary intercardinal points, such as North-Northeast or South-Southwest, to create a 16-point compass. These are drawn by bisecting the existing 45-degree angles into 22.5-degree segments. Once you are satisfied with the structure, use a fine-liner pen to trace your final lines and erase any remaining pencil marks. Whether you are creating a decorative piece for a map or a functional diagram for a school project, a clean, well-measured compass serves as an elegant and useful tool for any explorer.
Key facts
- A compass rose is a figure on a map or nautical chart used to display the orientation of the cardinal directions.
- The four cardinal directions are North, East, South, and West, typically represented by the letters N, E, S, and W.
- Always draw a perfect circle first to act as a frame, ensuring the cardinal points are spaced at 90-degree intervals.
- Use a ruler to draw a vertical line for the North-South axis and a horizontal line for the East-West axis.
- Intercardinal directions, such as Northeast (NE) or Southwest (SW), are placed exactly halfway between the cardinal points.
- Pencil sketches allow for easy erasing, so draw light guidelines before finalizing the lines with a pen or marker.
The bottom line
Drawing a compass rose is a foundational skill that combines basic geometry with historical cartographic conventions. By starting with a circle and using a ruler for perpendicular axes, you can create a clear, accurate guide for orientation. Remember to follow the clockwise order of cardinal directions to ensure your drawing remains functional, readable, and consistent with professional standards used in navigation and map design worldwide.
People also ask
Why is North always at the top of a standard compass drawing?
North is placed at the top by convention, a standard established by cartographers during the Middle Ages to align with the North Star. This orientation provides a consistent reference point for navigation across the globe.
What is the difference between a compass rose and a magnetic compass?
A compass rose is a decorative or functional diagram printed on a map to show direction. A magnetic compass is a physical tool that uses a magnetized needle to align with the Earth's magnetic field.
How do I ensure the directions are placed in the correct order?
Remember the mnemonic "Never Eat Shredded Wheat," which corresponds to North, East, South, and West in a clockwise direction. Following this sequence prevents common errors in map orientation.
Should I include intercardinal directions in my drawing?
Including intercardinal points like Northeast, Southeast, Southwest, and Northwest adds precision to your compass. These points are essential for more detailed navigation and aesthetic balance in artistic renderings.
Can I use a protractor to make the compass more accurate?
Yes, a protractor is the best tool for ensuring your lines are exactly 45 or 90 degrees apart. This mathematical precision is common in professional drafting and nautical mapping.
Is there a specific style for drawing the "North" arrow?
Traditionally, the North arrow is often drawn longer or more ornate than the other points. This stylistic choice helps the user immediately identify the primary orientation of the map.
This answer was created with the help of AI research tools and reference sources. Spotted an error? Let us know — we correct mistakes quickly. See our editorial policy.