How do you draw a cave?
Short answer
Drawing a cave requires establishing a dark, irregular entrance frame and using atmospheric perspective to suggest depth. By layering jagged rock textures around the perimeter and contrasting them with a soft, receding interior, you create a sense of scale. Use varying pencil pressures to mimic natural light falling into the cavern.
On this page
How to draw a cave entrance
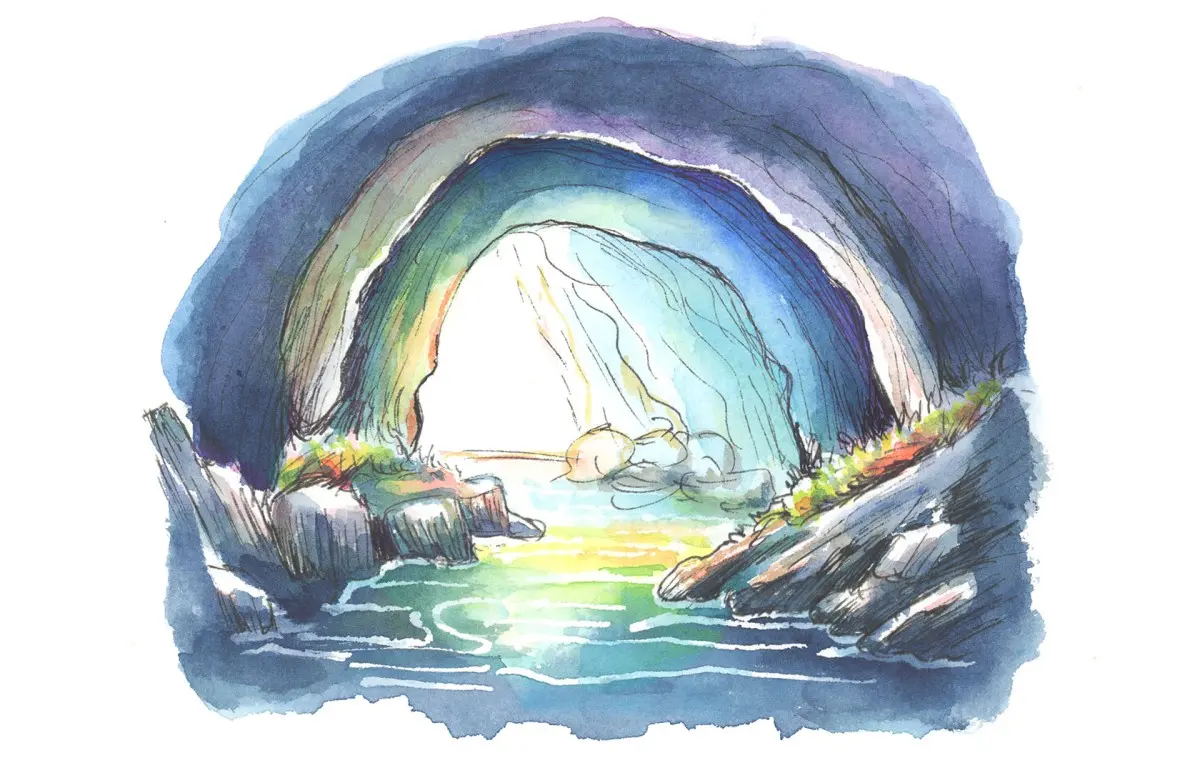
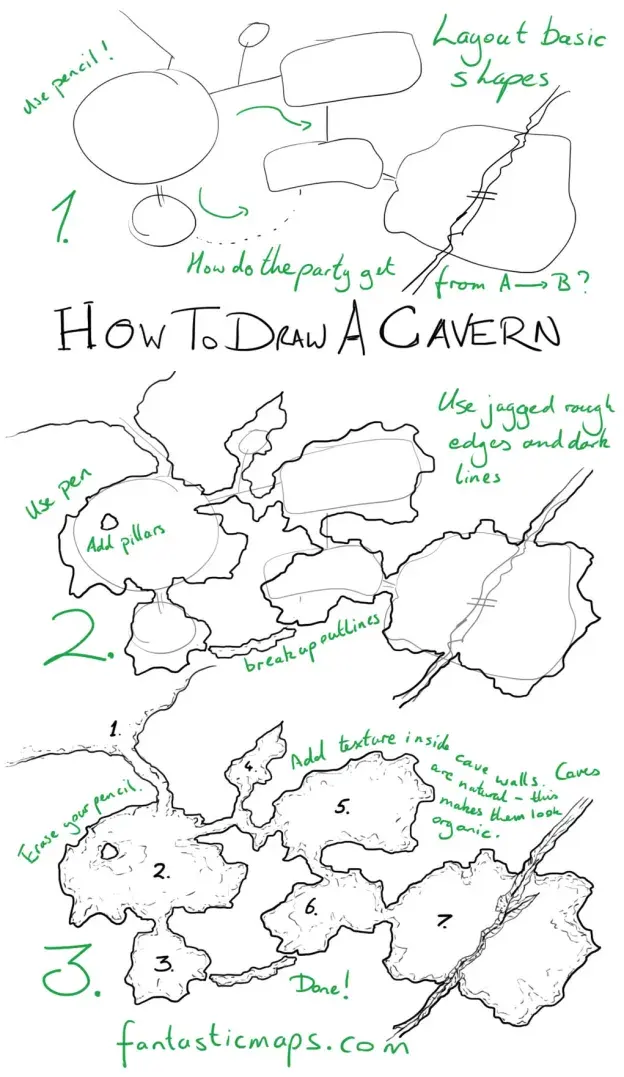
The entrance is the most critical part of a cave drawing because it defines the viewer's perspective. Start by sketching an irregular, organic shape that mimics the jagged, weathered edges of limestone or granite. Avoid perfectly straight lines or symmetrical curves, as natural rock formations are typically chaotic and uneven.
To add realism, focus on the texture of the rock face surrounding the opening. Use short, choppy strokes to indicate cracks, moss, or mineral deposits. By making the edges of the entrance darker than the surrounding landscape, you create a natural frame that draws the eye into the dark void of the cave.
- Sketch a rough, asymmetrical outline for the mouth of the cave.
- Add jagged, triangular shapes along the edges to represent broken rock.
- Use a soft lead pencil to darken the interior, leaving the edges slightly lighter to show depth.
- Add small pebbles or debris at the base to ground the entrance in its environment.
Best drawing techniques for beginners
Beginners often struggle with representing the vastness of an underground space. The secret lies in atmospheric perspective, which dictates that objects further away appear lighter, less detailed, and bluer in tone. As you move from the cave entrance toward the back of the cavern, gradually decrease the contrast of your marks.
Focus on creating a sense of volume rather than just outlining shapes. Use cross-hatching to build up shadows in the corners where light cannot reach. By leaving small, unshaded areas on protruding rock surfaces, you can simulate the way light catches on damp stone, adding a three-dimensional quality to your drawing.
- Use a 2B pencil for initial light sketches and structural guidelines.
- Switch to a 6B or 8B pencil for the deepest, darkest shadows inside the cave.
- Utilize a kneaded eraser to lift graphite and create highlights on jagged rock edges.
- Apply light, circular motions with a blending stump to smooth out the rocky walls.
Why cave depth is hard to capture
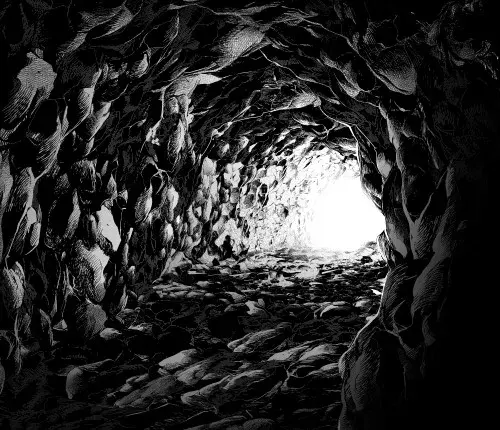
Capturing the illusion of depth is difficult because caves lack the familiar reference points found in outdoor landscapes, such as trees or buildings. Without these, the brain struggles to interpret the scale of the space. To solve this, incorporate stalactites hanging from the ceiling or stalagmites rising from the floor to provide visual markers.
These formations serve as natural rulers that help the viewer understand the height and width of the chamber. When drawing these features, ensure they are larger and more detailed near the foreground, becoming smaller and more silhouette-like as they recede into the distance. This transition is essential for convincing the eye that the cave extends deep into the earth.
If you are struggling with scale, place a small human figure or a silhouette of a person near the entrance. This provides an immediate sense of proportion, allowing the viewer to compare the size of the person to the massive walls of the cavern. This simple addition transforms a generic hole in the ground into an expansive, awe-inspiring cave system.
Common mistakes when drawing caves
One of the most frequent errors is making the interior of the cave a flat, uniform black. In reality, light bounces off cave walls, creating subtle gradients and reflected light even in deep areas. Avoid using a single shade of dark grey; instead, layer multiple tones to show the complex curves and recesses of the stone.
Another common mistake is neglecting the floor. Artists often focus entirely on the ceiling and walls, leaving the ground looking like a blank void. Remember that cave floors are often uneven, covered in gravel, water pools, or jagged rock formations. Adding these details prevents the drawing from looking like a floating tunnel and anchors it firmly to the ground.
- Do not use perfectly straight lines for rock formations, as these do not occur in nature.
- Avoid over-detailing the back of the cave, as this flattens the image and ruins the sense of distance.
- Refrain from making the entrance too symmetrical, which can make the cave look artificial or man-made.
- Ensure that the shadows follow a consistent light source, even if that source is faint moonlight or a flickering torch.
How to add light sources to a cave
Adding a light source, such as a lantern, torch, or a shaft of sunlight, brings a cave drawing to life. If you choose a torch, the light should be brightest at the source and fade rapidly as it hits the surrounding walls. This creates a high-contrast environment that emphasizes the darkness of the cave.
When drawing a light shaft, use sharp, diagonal lines to show the beam cutting through the dark air. If the air is dusty or damp, the light will appear to have a soft glow, which you can achieve by lightly smudging your pencil marks. This technique adds atmosphere and mystery, turning a simple rock drawing into a compelling scene that invites the viewer to imagine what lies hidden in the shadows.
Key facts
- Start by sketching irregular, jagged lines to represent the uneven walls and ceiling of the cave.
- Use heavy shading along the edges to create a sense of depth and suggest that the area is dark.
- Incorporate stalactites hanging from the top and stalagmites rising from the floor to add geological texture.
- Leave a lighter area near the entrance to simulate natural light filtering into the space.
- Add small, scattered rocks or pools of water on the floor to make the environment look realistic.
- Draw silhouettes of people or animals to provide a sense of scale compared to the massive rock formations.
The bottom line
Drawing a convincing cave requires balancing organic, irregular shapes with dramatic light and shadow. By focusing on the contrast between the dark interior and the bright entrance, you create a sense of vast, subterranean depth. Incorporating geological features like stalactites and rocky debris adds necessary detail. With practice, these simple techniques allow you to capture the rugged, mysterious essence of a natural cavern on paper.
People also ask
How do I make a cave look deep and mysterious?
Focus on high-contrast shading by keeping the deepest parts of the cave nearly black. Gradually transition to lighter grays as you move toward the entrance to guide the viewer's eye.
What is the difference between a stalactite and a stalagmite?
Stalactites hang down from the ceiling like icicles, while stalagmites grow upward from the cave floor. Remembering that "c" stands for ceiling and "g" stands for ground helps keep the two distinct.
Should I use straight lines when drawing cave walls?
Avoid straight lines entirely, as natural caves are formed by water erosion and geological shifts. Use organic, wavy, and broken lines to mimic the unpredictable nature of limestone rock.
How can I show water inside a cave?
Draw flat, horizontal lines for the water surface and add subtle ripples near the edges. Reflect the shapes of the cave walls on the water's surface to enhance the realism.
What drawing medium is best for beginners?
Graphite pencils are ideal because they allow for a wide range of shading techniques. You can easily smudge the lead to create soft shadows or press harder for sharp, dark crevices.
How do I draw the texture of rock?
Use short, choppy marks and cross-hatching to suggest cracks and rough surfaces. Vary the density of these marks to show where the rock is smoothed by water versus where it is jagged.
This answer was created with the help of AI research tools and reference sources. Spotted an error? Let us know — we correct mistakes quickly. See our editorial policy.