How do you draw a beehive for beginners?
Short answer
Drawing a beehive involves sketching a basic hexagonal or rounded shape and adding texture to represent the comb or protective structure. Beginners should focus on building the form with simple geometric shapes before adding details like the hive entrance and the hexagonal pattern that defines the iconic honeycomb aesthetic.
On this page
How to draw a basic beehive shape
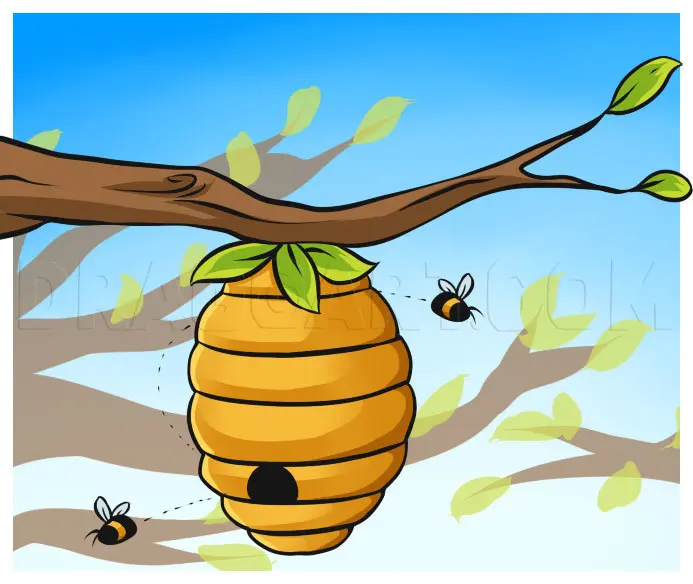
To draw a classic skep-style beehive, begin by sketching a large, inverted U-shape or an oval sitting on a flat horizontal line. This provides the foundational silhouette of the structure. You can refine the shape by adding a small, arched opening near the bottom center, which serves as the entrance for the bees. Keep your initial lines light and loose, as these are meant to be guidelines that you will eventually erase or refine.
Once the main body is established, add horizontal lines that follow the curve of the hive to represent the coiled straw or woven reeds historically used in skep construction. These lines should be spaced evenly to create a sense of volume and depth. If you prefer a more modern wooden box hive, use rectangular perspective drawing techniques instead. Start with a simple box shape and add smaller rectangles on top to represent the individual supers, ensuring all lines converge toward a central vanishing point to maintain proper 3D proportions.
How to add texture to a beehive drawing
Adding texture is the most effective way to make your drawing look realistic rather than like a flat cartoon. For a traditional skep hive, use short, overlapping dashes along your horizontal guide lines to mimic the texture of woven straw. Vary the pressure of your pencil to create shadows, particularly on the side of the hive opposite your light source. This simple technique adds significant visual weight and makes the structure appear solid and grounded.
If you are drawing the interior honeycomb, focus on the hexagonal grid pattern. This is a repetitive geometric task that requires patience and precision. Follow these steps to achieve a clean look:
- Draw a series of thin, vertical columns of small hexagons.
- Offset every other column slightly so the sides of the hexagons interlock perfectly.
- Use a sharp pencil to ensure the lines remain crisp and uniform throughout the grid.
- Add subtle shading inside each hexagon to give the cells a three-dimensional, hollow appearance.
Best tools for drawing beehives
For beginners, a standard HB graphite pencil is the best starting point because it allows for both light sketching and darker, more defined lines. You should also have a soft white eraser on hand to clean up your construction lines once the final shape is established. Using a drawing pad with a slight tooth, or texture, can help your pencil marks grip the paper better, which is particularly useful when you are trying to create the intricate details of a honeycomb pattern.
If you want to move beyond basic graphite, consider using fine-liner pens once your initial sketch is complete. Ink pens allow for high-contrast lines that make the hexagonal cells pop off the page. You might also experiment with colored pencils in shades of ochre, amber, and deep gold to capture the natural color of beeswax. When coloring, always apply your pigment in layers, starting with the lightest yellow and gradually building up to the darker, burnt-orange shadows found within the deepest parts of the comb.

Common mistakes when drawing beehives
One of the most frequent errors beginners make is neglecting the perspective of the hive entrance. Many artists draw the entrance as a flat, two-dimensional shape that looks like a sticker placed on the front of the hive. Instead, draw the opening as a small, deep tunnel by adding a few dark, angled lines inside the arch. This simple adjustment creates the illusion of depth, suggesting that the hive is a hollow, functional space rather than a solid object.
Another common mistake is drawing hexagons that are too large or irregular. While natural honeycomb is not perfectly uniform, a drawing will look messy if the grid loses its structure. If you struggle with freehand hexagons, try using a light grid of dots as a guide before connecting them into shapes. Additionally, avoid making the lines of the hive too dark too early in the process. Heavy, dark outlines can be difficult to correct if your proportions are slightly off, so keep your initial marks faint until you are satisfied with the overall composition.
How to shade a beehive for realism
Shading is the final step that transforms a simple sketch into a professional-looking illustration. Identify where your light source is coming from—for example, the top right corner—and ensure that all shadows are cast on the opposite side. On a rounded skep hive, the shading should follow the curve of the structure, becoming darkest at the edges to suggest a rounded, cylindrical form. Use a blending stump or a soft tissue to smooth out your graphite, creating a seamless transition from light to shadow.
When shading a honeycomb pattern, focus on the individual walls of the cells. By darkening the bottom and one side of each hexagon, you simulate the light hitting the top edge of the wax. This creates a "pop-out" effect that makes the comb look like it is physically protruding from the paper. Remember to keep the highlights bright and the shadows deep, as this contrast is what gives the honey-filled cells their characteristic translucent, glowing quality. Consistent shading throughout the entire drawing will unify the piece and provide a polished, expert finish.
Key facts
- A classic beehive shape is essentially an elongated oval or a rounded teardrop.
- Focus on the "skep" style, which is the traditional woven basket hive often depicted in illustrations.
- Use a series of horizontal, slightly curved lines to mimic the texture of coiled straw.
- The entrance hole is typically a small, dark arch located near the bottom center.
- Adding a few simple, flying bee shapes around the hive creates a sense of scale and movement.
- Keep your initial sketch light so you can easily erase or adjust the proportions before adding permanent ink.
The bottom line
Drawing a beehive is an accessible project that relies on simple geometric shapes and basic shading. By starting with a rounded oval and adding horizontal texture lines, you can quickly capture the iconic skep style. Whether you choose a traditional woven look or a modern wooden box, focus on consistent proportions and simple details to ensure your drawing remains clear, recognizable, and visually engaging for any viewer.
People also ask
What is a skep hive?
A skep is a traditional, dome-shaped beehive made from coiled straw or wicker. It has been used for centuries and remains the most recognizable icon for beehives in art and literature.
Should I use a ruler to draw the hive?
No, skip the ruler because beehives are organic, rounded structures. Freehand drawing creates a more natural, rustic appearance that fits the subject matter better than rigid, straight lines.
How do I make the hive look three-dimensional?
Add shading to one side of the hive, typically the side opposite your light source. A slightly darker tone at the base also helps ground the object on the page.
How many lines should I draw for the texture?
There is no set number, but spacing them evenly makes the hive look uniform. Aim for 5 to 8 horizontal lines to suggest the layers of woven straw without overcrowding the drawing.
What is the best way to draw the bees?
Draw small, dark ovals with tiny wings represented by two small loops or "v" shapes. Keep them simple, as their small size means you only need to suggest their form rather than detail them.
Can I draw a modern wooden hive instead?
Yes, a modern Langstroth hive is a stack of rectangular boxes. Use straight lines and perspective to draw a boxy shape, which is often easier for beginners than the curved skep.
This answer was created with the help of AI research tools and reference sources. Spotted an error? Let us know — we correct mistakes quickly. See our editorial policy.
![For beginners] This is actually a crucial part! Review the techniques for drawing noses!](/img/e4/how-do-you-draw-a-nose-for-beginners-1.webp)