How do you draw a coral reef step by step?
Short answer
Drawing a coral reef involves layering organic shapes to create depth and texture. Start by sketching basic geometric foundations, then add intricate details like polyps and branches. Use a variety of shapes—such as fans, tubes, and brain-like mounds—to mimic the biodiversity of a healthy, thriving underwater ecosystem.
On this page
How to draw coral reef shapes step by step
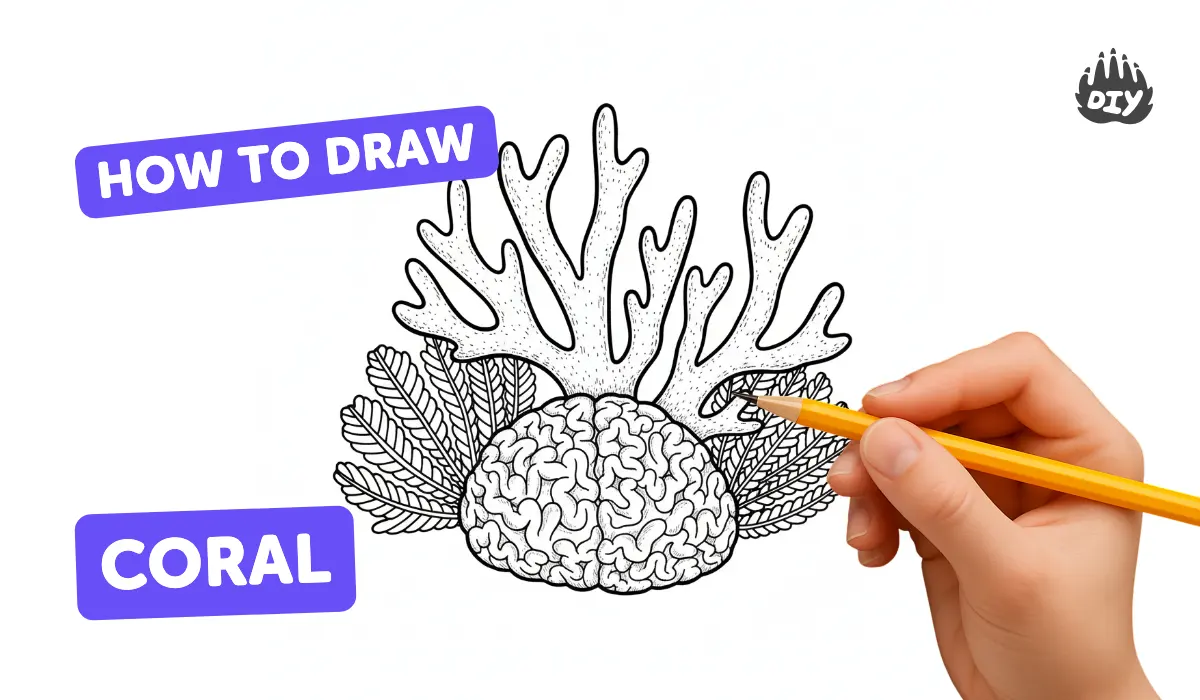
To begin your drawing, focus on establishing the "skeleton" of the reef using light pencil strokes. Coral reefs are composed of diverse structures, so you should aim for variety in your composition. Start by sketching rounded, brain-like mounds, tall tube sponges, and branching staghorn coral. Do not worry about detail at this stage; focus on the placement and size of these forms to ensure the composition feels balanced and natural.
Once the basic shapes are set, refine the outlines to reflect the organic nature of these organisms. Coral is rarely perfectly symmetrical, so embrace slight irregularities and bumps. You can use these steps to build your reef:
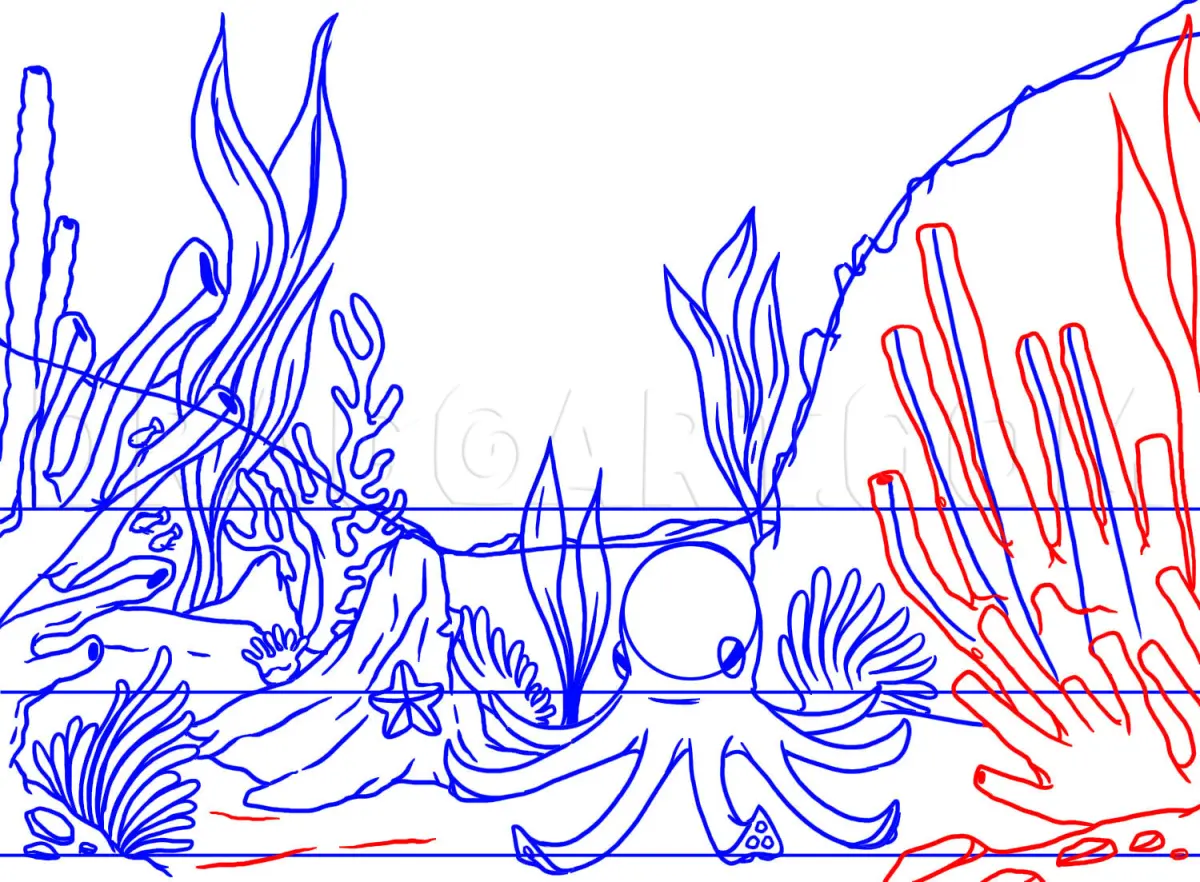
- Sketch large, foundational shapes like boulders or fan corals in the background.
- Add medium-sized branching corals in the mid-ground.
- Place small, intricate polyps and sea anemones in the foreground to create a sense of depth.
- Overlap these shapes to suggest that some corals are growing behind others.
Best drawing tools for beginners
For those new to drawing marine life, a set of graphite pencils ranging from 2H to 6B is ideal. The harder 2H pencils are perfect for initial light sketches, while the softer 6B pencils allow you to build deep, rich shadows that define the texture of the reef. Using a kneaded eraser is also essential, as it allows you to lift graphite gently to create highlights on the tops of coral branches where sunlight would naturally hit.
If you prefer adding color, watercolor pencils are an excellent choice for coral. They allow you to define sharp details with the dry point and then blend the colors with a damp brush to achieve the soft, translucent gradients seen underwater. Consider using a fine-liner pen with waterproof ink to outline your final shapes; this provides a crisp contrast against the soft washes of color. Always test your paper quality beforehand, as heavy layering of water can cause thinner sheets to buckle or tear.
How to add texture and detail to coral
The realism of a coral reef drawing relies heavily on texture. Different species have distinct surfaces that you can represent through specific mark-making techniques. For brain coral, use a series of squiggly, interconnected lines that follow the contours of the mound. For staghorn or branching coral, use small, repetitive dots or tiny "v" shapes to represent the individual polyps that cover the surface. These small marks suggest the living, breathing nature of the colony.
To enhance the three-dimensional quality of your drawing, pay close attention to light and shadow. Imagine a light source coming from the surface of the water and apply darker shading to the undersides of branches and the crevices between coral heads. This contrast is vital for making the reef appear three-dimensional rather than flat. Remember that underwater light is often diffused, so avoid using harsh, pitch-black shadows; instead, use soft, blended transitions to mimic the gentle way light filters through the ocean.
Common mistakes when drawing coral reefs
One of the most frequent errors is creating a drawing that looks too uniform or structured. Beginners often space their coral shapes evenly, which makes the reef look like a garden bed rather than a wild ecosystem. In nature, coral competes for space, leading to chaotic, overlapping growth patterns. Avoid drawing every piece of coral as a separate, isolated object; instead, let them grow into and around one another to create a dense, interconnected reef structure.
Another mistake is neglecting the negative space between the coral. The water itself is an important part of the composition, as it provides the environment for the reef. If you crowd every inch of the page with coral, the drawing will lose its sense of scale and depth. Leave gaps of empty space to represent the water column, and consider adding a few simple, flowing lines to suggest currents or the movement of small fish swimming through the reef. This adds life and narrative to your piece.
Why coral reefs look different in drawings
The appearance of a reef changes significantly depending on the depth and water clarity. In shallow, sunlit waters, coral colors are vibrant, ranging from bright oranges and yellows to intense purples. As you move deeper, the red end of the light spectrum is absorbed, causing the reef to appear in shades of blue, green, and grey. When coloring your drawing, you can use these principles to create atmospheric perspective, making distant corals appear paler and bluer than those in the foreground.
Finally, consider the biological diversity of your reef. A healthy reef is not just coral; it is a complex habitat for sponges, sea fans, and crustaceans. By incorporating these elements, you move your drawing from a simple study of shapes to a complex representation of a marine ecosystem. Keep your lines loose and your observations focused on the variety of life, and you will capture the essence of a coral reef with accuracy and artistic flair.
Key facts
- Coral reefs are colonies of tiny animals called polyps that secrete calcium carbonate to build hard structures.
- Use a light pencil for your initial sketch, as coral structures are organic and irregular rather than perfectly straight.
- Focus on variety by drawing different shapes like branching staghorn, rounded brain coral, and flat fan corals.
- Layer your colors using light base tones first, then add shadows to give the reef depth and dimension.
- Include small details like bubbles or floating particles to create a sense of underwater movement.
- Avoid drawing every single polyp, as this makes the drawing look cluttered; focus on the overall texture instead.
The bottom line
Drawing a coral reef is an exercise in layering organic shapes and vibrant colors. By starting with basic structural silhouettes and gradually adding texture, depth, and marine life, you can create a compelling underwater scene. Focus on the interplay of light and shadow to bring the reef to life, ensuring that your final composition feels balanced, diverse, and representative of the complex ecosystems found in nature.
People also ask
What are the best materials for drawing a coral reef?
High-quality colored pencils or alcohol-based markers work best for blending vibrant underwater colors. Use a fine-liner pen to add crisp details to the edges of the coral structures after your coloring is complete.
How do I make the water look realistic?
Use varying shades of blue and turquoise, with lighter areas near the surface to represent sunlight filtering down. Adding light-colored streaks or "caustics" can mimic the way light refracts through moving water.
Should I draw the fish before or after the coral?
It is generally easier to draw the coral shapes first to establish the reef environment. Once the background and structures are set, you can place fish in the open spaces to avoid overlapping them awkwardly.
How do I represent the texture of brain coral?
Use a series of squiggly, interconnected lines that follow a rounded contour. Adding darker shading in the grooves between these lines will make the texture pop and appear three-dimensional.
What is the most common mistake when drawing reefs?
Beginners often make the reef too symmetrical or uniform. Coral grows in chaotic, organic patterns, so embrace asymmetry and overlapping shapes to ensure the scene looks natural.
How can I make my drawing look more vibrant?
Use contrasting colors, such as bright oranges against deep blues, to make the coral stand out. Applying a white gel pen for highlights on the tops of the coral can simulate the shimmer of sunlight.
This answer was created with the help of AI research tools and reference sources. Spotted an error? Let us know — we correct mistakes quickly. See our editorial policy.