How do you draw sushi?
Short answer
Drawing sushi involves breaking down complex forms into basic geometric shapes like cylinders, rectangles, and ovals. By layering these foundational structures with realistic textures—such as the glossy sheen of nori or the marbled grain of fish—you can create an appetizing illustration. Focus on light, shadow, and color to achieve depth.
On this page
How to draw basic sushi shapes
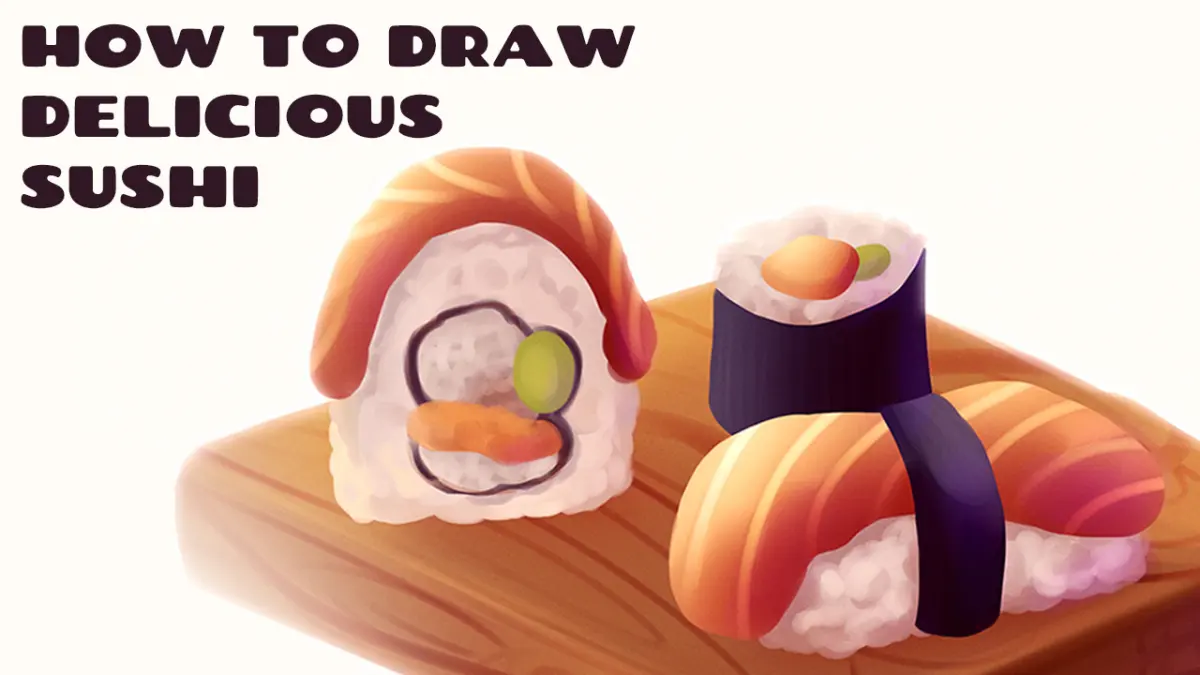
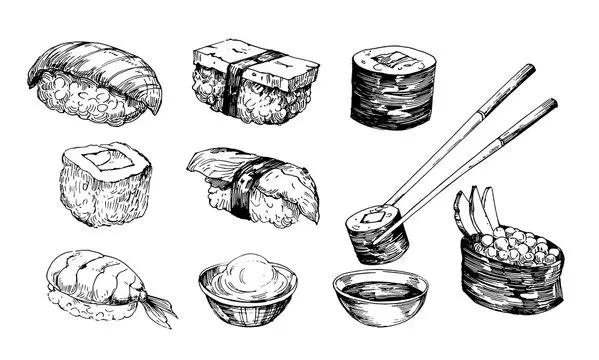
To begin drawing sushi, you must visualize the food as a collection of simple 3D forms. Nigiri, for instance, is essentially a rounded rectangle of vinegared rice topped with a slightly curved, elongated oval representing the slice of fish. Maki rolls are best approached as cylinders, which can be drawn by creating two parallel lines connected by ellipses at the top and bottom. Once these structural skeletons are in place, you can refine the edges to make them look more organic rather than perfectly mechanical.
Consistency in perspective is the most important element when building your sketch. If you are drawing a platter, ensure all pieces share the same vanishing point so the composition does not look disjointed. Start with light pencil strokes to map out the placement of each piece before committing to darker, final lines. This foundational approach allows you to adjust the proportions of the rice compared to the toppings, ensuring the final drawing looks balanced and realistic.
Best tools for drawing sushi
Selecting the right materials can significantly impact the final quality of your food illustration. For beginners, a set of graphite pencils ranging from 2H for light sketching to 4B for deep shadows is ideal. If you plan to add color, alcohol-based markers are excellent for achieving the smooth, vibrant gradients found in salmon or tuna. These markers blend seamlessly, which is necessary for mimicking the translucent, oily appearance of fresh seafood.
For those who prefer a more textured look, colored pencils are superior for layering fine details. You can use them to create the individual grains of rice or the subtle fibers in the fish. Consider the following tools for your kit:
- A kneaded eraser to lift graphite without damaging the paper surface.
- Fine-liner pens with archival ink for crisp, permanent outlines.
- White gel pens to add highlights on the glossy nori or wet fish surfaces.
- Smooth, heavyweight bristol paper to prevent ink bleed and allow for easy blending.

How to add texture and detail
The secret to making sushi look edible lies in how you render its unique textures. Nori, the dried seaweed wrapping, should be drawn with a matte, dark finish, often with tiny, irregular speckles to suggest its organic origin. In contrast, the fish topping requires a glossy appearance; leave small, thin white gaps or "hot spots" where light would naturally reflect off the moist surface. These highlights are essential for creating the illusion of freshness.
When drawing the rice, avoid trying to outline every single grain, as this will make the piece look cluttered. Instead, focus on the overall bumpy silhouette of the rice mound and use small, curved marks to suggest the texture in the shadows. This technique, known as suggestion, is more effective than literal representation. By focusing on the light hitting the rice and the shadows between the grains, you create a sense of depth that draws the viewer’s eye toward the center of the roll.
Common mistakes when drawing sushi
One of the most frequent errors is making the sushi look too rigid or symmetrical. Real sushi is handmade, meaning the rice is often slightly uneven and the fish may drape naturally over the sides. If your drawing looks like a perfect machine-made product, it will lack the appetizing quality of authentic Japanese cuisine. Always introduce slight irregularities in the curves of the rice and the edges of the fish to give it a more natural, human touch.
Another common mistake involves the use of color and contrast. Beginners often use flat, uniform colors, which results in a cartoonish appearance. To avoid this, remember that sushi has many subtle variations in tone. For example, a piece of salmon is not just orange; it contains streaks of white fat and darker pink hues. Follow these steps to improve your coloring:
- Apply a base layer of your lightest color to the entire subject.
- Use a darker shade to define the shadows under the fish or inside the roll.
- Layer in highlights using a lighter pencil or a white gel pen to define the wetness.
- Add final details like sesame seeds or green onion garnishes to break up the color.
How to arrange a sushi composition
A successful drawing often depends on how the pieces are arranged on the plate. Instead of drawing every piece of sushi facing the same direction, vary the angles to create visual interest. Place some pieces on their sides to show the filling, while keeping others upright to showcase the topping. This variety mimics how a chef would plate a real meal, providing a dynamic look that guides the viewer's eye across the page.
Consider the negative space around your sushi to keep the focus on the food. You might add simple accessories like a small dish of soy sauce, a pair of wooden chopsticks, or a mound of pickled ginger to provide context and scale. These supporting elements should be drawn with less detail than the sushi itself to ensure the main subject remains the star of the composition. By carefully balancing your focal points, you can transform a simple sketch into a professional-looking culinary illustration that feels complete.
Key facts
- Start by drawing a simple cylinder or a rectangular prism to represent the base shape of the sushi roll or nigiri.
- Use a soft graphite pencil for initial sketches, as dark lines are difficult to erase when refining the seaweed or rice texture.
- Focus on the "rice" texture by drawing small, overlapping ovals rather than solid blocks to create a sense of volume.
- Use a fine-liner pen to trace your final outlines after you have corrected the proportions of the fish or vegetable fillings.
- Add shadows on the side of the sushi piece opposite your light source to give the drawing a three-dimensional appearance.
- Use light, layered strokes with colored pencils to mimic the translucent, glossy look of raw fish like salmon or tuna.
The bottom line
Drawing sushi is an exercise in capturing simple geometric forms and applying realistic textures. By starting with basic shapes like cylinders, you can build complexity through layering rice grains and adding subtle highlights to the fish. Focus on the interplay between light and shadow to create depth. With practice, these techniques will help you render appetizing, lifelike illustrations that highlight the beauty of Japanese cuisine.
People also ask
What is the best way to draw the texture of sushi rice?
Instead of drawing individual grains, focus on creating small, irregular clusters using light, stippled dots. This suggests the density of the rice without cluttering the page with too much detail.
How do you make the seaweed (nori) look realistic?
Use a very dark, solid black for the nori wrap, but leave a tiny sliver of white space at the edges to show thickness. This contrast helps the seaweed stand out from the white rice.
Should I use markers or colored pencils for coloring sushi?
Colored pencils are generally better for beginners because they allow for layering and blending. Markers are excellent for bold, graphic styles but can be harder to control when creating subtle gradients in fish.
How do I draw the shiny surface of raw fish?
Leave small, thin white streaks or "highlights" on the surface of the fish. These reflections indicate a wet, fresh texture that is essential for making food look appetizing.
What is a common mistake when drawing sushi rolls?
A frequent error is making the roll perfectly symmetrical, which looks unnatural. Sushi is hand-pressed, so slightly uneven edges and varying sizes of ingredients make the drawing feel more authentic.
How can I draw chopsticks resting on the sushi?
Draw the chopsticks as two long, tapered rectangles that overlap the sushi slightly. Ensure they are drawn at an angle to create depth and perspective in your composition.
This answer was created with the help of AI research tools and reference sources. Spotted an error? Let us know — we correct mistakes quickly. See our editorial policy.