How do you draw rocks and stones?
Short answer
Drawing rocks requires observing irregular geometric shapes, varying textures, and consistent light sources. Begin by sketching blocky silhouettes, then define cracks and facets using sharp, angular lines. Apply shading to create depth, ensuring highlights remain bright to suggest hard surfaces. With practice, you can render realistic stones by layering values and emphasizing shadows.
On this page
How to draw realistic rocks for beginners
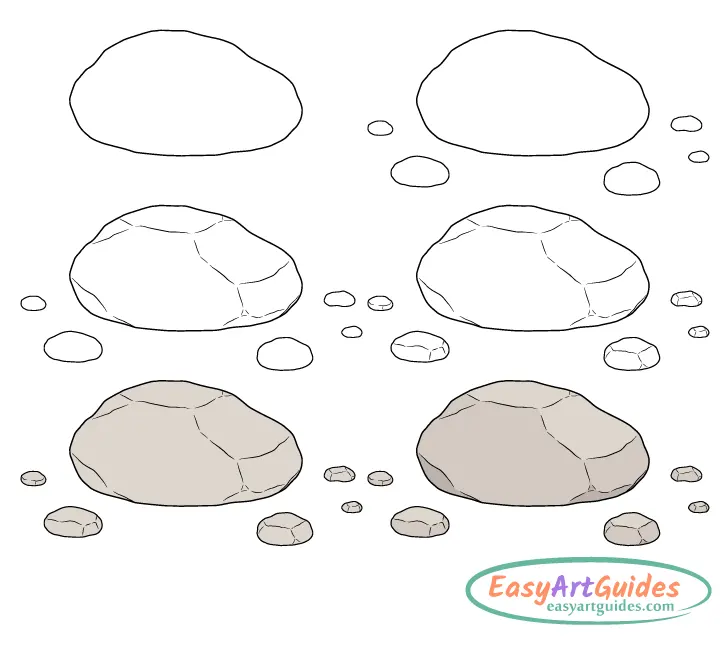
To draw a realistic rock, start by observing the fundamental geometry behind natural forms. Rocks are rarely perfectly round; they are usually composed of jagged planes and irregular facets. Begin your sketch by drawing a simple, blocky shape that represents the overall mass of the stone. Avoid drawing smooth, continuous circles, as these look unnatural. Instead, focus on creating straight, angular lines that represent the edges where different planes of the rock meet.
Once the basic silhouette is established, look for the "cracks" or fissures that define the rock's character. These lines should vary in thickness and depth, mirroring the way geological pressure shapes stone over time. Keep your initial lines light so they can be easily adjusted as you refine the form. Remember that nature is rarely symmetrical, so embrace imperfections and asymmetrical angles to give your drawing a sense of organic authenticity.
How to use shading to add depth
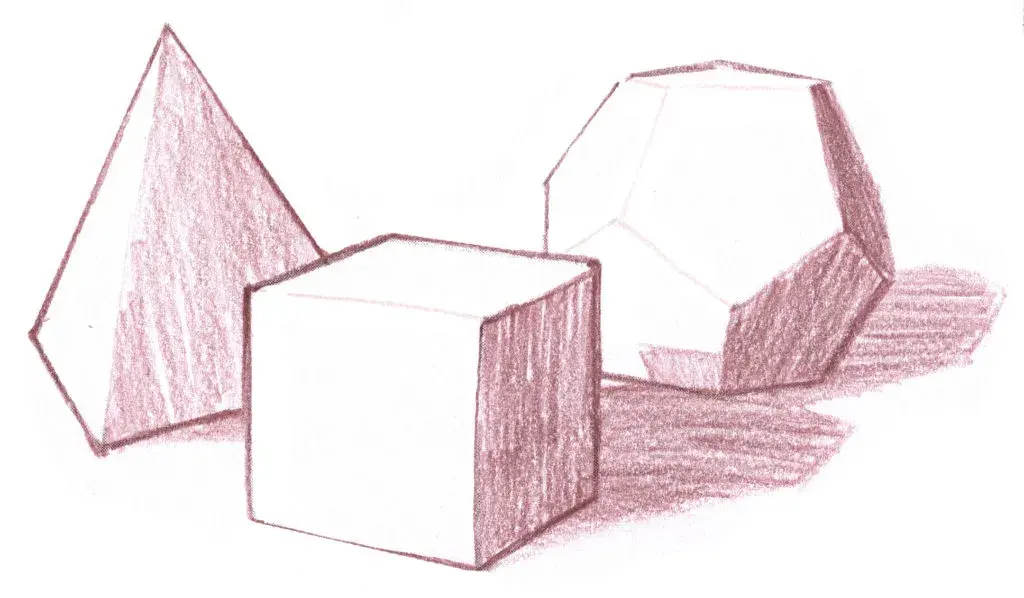
Shading is the most critical element in transforming a flat outline into a three-dimensional object. First, you must establish a consistent light source. If the light is coming from the upper right, all highlights should be concentrated on that side, while the shadows fall toward the bottom left. Use a range of graphite pencils, such as an HB for light sketching and a 4B or 6B for deep, dark shadows, to create a broad tonal range.
To achieve a convincing stony texture, follow these steps to build your values:
- Identify the brightest highlight and leave that area of the paper white.
- Apply a light base tone to the entire rock, excluding the highlight areas.
- Use a darker pencil to add deep shadows in the crevices and on the side opposite the light source.
- Blend the transitions between light and dark using a blending stump or a piece of tissue to create a smooth, weathered look.
Best tools for drawing stones
You do not need expensive equipment to produce high-quality drawings of rocks. A set of graphite pencils ranging from 2H (hard, light lead) to 6B (soft, dark lead) is sufficient for most artists. The 2H pencil is excellent for initial light sketches and fine details, while the softer 6B pencil allows you to create the rich, velvety blacks necessary for deep shadows. A kneaded eraser is also essential because it can be molded into precise shapes to lift highlights or clean up smudges.
The quality of your paper also influences the final result. A medium-tooth paper provides enough texture to catch the graphite, which helps in rendering the gritty surface of a rock. If the paper is too smooth, the shading may appear streaky or uneven. Experimenting with different paper surfaces will help you determine which texture best complements your drawing style. Always keep a sharpener or a sandpaper block nearby to maintain a crisp point on your pencils for those critical, sharp-edged details.
Common mistakes when drawing rocks
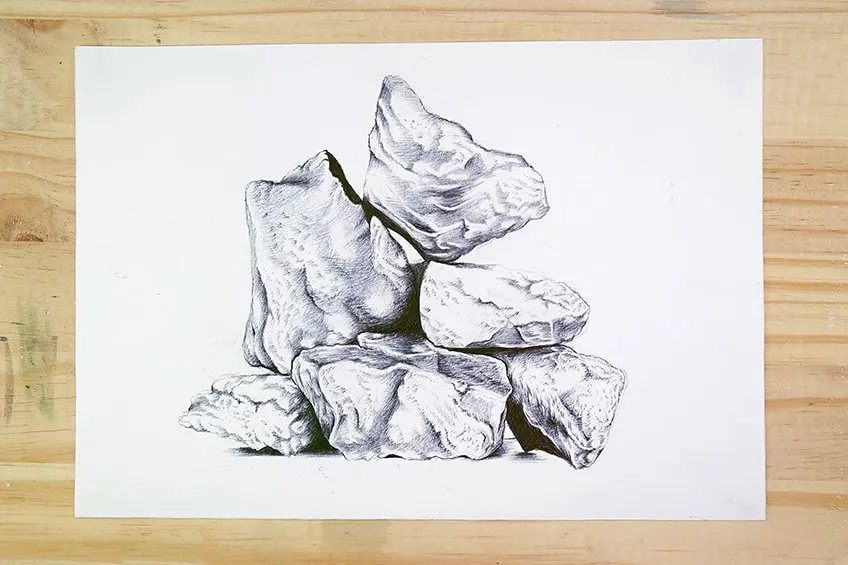
One of the most frequent errors is drawing rocks that look too soft or rounded. Beginners often use curved lines to define the edges of a stone, which makes the object appear like a ball or a cloud rather than a hard mineral. To correct this, focus on "facet" drawing, where you treat the rock as a collection of flat surfaces. Even a round river stone has subtle, flat planes that catch light differently; capturing these subtle shifts is what creates the illusion of hardness.
Another common mistake is failing to provide enough contrast. If your darkest shadows are not dark enough, the rock will appear flat and unconvincing. Many artists are afraid to press hard with their pencils, but deep, dark shadows are necessary to make the highlights pop. Ensure that your darkest values are truly dark by layering graphite gradually. Do not rush the process; building up values in thin, controlled layers prevents the paper from becoming over-saturated with graphite, which can make the drawing look muddy or gray.
Why texture is important for stone drawings
Texture is the final layer of detail that elevates a drawing from a simple shape to a convincing piece of art. Rocks are rarely uniform; they often feature pits, moss, lichen, or crystalline structures that break up the surface. To represent these features, use small, stippled dots, short cross-hatching marks, or light scribbles. These marks should follow the contours of the rock's planes to maintain the sense of volume you established during the shading phase.
Consider these techniques to enhance the tactile quality of your stone:
- Use a sharp pencil to carve out tiny cracks that run across the surface of the rock.
- Vary the pressure of your pencil to create subtle variations in the stone's surface, such as rough patches or smooth, worn areas.
- Add small, scattered debris or pebbles around the base of the main rock to ground it in its environment.
- Use a white gel pen or a very sharp eraser to add tiny, bright specks of light that simulate mineral reflections or damp spots.
By focusing on these textural details, you create a sense of history and physical presence that makes your drawing feel truly alive and grounded.
Key facts
- Use a hard pencil, such as an HB or 2H, to outline the jagged, irregular silhouettes of rocks.
- Focus on the light source first, as rocks are defined primarily by the contrast between highlight and shadow.
- Apply cross-hatching or stippling techniques to replicate the rough, uneven texture of mineral surfaces.
- Avoid perfectly smooth lines; rocks are characterized by cracks, chips, and weathered edges.
- Use a kneaded eraser to lift graphite and create bright highlights on the protruding corners of stones.
- Group small stones into clusters to create a sense of scale and natural geological distribution.
The bottom line
Drawing convincing rocks requires observing how light interacts with irregular, angular surfaces. By prioritizing high-contrast shadows and jagged silhouettes over smooth transitions, you can create a sense of weight and texture. Practice varying your line pressure to capture the weathered nature of stone, and always anchor your subjects with dark cast shadows. Consistent observation of real-world geological formations remains the best way to improve your technique.
People also ask
Should I use a blending stump to smooth out my shading?
Avoid blending too much, as rocks typically have sharp, angular transitions rather than soft gradients. Over-blending often makes a hard stone look like soft clay or fabric.
How do I make a rock look heavy?
Focus on the "cast shadow" directly beneath the rock where it meets the ground. A dark, sharp shadow anchors the object and provides the visual weight necessary for realism.
What is the best way to draw moss or lichen on a rock?
Use light, circular scribbling or short, broken lines to suggest surface growth. Keep these textures subtle so they do not distract from the overall form of the stone.
How do I draw a pile of rocks rather than just one?
Start by drawing the largest, most prominent rocks first to establish the composition. Fill the gaps with smaller pebbles and debris to create a natural, chaotic appearance.
Why do my rocks look like flat shapes instead of 3D objects?
You are likely missing the "core shadow," which is the darkest area on the rock itself. Ensure there is a full range of values from white highlights to deep blacks.
Do I need to draw every single crack in the rock?
No, over-detailing can make the drawing look cluttered. Focus on the major structural cracks and suggest smaller textures with light, suggestive marks.
This answer was created with the help of AI research tools and reference sources. Spotted an error? Let us know — we correct mistakes quickly. See our editorial policy.