What is the easiest way to draw a cup?
Short answer
The easiest way to draw a cup is to use the ellipse method. By sketching two parallel ovals connected by vertical lines, you establish the structure of a cylinder. This geometric approach simplifies complex curves into manageable shapes, ensuring your drawing maintains proper perspective and symmetry before you add final details.
On this page
How to draw a cup for beginners
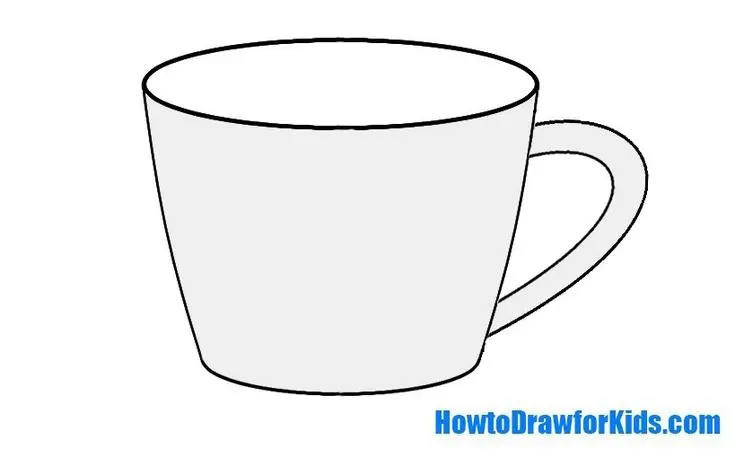
The most effective technique for beginners is to break the cup down into basic geometric forms. Every standard mug or glass is essentially a cylinder. By mastering the cylinder, you gain the ability to draw almost any drinking vessel with accuracy. Start by drawing a light, horizontal oval to represent the top opening of the cup. This is known as an ellipse. The width of the ellipse determines how open the cup looks from your specific viewing angle.
Once the top ellipse is established, draw two vertical lines descending from the widest points of the oval to create the sides. To finish the base, draw a curved line that mirrors the bottom half of your top ellipse. This bottom curve must be slightly rounder than the top one to account for the way human eyes perceive perspective. Keep your initial lines very light so you can easily erase or adjust them as you refine the shape.
What tools are best for drawing cups
You do not need expensive equipment to begin drawing. A standard HB graphite pencil is ideal for beginners because it allows for both light sketching and darker, defined lines. You will also need a smooth, white drawing paper or a sketchbook to ensure your pencil glides easily across the surface. A soft white eraser is essential for cleaning up construction lines once your drawing is complete.
For those looking to add depth, consider using a range of pencils. You might use a 2H pencil for the initial light framework and a 4B pencil for shading and final outlines. If you are just starting, follow these steps to organize your workspace:
- Keep a sharpener nearby to maintain a fine point for detail work.
- Use a piece of scrap paper under your hand to prevent smudging.
- Ensure your light source is consistent so you can see your lines clearly.

How to add handles and details
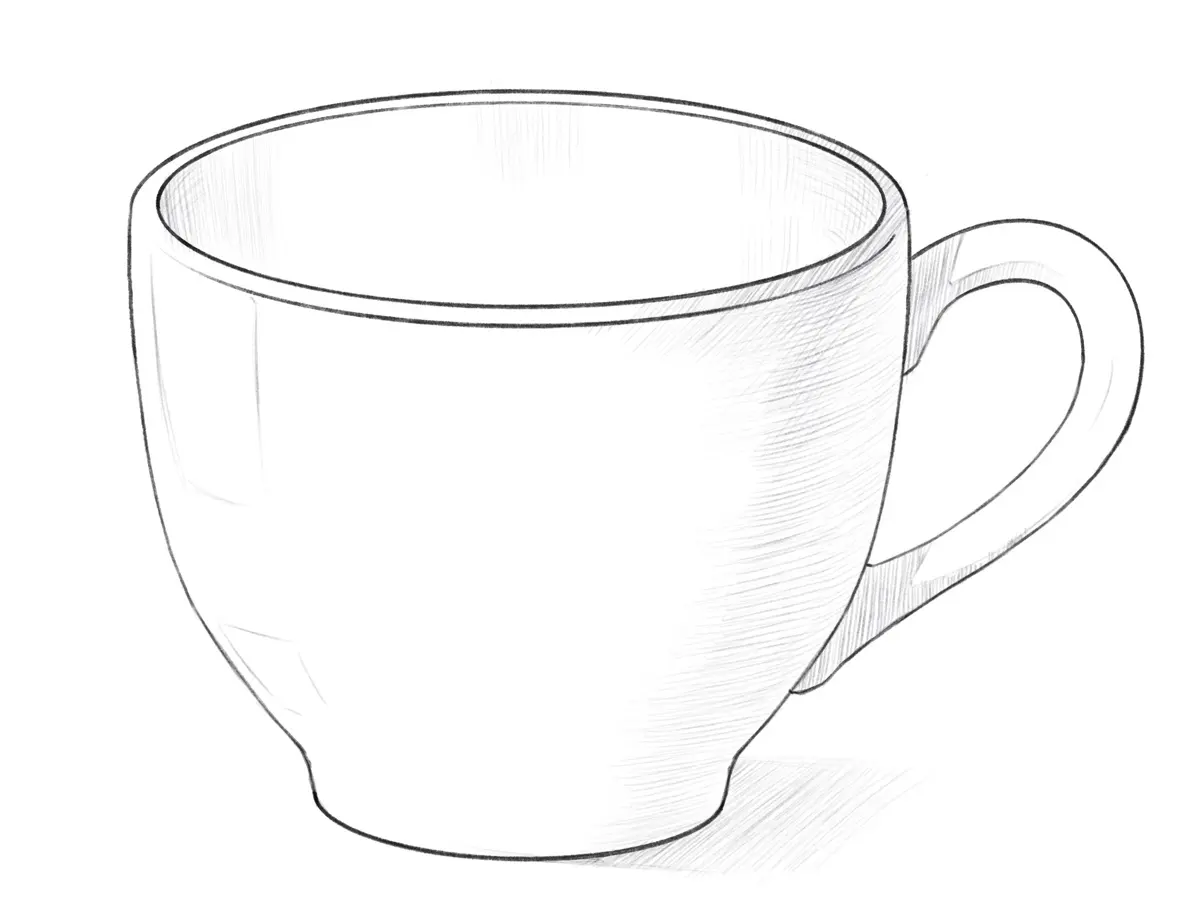
Once the main body of the cup is drawn, adding a handle is a matter of attaching a secondary shape. Imagine the handle as a letter "C" or a "D" attached to the side of your cylinder. Draw two parallel lines that follow the curve of the cylinder to represent the thickness of the handle. Connect these with a rounded outer edge to give the handle volume and weight.
Refining the cup requires attention to the rim and the base. Add a thin, second oval just inside the top rim to indicate the thickness of the material, such as ceramic or glass. You can also add a subtle shadow underneath the base of the cup to ground it on a surface. This simple addition prevents the cup from appearing as if it is floating in space. Focus on these small details after the main structure is fully finalized.
Common mistakes when drawing cups
The most frequent error is drawing the top and bottom ellipses with different widths or angles. If the top ellipse is wide and the bottom is flat, the cup will look distorted or tilted. Always ensure the bottom curve is a partial ellipse that matches the perspective of the top opening. Another common mistake is making the sides of the cup perfectly straight when they should slightly taper or curve depending on the specific design of the vessel.
Avoid these pitfalls by checking your proportions frequently:
- Hold your pencil up to your drawing to measure the height versus the width.
- Step back from your paper every few minutes to view the drawing from a distance.
- Check that your vertical lines are truly parallel to avoid a lopsided appearance.
- Ensure the handle is attached at the correct height relative to the rim and base.
How long does it take to draw a cup
Drawing a simple cup can take anywhere from five to fifteen minutes depending on your experience level. The initial construction phase usually takes about two minutes, while refining the lines and adding shading for a realistic look takes the remainder of the time. Do not rush the construction phase, as a solid foundation saves significant time during the cleaning and shading process. With consistent practice, you will find that your speed increases as your muscle memory develops.
If you are aiming for a highly realistic rendering, you might spend up to thirty minutes layering graphite to create smooth gradients. This involves carefully observing how light hits the cup and where the darkest shadows fall. Whether you are aiming for a quick sketch or a polished piece, the key is patience. By focusing on the geometric structure first, you will consistently produce better drawings in less time, eventually reaching a point where the process feels entirely natural and intuitive.
Key facts
- Start by drawing a horizontal oval to represent the top opening of the cup.
- Connect the sides of the oval with two vertical lines that curve slightly inward toward the bottom.
- Draw a curved line at the bottom to mirror the curve of the top oval, creating a rounded base.
- Add a smaller oval inside the top one to create the illusion of depth and thickness for the rim.
- Attach a "C" shape or a sideways "D" shape to the side of the cup to represent the handle.
- Use an eraser to remove the overlapping lines where the handle meets the body of the cup.
The bottom line
Drawing a cup is fundamentally about mastering the ellipse. By starting with a simple oval and building the structure through curved lines, you create a sense of volume and perspective. Focus on the relationship between the rim and the base, and remember to clean up your construction lines. With practice, these basic geometric shapes will allow you to render any vessel with accuracy and ease.
People also ask
How do I make the cup look three-dimensional?
Add a light source to one side of your drawing and shade the opposite side. Use darker pencil strokes near the edges and lighter ones toward the center to create volume.
Should I use a ruler to draw the sides?
Avoid using a ruler for standard cups, as most are made of ceramic or glass with soft, organic curves. Freehand drawing creates a more natural and realistic appearance.
How do I draw the liquid inside the cup?
Draw a horizontal line slightly below the rim inside the cup. Ensure the line is slightly curved to match the shape of the top oval, suggesting the surface of the liquid.
What is the best way to draw a handle that looks attached?
Ensure the top and bottom of the handle connect to the cup body at different heights. This perspective trick makes the handle appear to wrap around the side rather than sitting flat.
Why does my cup look tilted?
This usually happens when the top oval is not perfectly centered over the base. Use a faint vertical center line as a guide to keep both ends of the cup aligned.
Can I draw a cup without an oval top?
Only if you are drawing the cup from a perfectly side-on or "flat" perspective. In most realistic angles, the top opening will always appear as an ellipse due to foreshortening.
This answer was created with the help of AI research tools and reference sources. Spotted an error? Let us know — we correct mistakes quickly. See our editorial policy.