How do you shade a hand?
Short answer
Shading a hand requires treating it as a collection of geometric volumes, such as cylinders for fingers and a wedge for the palm. By establishing a single light source, you can apply consistent shadows to create depth. Use soft gradients for rounded surfaces and sharp transitions where bones or tendons create distinct edges.
On this page
How to break down hand anatomy for shading
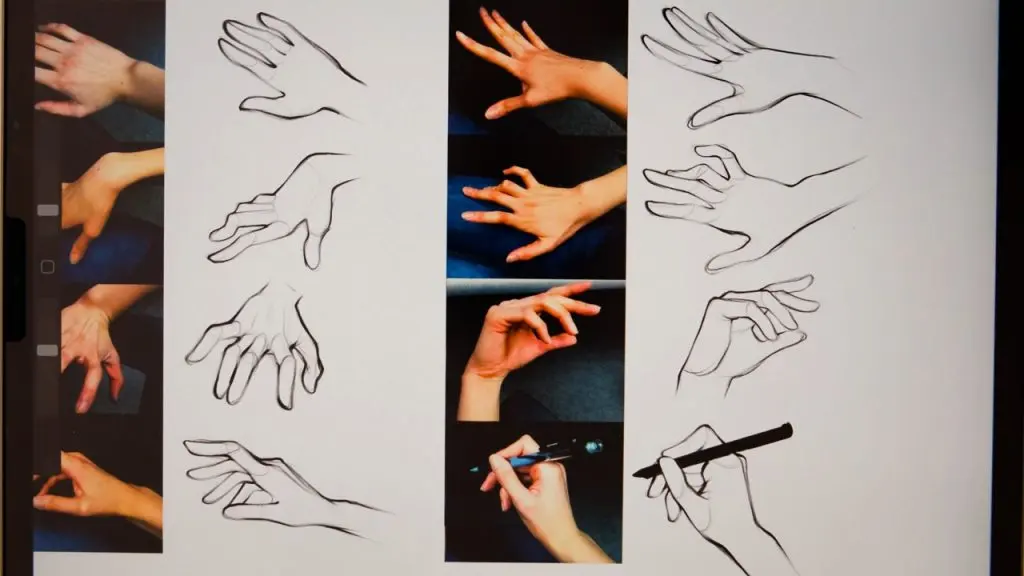
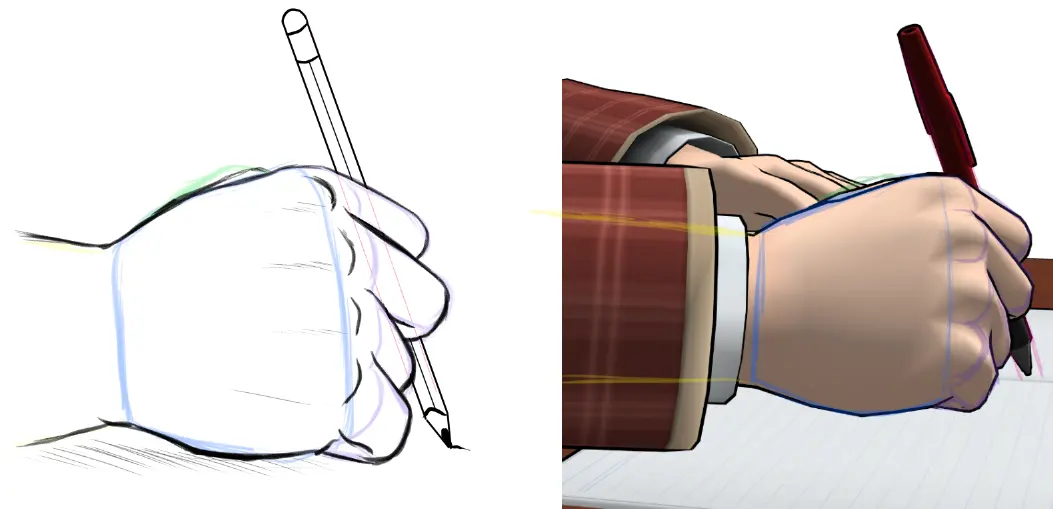
The human hand is complex, but you can simplify it into basic 3D shapes to make shading manageable. Visualize the palm as a flat, slightly curved block, and the fingers as a series of connected cylinders. The thumb acts as a distinct, mobile unit attached to the side of the palm with a large, fleshy muscle pad. By identifying these underlying forms, you avoid treating the hand as a flat silhouette.
To achieve a realistic look, focus on the transition between these shapes. Every finger has three segments, or phalanges, which act like small pipes. When you shade these, think about how light wraps around the curve of the cylinder. Light will hit the top of the finger, while the underside remains in shadow. Using this structural approach ensures that your shading follows the physical reality of the hand rather than just coloring in lines.
Best shading techniques for beginners
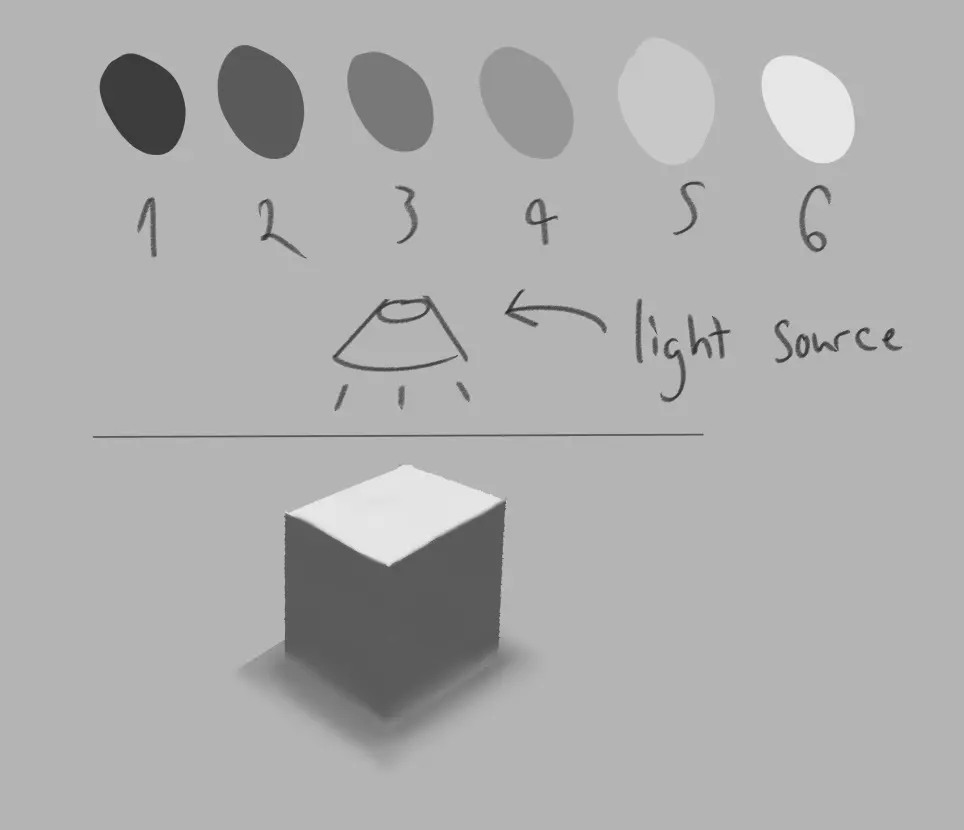
When starting, prioritize the "value scale," which is the range of light to dark tones in your drawing. Beginners often make the mistake of using only mid-tones, which makes the hand look flat and lifeless. To add volume, you must push your darks to be deeper and your highlights to be brighter. This contrast is what defines the three-dimensional form on a two-dimensional surface.
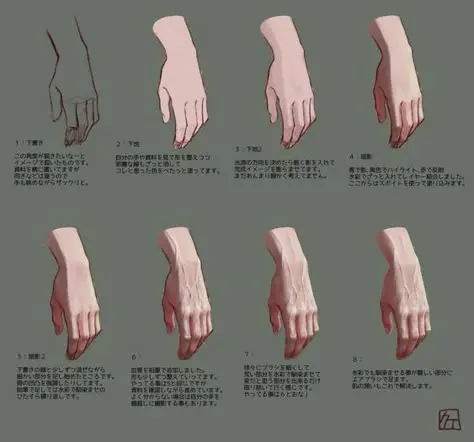
Follow these steps to build your shading systematically:
- Identify the light source and mark where the highlights will sit, usually on the knuckles and the top of the fingers.
- Apply a light base tone across the entire hand, avoiding the designated highlight areas.
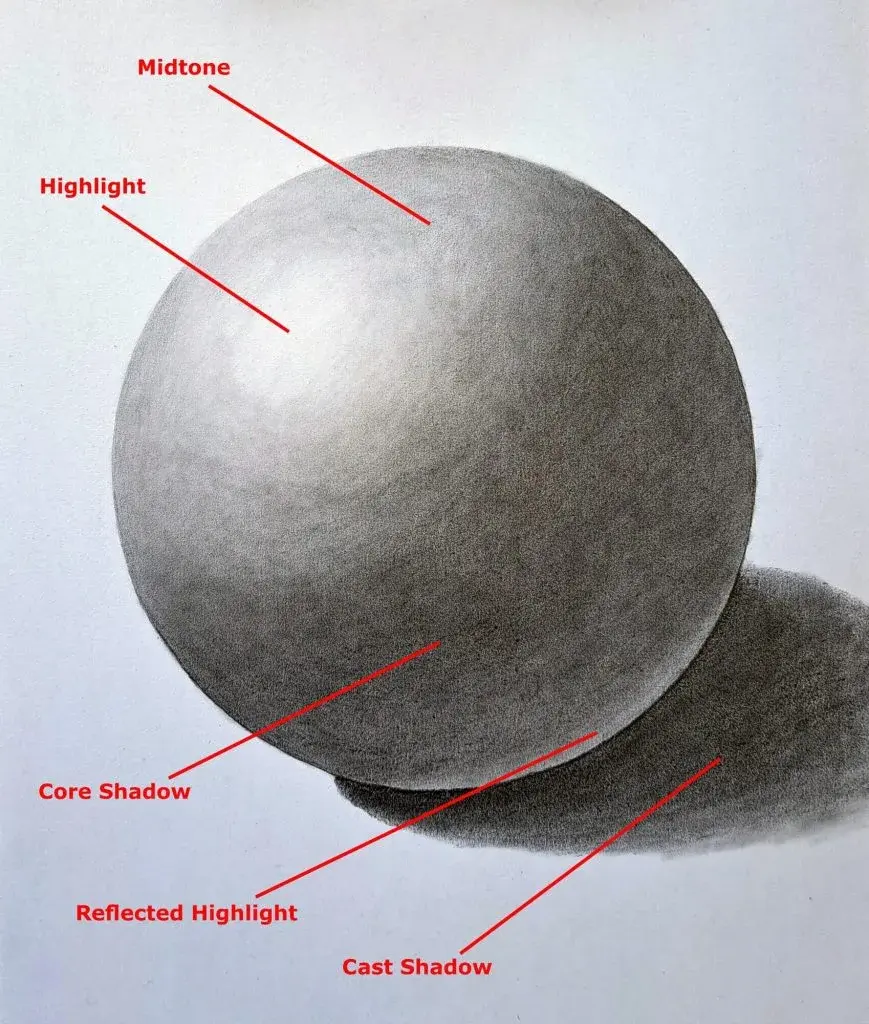
- Use a darker pencil or increased pressure to place core shadows on the sides of the fingers and the underside of the palm.
- Smooth the transitions between tones using a blending stump or a piece of tissue to create soft, realistic gradients.
Why cast shadows are important
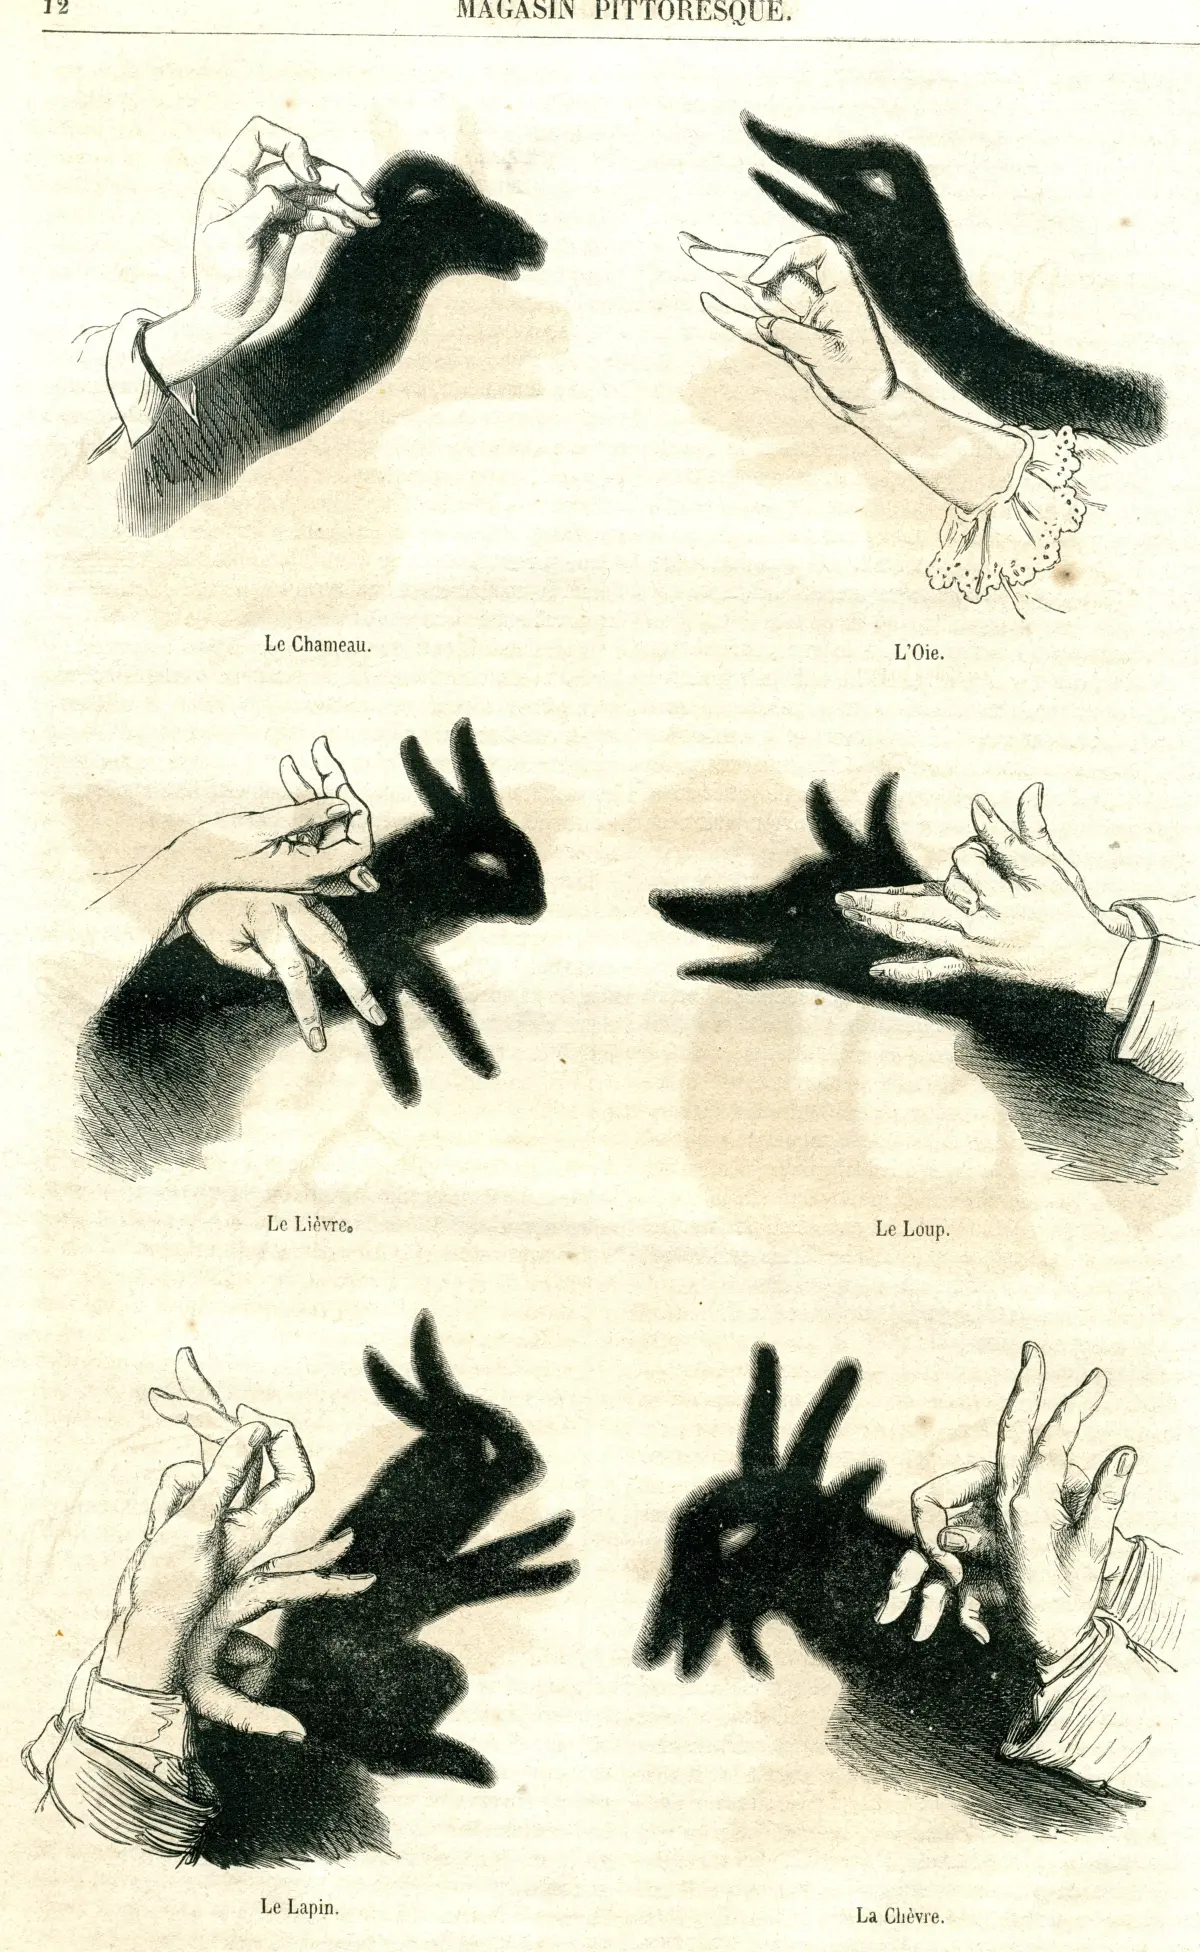
A cast shadow occurs when one part of the hand blocks light from reaching another surface, such as a finger casting a shadow onto the palm. These shadows are essential because they anchor the hand in space and provide a sense of weight. Without cast shadows, the hand will appear to float in mid-air, lacking a clear relationship with its environment.
Pay attention to the edges of these shadows to add realism. A shadow cast by an object close to the surface, like a finger resting on the palm, will have a sharp, defined edge. If the finger is held further away, the shadow becomes softer and more diffused. Mastering these edge qualities allows you to convey the exact distance between different parts of the hand, which is a hallmark of professional-quality anatomical drawing.
Common mistakes when shading hands
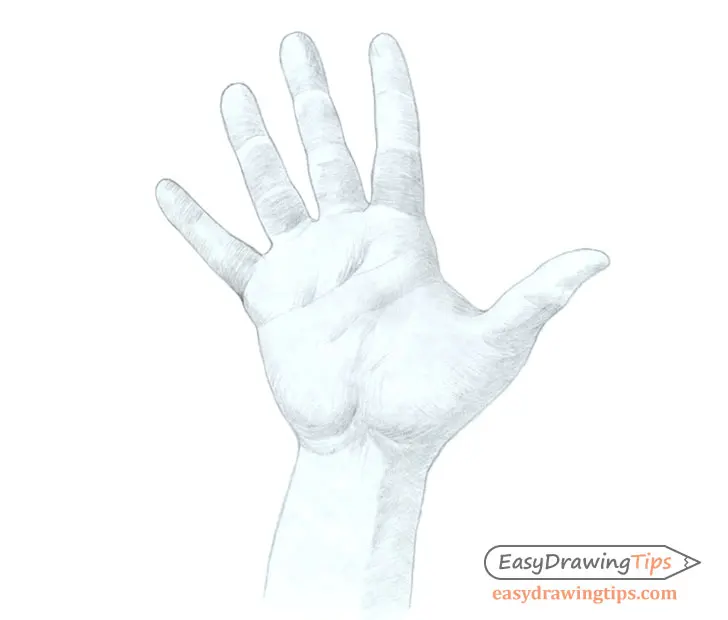
One of the most frequent errors is ignoring the reflected light that bounces off surfaces. Even in the darkest shadow, there is usually a subtle glow caused by light reflecting from the table or the other fingers. If you shade the entire shadow area with a uniform, flat black, the hand will look like a cutout rather than a solid object. Always leave a thin, lighter strip along the edge of the shadow to suggest this bounce light.
Another common mistake involves over-shading the knuckles. Because knuckles are bony protrusions, they are often the highest points on the hand and catch the most light. Many beginners mistakenly shade them as dark circles, which makes the fingers look bruised or swollen. Instead, keep the tops of the knuckles bright and apply your darkest values in the valleys between the fingers and the creases of the skin.
How to add texture and detail
Once the basic shading is established, you can add skin texture to make the hand look authentic. Skin is not perfectly smooth; it features fine lines, wrinkles, and pores. Use light, varied hatching marks to suggest these textures, focusing on areas where the skin bunches up, such as the knuckles and the wrist. Avoid drawing every single wrinkle, as this can make the hand look aged or overly cluttered.
Use these tips to refine your final shading:
- Use a kneaded eraser to lift out small, sharp highlights on the fingernails or the edge of a tendon.
- Vary your pencil pressure to create a sense of organic movement rather than mechanical uniformity.
- Observe your own hand under a lamp to see how light behaves on different skin tones and textures.
- Keep your shadows consistent with the light source; if the light is coming from the left, all cast shadows must point toward the right.
By consistently applying these principles, you will develop the ability to render hands that look solid, expressive, and anatomically convincing. Practice sketching hands in different positions to understand how the shadows shift as the fingers bend and the palm rotates.
Key facts
- Treat the hand as a collection of simple geometric shapes, such as cylinders for fingers and a wedge for the palm.
- Identify your light source early, as consistent shadows are essential for creating the illusion of three-dimensional volume.
- Use a light touch to establish mid-tones before layering darker shadows to avoid muddying the paper.
- Cast shadows, which occur where one digit overlaps another, are typically darker and sharper than form shadows on the skin.
- The underside of the fingers and the palm are generally darker than the back of the hand, which is usually more exposed to light.
- Use a kneaded eraser to lift highlights from the knuckles and fingernails to add a realistic, reflective quality to the skin.
The bottom line
Shading a hand effectively requires a firm grasp of anatomy and light physics. By breaking the complex structure into basic geometric forms, you can apply shadows that define volume and depth. Focus on maintaining consistent light sources, using varied pencil pressures, and emphasizing the soft transitions of skin. With patience and careful observation of how light hits the knuckles and creases, your drawings will appear lifelike.
People also ask
How do I draw knuckles so they look realistic?
Knuckles are rounded protrusions that catch light on top and cast small, crescent-shaped shadows underneath. Focus on the subtle transition between the curved bone and the surrounding skin rather than drawing hard, dark lines.
Should I use a blending stump to smooth out my shading?
Blending stumps are useful for softening transitions, but over-blending can make skin look flat or oily. Use them sparingly to smooth mid-tones, but keep your darkest shadows crisp to maintain contrast and structure.
How do I shade the palm of the hand?
The palm is complex, featuring deep creases and fleshy pads that create varied shadow patterns. Shade the pads as individual spheres and use thin, precise lines to emphasize the deep lines that define the palm's unique anatomy.
What is the best pencil grade for shading skin?
Start with an HB or H pencil for initial light mapping and mid-tones to keep the paper clean. Switch to a 2B or 4B pencil for the deeper shadows to achieve the necessary contrast without damaging the drawing surface.
How do I avoid making the hand look like a glove?
Avoid outlining every finger with a continuous dark line, which flattens the form. Instead, use shading to differentiate the fingers from one another and allow the shadows to define the edges of the skin.
Why do my drawings of hands look stiff?
Stiffness often results from ignoring the natural curvature of the fingers and the slight arch of the palm. Ensure your shading follows the contour of the hand’s anatomy to suggest movement and flexibility instead of rigid, straight lines.
This answer was created with the help of AI research tools and reference sources. Spotted an error? Let us know — we correct mistakes quickly. See our editorial policy.