How do you draw a pelican step by step?
Short answer
Drawing a pelican requires capturing its iconic, oversized bill and streamlined body shape. By breaking the bird down into simple geometric forms—an oval for the body and a large, curved pouch for the beak—you can construct an accurate silhouette. Focus on the graceful neck curve and the distinct wing structure to finish.
On this page
How to draw a pelican step by step
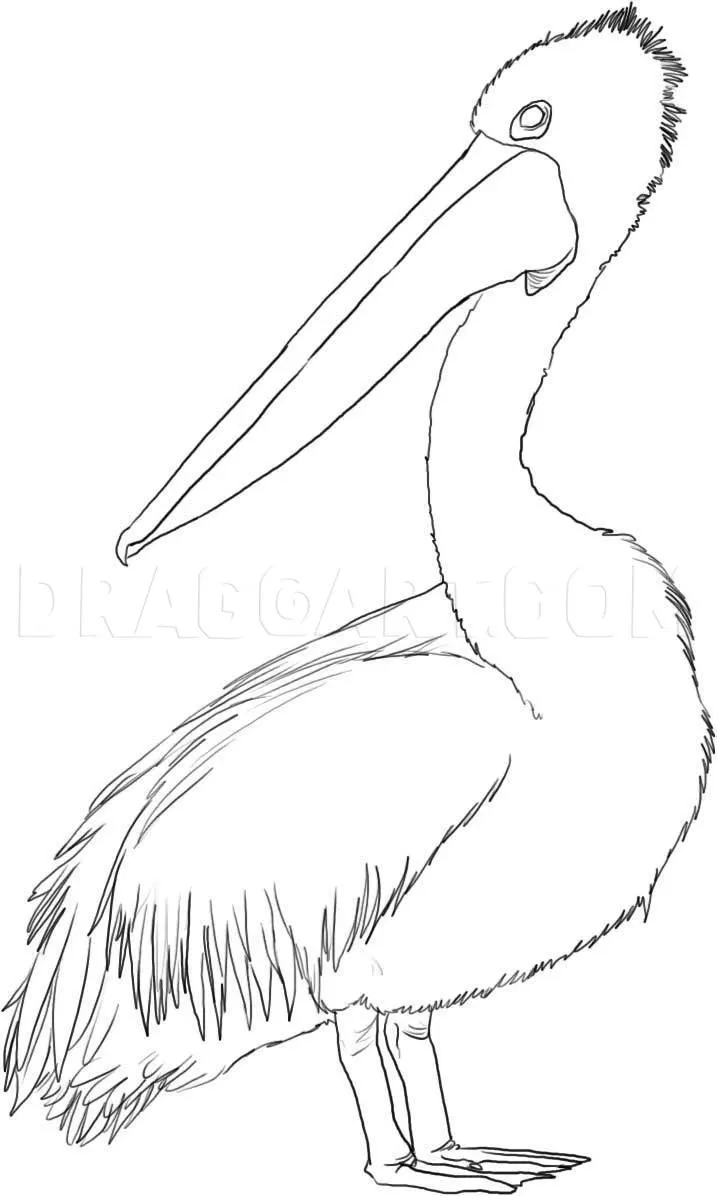
To begin your drawing, start with the basic skeletal structure of the bird. Pelicans are defined by their long, heavy bills and their S-shaped necks, which act as the primary focal points of the composition. Use a light graphite pencil to sketch these shapes without applying too much pressure, as you will need to refine these lines later.
- Draw a large, horizontal oval to represent the main body of the pelican.
- Add a smaller, elongated circle above and to the left of the body for the head.
- Connect the head to the body with two curved lines to form the flexible, thick neck.
- Sketch a long, downward-curving shape attached to the head to serve as the massive bill and pouch.
- Add a simple triangle for the tail feathers and two short, sturdy lines at the bottom of the body for the webbed feet.
By establishing these proportions early, you ensure that the final drawing maintains the correct balance and anatomical realism typical of the species.
Best drawing techniques for beginners
When approaching the details of a pelican, focus on the texture of the feathers and the leathery appearance of the throat pouch. Beginners often struggle with the transition between the head and the bill, so pay close attention to where the upper mandible meets the skull. Use short, overlapping strokes to suggest the layering of feathers along the wings and back.
- Use a 2H pencil for light, initial guidelines that are easy to erase.
- Switch to a 2B or 4B pencil for shading the dark areas under the bill and wings.
- Apply cross-hatching techniques to build depth in the shaded regions of the pouch.
- Keep your lines fluid rather than rigid, as pelicans have soft, organic contours.
Practicing these techniques on a separate sheet of paper before starting your final piece helps build muscle memory. Focus on the interplay between light and shadow to give the bird a three-dimensional quality.
How to capture the pelican's unique anatomy
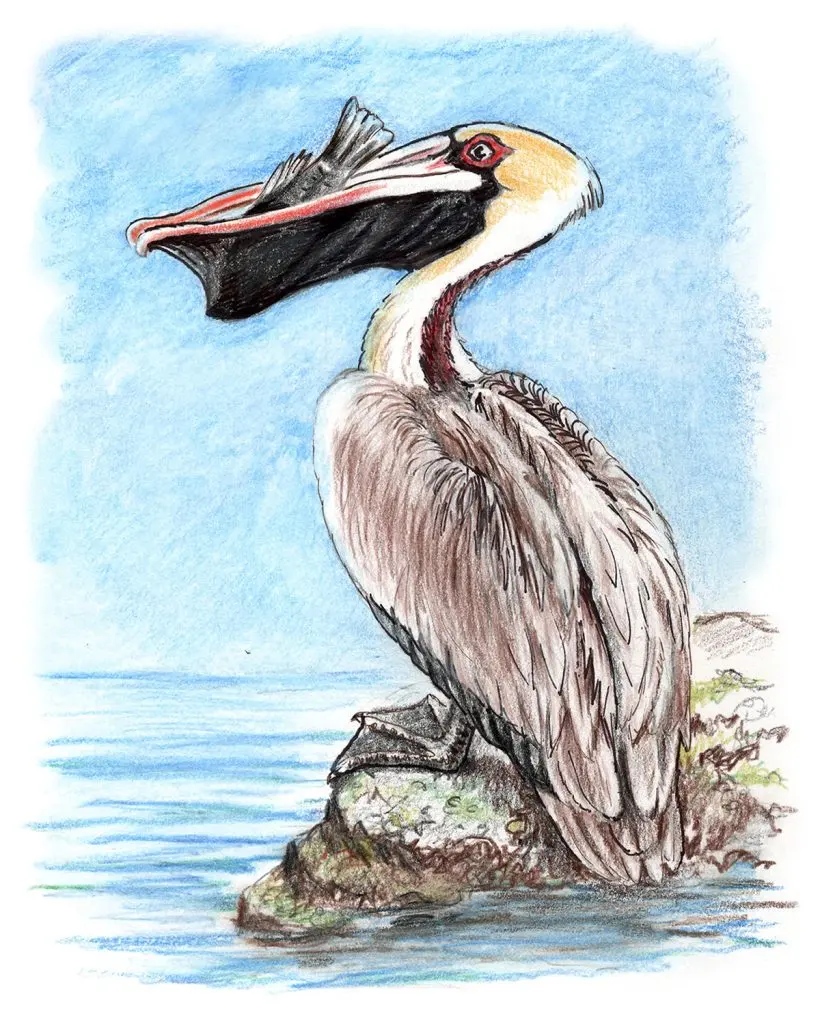
The most recognizable feature of a pelican is its gular pouch, which is the skin sac beneath the lower bill. When drawing this, avoid making it look like a rigid container; instead, depict it as a soft, hanging membrane that changes shape depending on the bird's posture. Observe how the pouch connects to the throat area, creating a smooth, continuous line from the chin down to the chest.
The eyes are typically small and set high on the head, often surrounded by a patch of bare, colored skin. Ensure the eye is placed correctly relative to the top of the bill to avoid a distorted expression. The wings, when folded, should be drawn as a series of long, overlapping plates that hug the body tightly. By emphasizing the heaviness of the bill and the sleekness of the body, you create a convincing representation of this coastal bird.
Common mistakes when drawing pelicans
A frequent error is making the bill too short or too thin, which ruins the bird’s signature silhouette. The bill should be roughly the same length as the head and neck combined, providing the necessary visual weight to the front of the drawing. Another common mistake is neglecting the curve of the neck, which should look like a gentle "S" rather than a straight, stiff column.
- Avoid drawing the feet too small, as they must support a relatively large body.
- Do not outline every single feather, as this creates a cluttered and unnatural look.
- Steer clear of perfectly symmetrical shapes, as organic forms are always slightly irregular.
- Ensure the bill is not perfectly straight; it should have a slight hook at the very tip of the upper mandible.
If you find your drawing looks stiff, loosen your grip on the pencil and focus on drawing long, sweeping curves rather than short, choppy lines.
How to add shading and texture
Adding depth through shading is the final step to bringing your pelican to life. Start by identifying the light source, typically from above, and shade the underside of the wings, the belly, and the bottom of the bill accordingly. Use a blending stump or a soft cloth to smooth out the graphite in the pouch area, giving it a supple, skin-like texture.
For the feathers, use individual, flicking motions to indicate direction and growth patterns. The primary flight feathers on the wings should be longer and darker than the downy feathers on the neck. Add a small, bright white highlight in the eye to create a sense of alertness and vitality. By layering your shading from light to dark, you gradually build a realistic form that captures the essence of the pelican in its natural habitat. Continue refining the edges until the bird feels integrated into the space of your paper.
Key facts
- Pelicans are characterized by their massive, distensible throat pouches used primarily for scooping up fish.
- The body of a pelican is generally bulky, while the neck is long and often held in an S-curve.
- When drawing, start with a large oval for the body and a smaller circle for the head to establish proportions.
- The bill is the most iconic feature; it should be drawn as a long, slightly curved shape that takes up nearly half the head's profile.
- Webbed feet are essential for accuracy, as pelicans are aquatic birds that use their feet for swimming and stability.
- Common mistakes include drawing the neck too thin or failing to emphasize the weight and downward curve of the heavy bill.
The bottom line
Drawing a pelican requires focusing on its distinct, heavy proportions rather than fine detail. By establishing the large, sagging throat pouch and the long, hooked bill first, you capture the bird's most recognizable traits. Keep the body shape bulky and the neck thick to maintain a realistic silhouette. With these foundational shapes in place, you can add subtle texture to represent feathers and webbed feet.
People also ask
What is the most important feature to emphasize when drawing a pelican?
The most important feature is the large, expandable throat pouch attached to the lower mandible. This structure gives the bird its unique silhouette and should be drawn with a distinct, sagging curve.
Should I draw the pelican with its wings open or closed?
Drawing a pelican with wings closed is easier for beginners because it focuses on the bird's bulky body shape. If you choose to draw them open, remember that pelicans have a very large wingspan, often exceeding 8 feet in some species.
How do I make the bill look realistic?
To add realism, draw a small hook at the very tip of the upper mandible. This hook is a signature trait of the pelican, used to help grip slippery prey.
What is the best way to draw the eyes?
Place the eye relatively high on the head, just above the base of the bill. Keep the eye small and dark to contrast with the large, pale surface area of the face.
Are there different types of pelicans I should consider?
There are eight species of pelicans, but most share the same basic anatomy. You can choose between the brown pelican, which dives from the air, or the white pelican, which typically hunts while swimming.
How do I draw the feathers?
Do not draw every individual feather, as this creates a cluttered look. Instead, use simple, overlapping curved lines to suggest the texture of the wings and back.
This answer was created with the help of AI research tools and reference sources. Spotted an error? Let us know — we correct mistakes quickly. See our editorial policy.