How do you shade a cube?
Short answer
Shading a cube involves establishing a consistent light source to define three distinct planes: the highlight, the midtone, and the core shadow. By applying varying pressure to your pencil, you create a gradient that mimics how light interacts with flat surfaces, ultimately grounding the object with a cast shadow on the ground plane.
On this page
How to determine light source and planes
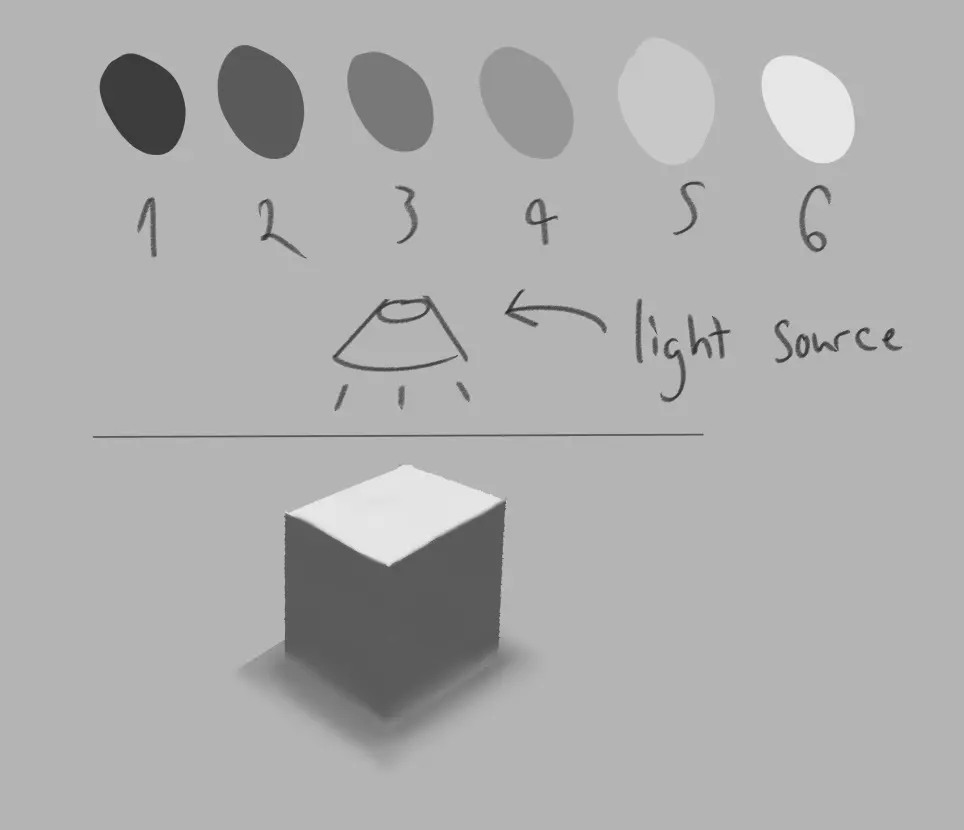
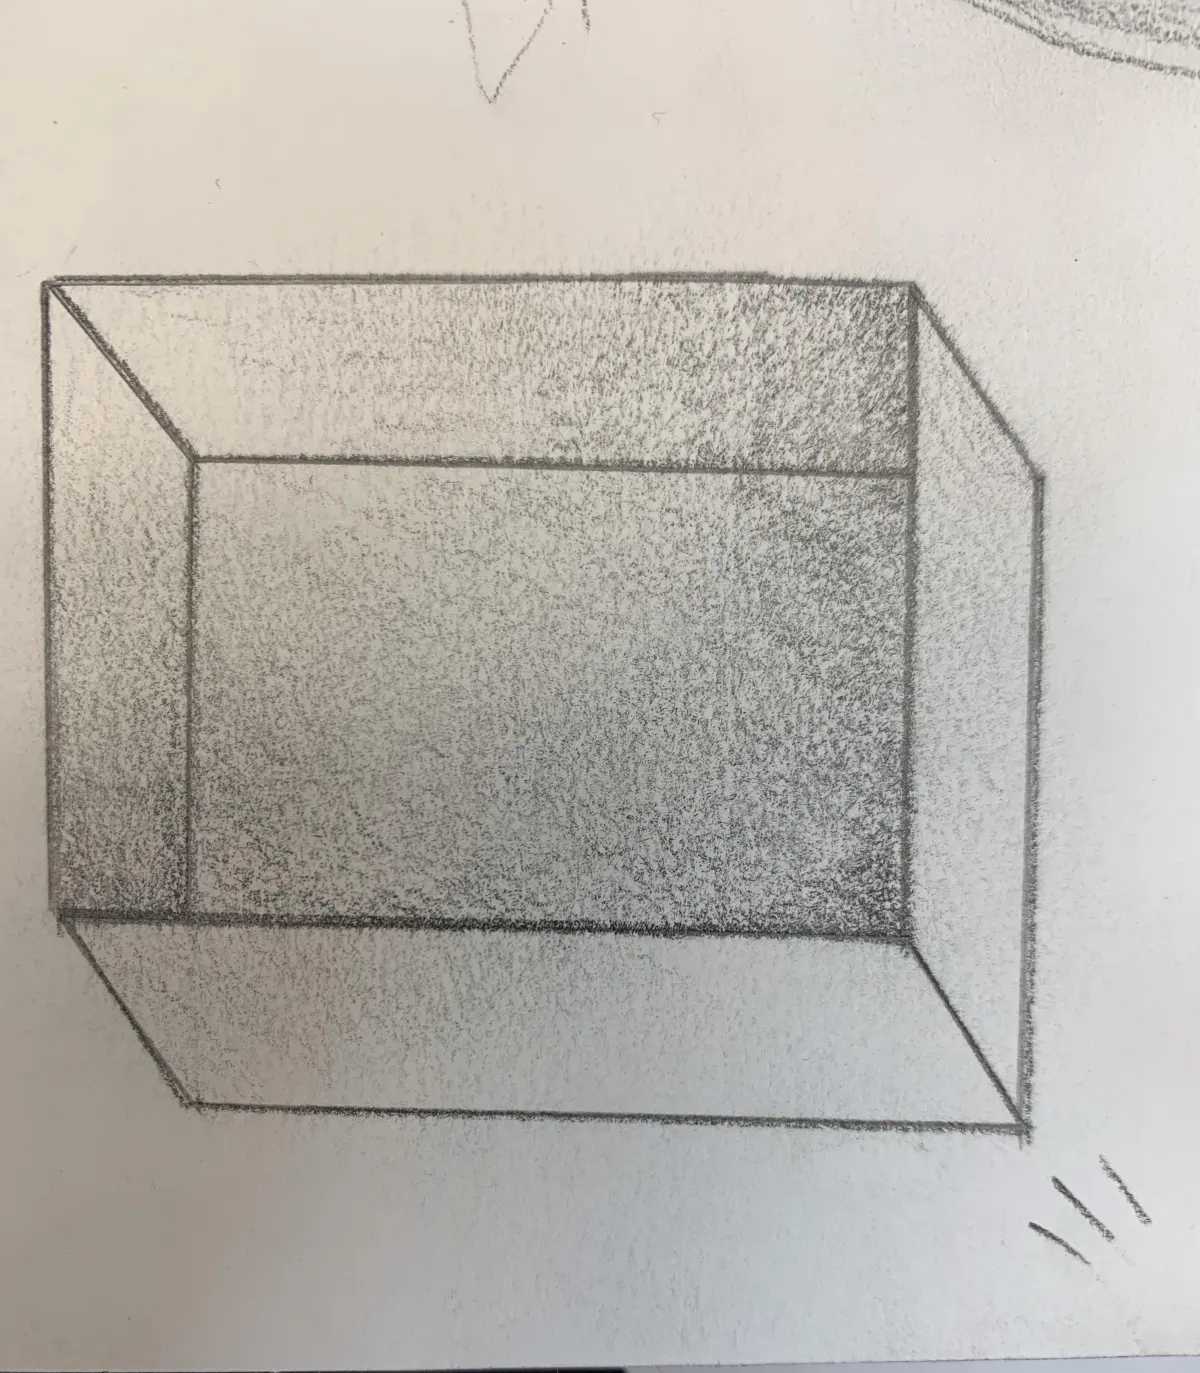
The foundation of realistic shading is identifying exactly where the light originates. Before applying graphite, imagine a single light source, such as a lamp or the sun, hitting the cube from a specific angle. This light will strike the top face, the front face, and the side face with different intensities, creating the three primary values: the highlight, the midtone, and the core shadow.
To achieve a convincing three-dimensional effect, follow these steps to map your values:
- Identify the face closest to the light source; this will be your lightest plane.
- Designate the face furthest from the light as the darkest plane, which will contain the core shadow.
- Assign the remaining face a midtone value that bridges the gap between the highlight and the shadow.
- Ensure the transition between these planes remains sharp, as cubes possess distinct, non-rounded edges.
Maintaining a consistent light direction is critical for spatial logic. If you accidentally shade multiple sides with the same intensity, the cube will appear flat and lose its geometric integrity.
Best shading techniques for beginners
Beginners often struggle with inconsistent pressure, leading to patchy or uneven surfaces. The most effective technique is the "layering method," where you build up graphite density gradually rather than pressing hard immediately. Start with a light touch using an HB or 2H pencil to outline the basic structure, then transition to softer leads like 2B or 4B for the deeper shadows.
When filling in the planes, utilize these professional shading habits:
- Use a side-to-side or cross-hatching motion to maintain uniform coverage across the cube's faces.
- Keep your pencil strokes parallel to the edges of the cube to reinforce its structural geometry.
- Avoid using your finger to smudge graphite, as this introduces oils that create muddy, unpredictable textures.
- Use a kneaded eraser to lift out highlights if you find you have darkened a plane too aggressively.
Consistent stroke direction creates a clean, architectural look. If your strokes go in too many directions, the cube may look fuzzy or organic rather than solid.
Why cast shadows are necessary
A cube floating in a void looks unnatural because it lacks a relationship with its environment. The cast shadow is the dark shape projected onto the surface beneath the cube, caused by the object blocking the light. This shadow is typically darkest near the base of the cube and becomes softer and lighter as it extends away from the object.
The shape of the cast shadow depends entirely on the position of the light source. If the light is high, the shadow will be short and compact; if the light is low, the shadow will be elongated. To render this accurately, observe the following:
- The base of the shadow should be the darkest point, often referred to as the "occlusion shadow."
- The edges of the shadow should be sharpest near the cube and become progressively blurrier as they move outward.
- The shadow must follow the perspective lines of the ground plane to ensure the cube appears firmly planted.
Common mistakes when shading cubes
The most frequent error is neglecting the "reflected light" within the core shadow. Even in the darkest areas, light bounces off the ground and hits the underside of the cube, creating a subtle glow. If you shade the shadow side as a solid, flat black, the cube will look like a hole in the paper rather than a physical object.
Another common mistake involves ignoring the perspective of the edges. In a standard two-point or three-point perspective, the lines of the cube must converge toward vanishing points. If the lines are perfectly vertical or horizontal when they should be angled, the cube will look distorted. Furthermore, many beginners fail to distinguish between the "core shadow" on the object and the "cast shadow" on the ground. The cast shadow is almost always darker than the shadow on the cube itself, as it sits on a surface that receives no direct light. Always compare these two values to ensure the contrast is realistic.
How to refine your finished drawing
Once the primary planes and shadows are established, the final stage involves cleaning up the edges and deepening the contrast. Use a sharp, soft-lead pencil to define the "terminator line," which is the sharp edge where the light side meets the shadow side. A crisp terminator line is the hallmark of a well-rendered cube, as it emphasizes the sharpness of the corners.
To add final polish, consider these professional finishing touches:
- Sharpen your highlights by using a clean eraser to create a crisp, white edge along the light-facing corners.
- Check the "ambient occlusion," or the tiny, dark line where the cube touches the ground, to ground the object.
- Vary your pencil grades to achieve a full range of values from deep charcoal blacks to bright whites.
- Step back from your work frequently to ensure the overall proportions and light values remain balanced.
By systematically refining these details, you transform a basic sketch into a sophisticated study of light, volume, and form. Consistent practice with these steps will eventually make the process intuitive, allowing you to shade any geometric object with confidence and precision.
Key facts
- Light sources create three distinct values on a cube: the highlight, the mid-tone, and the core shadow.
- A light source positioned at a 45-degree angle typically creates the most dramatic contrast between cube faces.
- The face closest to the light source should be the lightest, while the face furthest away receives the darkest shadow.
- Cast shadows are always darkest near the base of the object and become lighter and softer as they extend away.
- Reflected light often appears along the bottom edge of the shadow side, preventing the cube from looking flat.
- Using a consistent light direction is essential to maintain structural integrity across all sides of the object.
The bottom line
To effectively shade a cube, focus on the interplay between the light source and the three visible planes. Assign a unique value to each side based on its orientation to the light, and remember to include a grounded cast shadow. By carefully balancing the core shadow against subtle reflected light, you create the illusion of depth, transforming a simple two-dimensional sketch into a convincing three-dimensional volume.
People also ask
Why does my shaded cube look like a flat square?
This usually happens because the values between the three visible faces are too similar. Ensure you have a clear distinction between the light, medium, and dark sides to define the three-dimensional form.
Should I use a smudge tool to blend my shading?
Professional artists generally avoid smudging with fingers or tools because it creates a muddy, inconsistent texture. Instead, use controlled hatching or cross-hatching strokes to build up transitions between light and dark areas.
Where should the darkest part of the cube be placed?
The darkest area, known as the core shadow, is typically located on the side of the cube facing away from the light. It is often darkest right where the shadow begins to turn away from the light source.
How do I handle the cast shadow on the ground?
The cast shadow should be darker than any shadow on the cube itself. It must follow the perspective lines of the ground plane to ensure the cube appears firmly planted on the surface.
What is the purpose of reflected light in shading?
Reflected light is the subtle illumination that bounces off the ground or nearby objects onto the shadowed side of the cube. Adding this detail prevents the shadow side from appearing like a solid black hole.
Does the material of the cube change how I shade it?
Yes, a matte surface will have soft, gradual transitions between values. A reflective or metallic surface will have sharp, high-contrast highlights and distinct, crisp edges where the light hits the object.
This answer was created with the help of AI research tools and reference sources. Spotted an error? Let us know — we correct mistakes quickly. See our editorial policy.