How do you paint a koi fish with watercolor?
Short answer
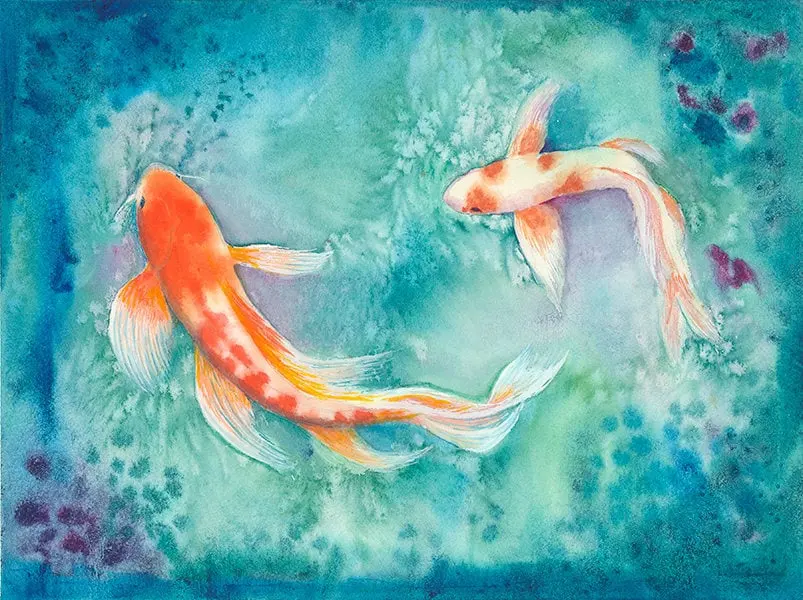
Painting a koi fish with watercolor involves layering transparent pigments to build depth and texture. Begin by sketching the fish’s elongated, muscular form, then apply light washes for the base color. Use wet-on-wet techniques to blend scales and wet-on-dry strokes to define fins, ensuring you preserve bright highlights for a realistic appearance.
On this page
How to prepare your watercolor materials
Success begins with selecting the right supplies to handle the delicate nature of watercolor. For koi paintings, use cold-press watercolor paper with a weight of at least 140 pounds (300 grams per square meter). This thickness prevents the paper from buckling when you apply multiple layers of water. Choose professional-grade pigments, as they offer the transparency required to capture the luminous, skin-like quality of a fish.
You will need a selection of round brushes, specifically sizes 4, 8, and 12. A synthetic-sable blend is ideal because it holds a significant amount of water while maintaining a sharp point for fine details. Additionally, keep two jars of water nearby: one for rinsing dirty brushes and another for clean water to mix fresh colors. A white ceramic palette is essential for accurate color mixing, as it allows you to see the true hue of your paint before it touches the paper.
How to sketch a koi fish accurately
Before applying paint, create a light pencil outline using a hard lead, such as an H or 2H. Koi possess a distinct, torpedo-shaped body that tapers significantly toward the tail. Focus on the curvature of the spine, as this movement gives the fish its characteristic grace. Avoid pressing too hard, as graphite can smear or become trapped under transparent watercolor washes.
- Draw a long, slightly curved oval to establish the main body.
- Add a smaller, rounded triangle for the head and a wide, fan-like shape for the tail.
- Place the fins near the mid-section, ensuring they look fluid and attached to the body.
- Mark the placement of the eyes and the barbels, which are the small, whisker-like sensory organs near the mouth.
- Use a kneaded eraser to lift excess graphite until the lines are barely visible.
How to paint koi scales and patterns
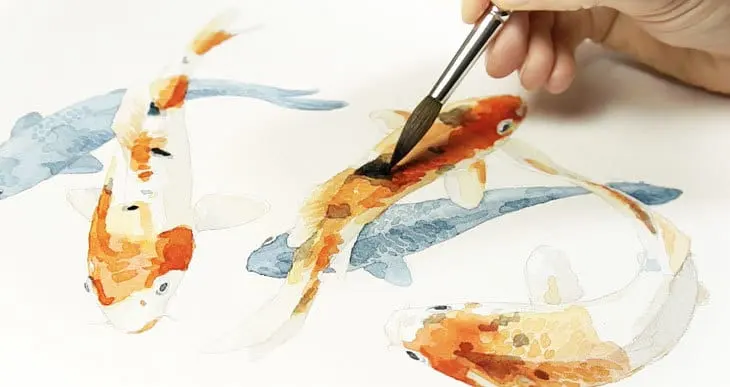
Koi are prized for their vibrant, distinct color patterns, often featuring patches of orange, red, black, or white. To achieve these, start by painting the lightest areas first, such as the white body or pale yellow patches. Use a wet-on-wet technique by dampening the fish’s body with clean water before dropping in your colors. This allows the pigment to diffuse softly, mimicking the natural transition of scales.
Once the base layer is dry, use a smaller brush to define the edges of the color patches. To create the illusion of scales, use a technique called "dry brushing." Load your brush with a thick, barely damp pigment and lightly drag it across the paper’s surface. This leaves paint on the raised texture of the paper while skipping the recessed areas, effectively creating a shimmering, textured effect. Focus this detail primarily along the dorsal ridge where the light hits the fish most directly.
How to paint realistic fins and movement
The fins of a koi fish are translucent and flow through the water like silk. To capture this, thin your paint with a large amount of water to create a very pale, transparent wash. Apply this wash in long, sweeping strokes that follow the direction of the fin’s movement. If you want to show the fish deep underwater, keep these strokes muted and soft, avoiding sharp, dark edges that would pull the eye away from the main body.
- Mix a very watery, light blue or grey pigment for the fin base.
- Paint the fin in one continuous stroke to maintain fluidity.
- While the paint is still damp, use a darker version of the same color to add thin, radiating lines that represent the fin rays.
- Let the paint dry completely before adding any final highlights or shadows.
- Use a clean, damp brush to soften any hard edges that look too rigid or unnatural.
Common mistakes when painting koi
One frequent error is overworking the paper, which causes the fibers to pill and the colors to turn muddy. Watercolor relies on the white of the paper for brilliance; if you keep adding layers, you lose that luminosity. Another mistake is failing to account for the refraction of light in water. Beginners often paint the fish as if it is sitting on a flat surface, rather than submerged. Remember that the water itself has color and shadow, which should be reflected in your background.
Avoid using black paint directly from the tube for shadows, as it can look flat and lifeless. Instead, mix a dark neutral by combining complementary colors, such as burnt sienna and ultramarine blue. This creates a vibrant, deep shadow that feels more natural. Finally, do not forget to leave small, unpainted gaps to represent the highlights on the fish’s wet skin. These tiny white spaces are the most important element for making the koi appear as though it is truly swimming through the water.
Key facts
- Use high-quality cold-press watercolor paper, as its texture helps capture the shimmering, scaled look of koi.
- Keep a clean damp brush nearby to soften edges, which mimics the fluid, underwater movement of the fish.
- Apply a light wash of color first, then layer deeper pigments while the paper is still damp to create natural shading.
- Use a masking fluid or a white gouache pen to preserve the bright highlights on the fish’s scales.
- Koi are typically orange, white, and black, so keep your palette limited to these colors to maintain a realistic appearance.
- Work from the lightest colors to the darkest, finishing with fine details like the whiskers and individual scale patterns.
The bottom line
Painting a koi fish requires balancing fluid washes with precise, layered details. By starting with light base colors and gradually building depth, you can capture the creature's vibrant patterns and translucent fins. Remember to preserve highlights for a realistic sheen and allow drying time between layers to keep your colors crisp. With patience and careful brushwork, you will successfully create a graceful, lifelike aquatic scene.
People also ask
How do I make the water look realistic around the koi?
Paint the water using horizontal, fluid strokes and leave small white gaps to represent light reflections on the surface. Adding subtle ripples around the fish’s body helps integrate it into the environment.
Should I paint the koi before or after the background?
It is generally easier to paint the koi first on dry paper, then carefully paint the water around it. This prevents unwanted color bleeding and allows you to control the fish's sharp edges.
What brushes are best for painting koi scales?
A small, round synthetic brush with a fine point is ideal for detail work. These brushes hold enough water for washes but provide the precision needed for individual scale markings.
How do I prevent the colors from looking muddy?
Wait for each layer to dry completely before adding a new one, especially when layering black over orange. Using a clean brush and fresh water for every color change will keep your pigments vibrant.
Can I use metallic watercolors for the scales?
Yes, adding a touch of metallic gold or pearlescent paint can mimic the reflective nature of koi scales. Use these sparingly as a final highlight to avoid overpowering the traditional watercolor look.
How do I capture the koi's fins?
Use a very diluted wash for the fins to create a translucent effect. Apply the paint with light, sweeping motions to suggest the delicate, flowing motion of the fins underwater.
This answer was created with the help of AI research tools and reference sources. Spotted an error? Let us know — we correct mistakes quickly. See our editorial policy.