How do you draw a koi fish?
Short answer
Draw a koi fish by sketching an elongated, teardrop-shaped body with a rounded head and a tapered tail. Focus on the distinct barbels near the mouth and the flowing, fan-like fins. Use fluid, overlapping lines to suggest movement, then add asymmetrical scale patterns and vibrant, layered colors to complete the lifelike appearance.
On this page
How to structure a koi fish drawing
Begin by sketching a long, slightly curved oval that serves as the main body of the fish. Koi are known for their robust, torpedo-like shapes, so ensure the midsection is thicker than the head or tail. Lightly mark the center line of the body to maintain symmetry as you add the fins. The head should be rounded with a slight indentation for the mouth area, while the tail section should narrow significantly before widening into the caudal fin.
To achieve a natural look, follow these foundational steps:
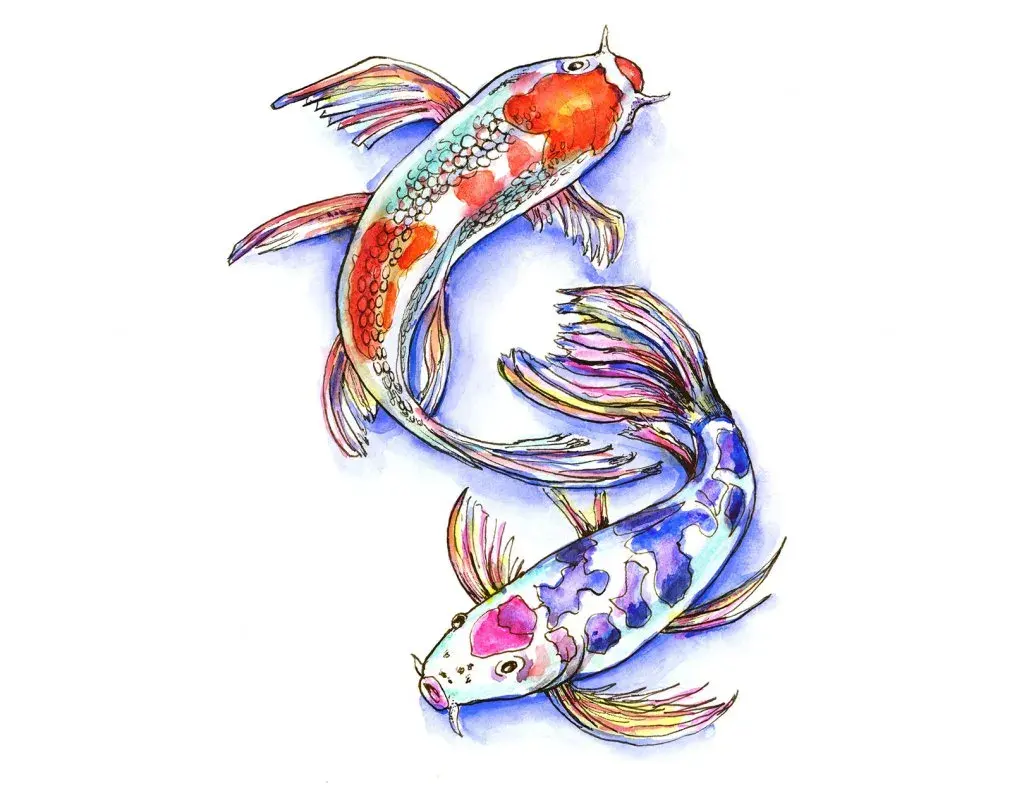
- Draw a gentle "S" curve to establish the spine, which gives the fish a sense of swimming motion.
- Sketch the head as a blunt, rounded shape, adding small, whisker-like barbels near the corners of the mouth.
- Outline the dorsal fin on the top of the back, keeping it triangular and slightly angled toward the tail.
- Add the pectoral fins behind the gills, making them large and fan-shaped to suggest graceful movement through water.
Best techniques for beginners
Focusing on the flow of the fish is essential for beginners. Instead of drawing rigid, straight lines, use long, sweeping strokes that mimic the flexibility of a living creature. Practice drawing the fins as thin, translucent sheets that fold over one another. By varying the pressure of your pencil, you can create soft edges that make the fish appear as though it is submerged in a pond rather than resting on a flat surface.
When refining your sketch, pay close attention to the proportions of the fins relative to the body. Beginners often make the pectoral fins too small, which makes the fish look static. Aim for fins that are roughly one-third the length of the body. Use a light touch to define the gill covers, which are generally located just behind the head, and ensure the eyes are positioned on the sides of the head to maintain a realistic profile.
Why koi scale patterns vary
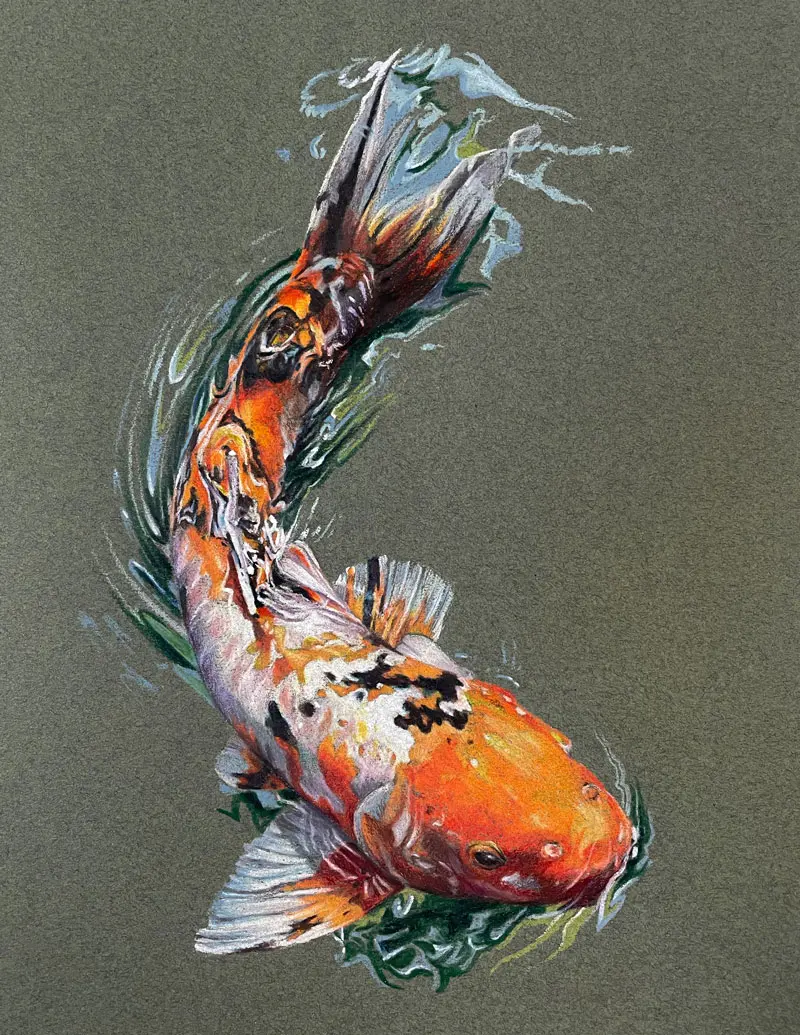
Koi are famous for their unique color patches, which are technically known as "hi" (red) or "sumi" (black). When drawing these, avoid creating perfectly uniform shapes. In nature, these patches are irregular and often look like abstract clouds or jagged islands across the fish's back. To make your drawing look authentic, map out these patches before adding fine details like individual scales. This prevents the pattern from looking like a repetitive grid.
When applying color or shading, remember that koi scales are large and overlapping. You do not need to draw every single scale on the fish. Instead, suggest the texture by drawing a few curved, U-shaped lines along the top of the back and near the tail. Focus the detail on the areas where the light hits the fish, leaving the underside relatively smooth. This contrast between textured and smooth areas adds depth and highlights the metallic sheen often found in high-quality koi.
Common mistakes when drawing koi
A frequent error is placing the mouth too far down on the head. Koi are bottom-feeders, but their mouths are positioned at the very front of the snout, not underneath like a shark. Another common mistake is drawing the tail fin too stiff. The tail should be wide and slightly scalloped at the edges, resembling a fan. If the tail is too narrow, the fish will appear to have no propulsion, losing the dynamic energy that characterizes koi in motion.
Avoid these pitfalls to improve your accuracy:
- Do not draw the eyes too large; they should be small and set into the side of the head.
- Avoid perfectly straight lines for the body; koi are soft-bodied and should always look curved.
- Do not outline every scale with heavy black ink, as this creates a cartoonish, armored appearance.
- Ensure the barbels are visible; these sensory whiskers are a defining feature of the species.
How to add depth and movement
To bring your drawing to life, consider the environment of the koi. Adding ripples or circular distortions around the fish can imply that it is swimming just below the surface of the water. Use light, horizontal shading lines to represent the water's surface, and place the fish slightly off-center to create a more professional composition. The interaction between the fish and the water is what makes the final piece feel complete and engaging.
Finally, refine your work by adding highlights. Use an eraser or a white gel pen to pull out small, bright spots on the top of the back and the tips of the fins. These highlights simulate the way sunlight reflects off wet scales and the water's surface. By focusing on these subtle light interactions, you transform a simple outline into a three-dimensional representation of a koi fish. Take your time with these final touches, as they provide the necessary contrast to make the colors pop and the movement feel truly fluid.
Key facts
- Koi are characterized by their elongated, torpedo-shaped bodies and prominent barbels near the mouth.
- Start your sketch with an oval or almond shape to define the fish's core volume before adding fins.
- The dorsal fin is typically positioned slightly behind the center of the back and should be triangular.
- Use sweeping, curved lines to represent the tail, as koi are powerful swimmers with broad, rounded caudal fins.
- When drawing scales, use a "net" pattern that follows the curve of the body rather than drawing individual circles.
- Keep the eyes positioned on the side of the head, slightly above the midline of the mouth.
The bottom line
Drawing a convincing koi fish requires balancing a streamlined, torpedo-shaped body with fluid, graceful fins. By focusing on the fish's natural "S" curve and using a subtle scale pattern that follows its anatomy, you can create a sense of life and motion. Practice sketching the basic volume first, then refine the details like the barbels and dorsal fin to achieve a realistic, elegant final illustration.
People also ask
What is the best medium for drawing koi fish?
Graphite pencils are excellent for practicing form and shading, while watercolor is the traditional choice for capturing the vibrant, fluid nature of koi. Ink pens are also useful for creating sharp, defined scale patterns.
How do I make a koi fish look like it is swimming underwater?
Use light, horizontal lines across the body to represent ripples or light refraction. Varying the opacity of the colors or shading can also create the illusion of depth beneath the water's surface.
Should I draw the scales on every part of the koi?
No, the scales should be concentrated along the back and sides, fading out near the belly. Drawing too many scales can make the fish look stiff and cluttered.
How do I draw the barbels correctly?
Barbels are the sensory whiskers near the mouth; draw them as thin, delicate lines extending outward. They should look flexible and slightly curved to suggest movement in the water.
What are the most common mistakes when drawing koi?
Beginners often make the body too short or round, forgetting that koi are streamlined. Another error is drawing the fins as rigid triangles rather than soft, flowing appendages.
How do I capture the personality of a koi?
Focus on the curvature of the spine, as koi often bend their bodies in an "S" shape when turning. A dynamic, curved pose is much more expressive than a straight, static fish.
This answer was created with the help of AI research tools and reference sources. Spotted an error? Let us know — we correct mistakes quickly. See our editorial policy.