How do you draw scales?
Short answer
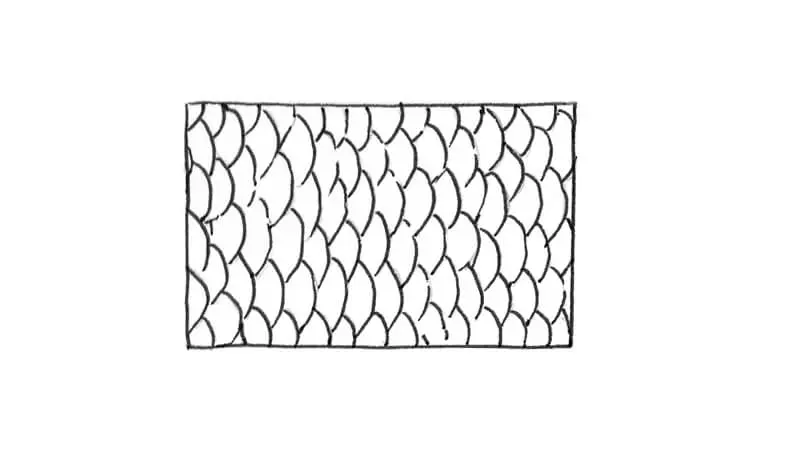
Draw scales by creating a grid of overlapping, staggered U-shaped arcs. Start from the bottom of the form and work upward, ensuring each row sits in the gaps of the row below. Use consistent pressure for uniform shapes, then add depth with a crescent-shaped shadow on the underside of each individual scale.
On this page
How to draw fish scales step by step
Drawing realistic scales requires a methodical approach to ensure the pattern remains consistent across a curved surface. Begin by sketching the general outline of the creature, then lightly draw horizontal guidelines to keep your rows straight. Starting at the tail end, draw a series of U-shaped curves that follow the contours of the body. Once the first row is complete, move toward the head, placing the next row of scales so that each arc sits directly in the gap created by two scales in the row below.
- Draw a light horizontal guideline across the body.
- Create a row of evenly spaced, rounded arcs along this line.
- Start the second row by placing the point of the arc between the two scales of the first row.
- Continue this overlapping pattern until the entire surface is covered.
- Refine the edges of each scale to ensure they look like thin, overlapping plates rather than simple circles.
Best tools for drawing scales
The choice of medium significantly impacts the final texture of the scales. For beginners, a mechanical pencil with an HB lead is ideal because it allows for precise, thin lines that are easily erased if the pattern goes astray. If you are aiming for a more polished look, fine-liner pens with varying tip sizes help create crisp edges that define the overlapping nature of the scales. When adding texture, a kneaded eraser is essential for lifting graphite to create highlights on the top surface of each scale.
- Mechanical pencils (0.5mm) for initial sketching and fine detail.
- Fine-liner pens for permanent, high-contrast outlines.
- Kneaded erasers to create highlights and adjust shading.
- Graphite sticks for covering large areas quickly while maintaining texture.
- Blending stumps to soften the transition between light and shadow on individual scales.
Why scale patterns look distorted
Distortion often occurs when the artist fails to account for the three-dimensional volume of the subject. As a surface curves away from the viewer, the scales should appear narrower and more compressed due to foreshortening. Many beginners make the mistake of drawing every scale the same size, which makes the subject appear flat and two-dimensional. To fix this, observe how the scales wrap around the anatomy; they should follow the muscle structure rather than remaining perfectly uniform.
If you are drawing a fish or reptile, remember that scales near the belly are often larger and more elongated than those near the spine. By varying the size and shape of the scales based on their location on the body, you create a sense of realism. Use the light source to determine which side of the scales should be highlighted and which should be cast in shadow. This interaction between light and form is what gives the scales their characteristic metallic or wet sheen.
Common mistakes when drawing scales
The most frequent error is neglecting the "overlapping" logic, which results in a grid of circles rather than a natural skin texture. If the scales do not overlap correctly, the drawing will look like a chain-link fence instead of biological armor. Another common mistake is applying too much pressure during the initial sketch. Dark, heavy lines are difficult to correct and often make the final shading look muddy or cluttered, especially when you need to add finer details like patterns or color variations later.
- Drawing scales as isolated circles that do not touch or overlap.
- Ignoring the curvature of the body, leading to flat, unnatural patterns.
- Making every scale identical in size regardless of its position on the anatomy.
- Using heavy, dark outlines that prevent the scales from looking like thin, delicate plates.
- Failing to add shadows beneath the overlapping edges, which removes the sense of depth and physical layering.
How to add texture and depth to scales
Adding depth is the final step that transforms a simple line drawing into a professional illustration. Once the outlines are set, focus on the shading of individual scales. Use a circular motion with your pencil to darken the bottom edge of each scale, creating a small crescent shadow that suggests the scale is lifting off the body. This subtle shading technique provides the necessary contrast to make the scales look like they have thickness and weight.
Finally, consider the surface quality of the creature. For a wet, slimy look, leave sharp, bright white highlights on the upper portion of each scale where the light hits directly. For a dry, matte texture, use a softer touch with your pencil to keep the transitions between light and shadow smooth and gradual. By observing real-world references, such as the skin of a lizard or the flank of a trout, you can replicate the specific patterns and light reflections that make your drawing appear truly lifelike and authentic.
Key facts
- Start by drawing a horizontal guideline to keep your rows of scales aligned and consistent.
- Use a "U" or "V" shape for the base of each scale, overlapping them like bricks in a wall.
- Always offset the next row so the point of the new scale sits in the center of the gap between two scales below it.
- Vary the size of the scales by making them smaller near the edges of the body to create a sense of curvature.
- Apply shading only to the bottom edge of each scale to give the surface a three-dimensional, rounded appearance.
- Avoid drawing perfect, identical shapes, as natural scales vary slightly in size and orientation across an animal's body.
The bottom line
Drawing realistic scales requires a methodical approach based on overlapping patterns and consistent shading. By utilizing a guideline and offsetting each row like masonry, you create a believable structure that follows the animal's anatomy. Remember that light and shadow define the texture, so focus on shading the bottom edges of each scale. With practice, these simple techniques will transform flat lines into a lifelike, three-dimensional surface.
People also ask
What is the best pencil grade for drawing scales?
An HB pencil is ideal for sketching the initial grid and light outlines. Use a softer 2B or 4B pencil to add depth and shadow to the bottom edges of the scales.
How do I make scales look like they are wrapping around a limb?
You must curve your rows of scales to follow the contour of the object. As the surface turns away from the viewer, make the scales appear thinner and more compressed.
Should I draw every single scale on a creature?
It is usually better to suggest the texture rather than drawing every individual scale. Focus on high-detail scales near the focal point and simplify them toward the periphery.
How do I prevent my scale pattern from looking flat?
The key is consistent shading at the base of each scale. If you treat every scale as a small, individual dome, the overall surface will appear textured and realistic.
Can I use a stencil to draw scales?
While stencils can provide uniformity, they often result in a mechanical look. Hand-drawing allows for the organic irregularities found in nature, which makes the illustration more convincing.
What is the most common mistake when drawing reptile skin?
Beginners often forget to overlap the scales, drawing them as a grid of separate shapes. Overlapping is essential because it mimics the biological structure of real skin and creates natural shadows.
This answer was created with the help of AI research tools and reference sources. Spotted an error? Let us know — we correct mistakes quickly. See our editorial policy.