How do you draw glasses on a face?
Short answer
Drawing glasses requires establishing the bridge’s placement across the nose, then sketching symmetrical frames that align with the subject’s eye line. By focusing on perspective, lens thickness, and the temple arms receding toward the ears, you can create a realistic accessory that complements the underlying facial structure and adds character depth.
On this page
How to draw glasses step by step
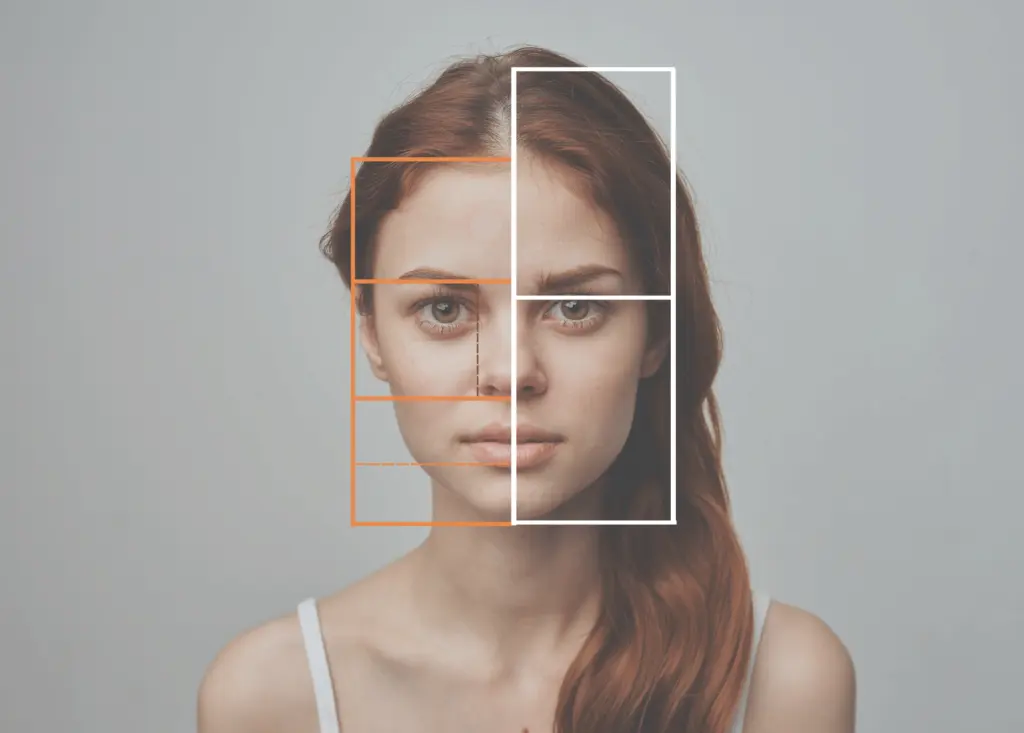
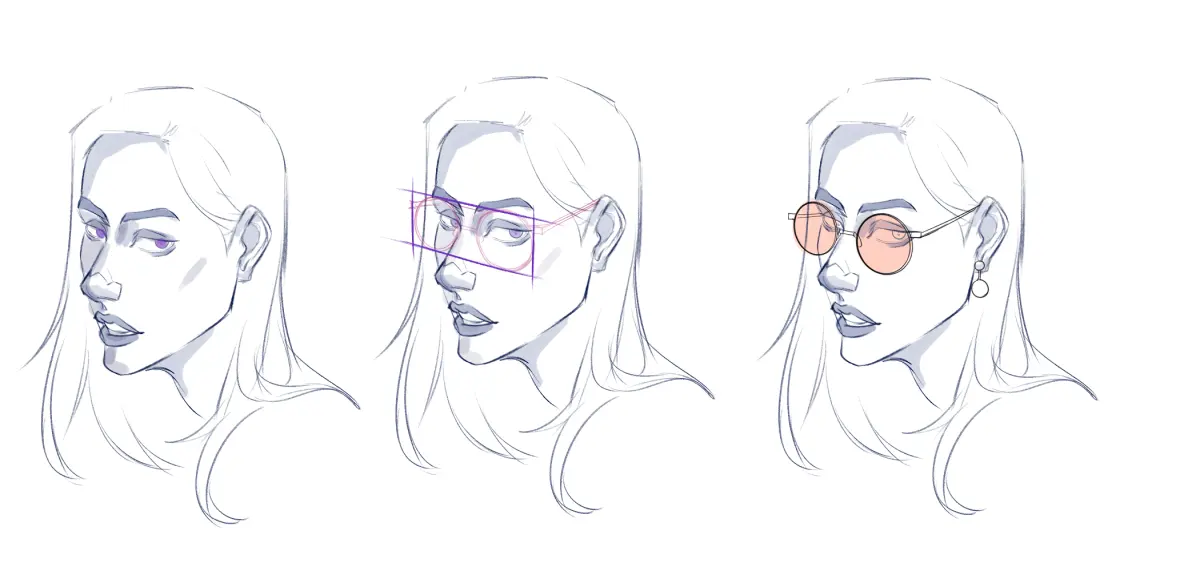
To begin drawing glasses, start by lightly sketching a horizontal line across the bridge of the nose to serve as your guide for symmetry. This line ensures that both lenses sit at the same height, preventing the common issue of lopsided frames. Once the guide is set, draw two shapes—circles, ovals, or rectangles—centered over the eyes, keeping the inner edges close to the bridge of the nose.
After defining the lens shapes, connect them with a bridge piece that rests on the nose. Follow these steps to complete the basic structure:
- Draw the bridge, which can be a simple arch or a straight bar depending on the style.
- Add the outer frames, ensuring they wrap slightly around the temples.
- Sketch the temple arms, starting from the top outer corners of the frames and angling them back toward the ears.
- Add small hinges where the arms meet the frames to increase realism.
Best glasses styles for beginners
When you are first learning to draw eyewear, start with classic round or oval frames. These shapes are forgiving because they rely on simple geometric curves rather than the precise, sharp angles required for rectangular or aviator-style glasses. Round frames also make it easier to maintain symmetry, as any slight deviation is less noticeable than it would be on a rigid, straight-edged frame.
Once you feel comfortable with circular shapes, you can experiment with thicker frames, such as "wayfarer" or "cat-eye" styles. Thicker frames provide a clear boundary, allowing you to practice shading the inner rim of the glasses to create a sense of depth. Avoid overly complex designs like wire-rimmed spectacles initially, as they require very fine, steady lines that can be difficult to control without a solid foundation in basic shape construction.
Why glasses look distorted on a face
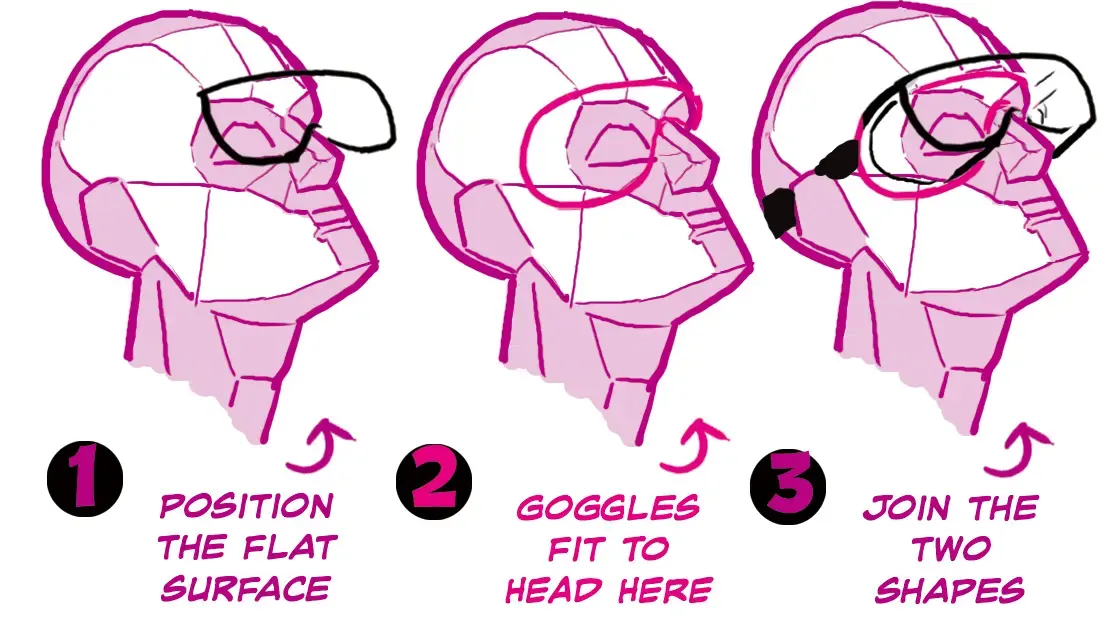
The most frequent reason glasses appear "off" is a failure to account for the perspective of the face. If the head is turned at an angle, the lens closer to the viewer should appear slightly wider and more detailed than the lens further away. Failing to adjust for this foreshortening makes the glasses look like a flat sticker placed on top of the face rather than an object worn by the subject.
Another common issue is ignoring the curvature of the face. Because the human head is three-dimensional, glasses do not sit on a flat plane; they curve slightly around the skull. To fix this, ensure the temple arms are not drawn as straight lines extending from the side of the head. Instead, angle them slightly inward toward the ears to follow the natural contours of the face, which grounds the accessory in the drawing’s space.
Common mistakes when drawing glasses
One frequent error is drawing the glasses too high or too low on the bridge of the nose. Glasses should typically rest where the bridge of the nose is narrowest, just below the brow line. If they are placed too high, the subject will look surprised or unnatural; placed too low, they appear to be sliding off the face. Always check the alignment of the frames against the pupils to ensure the glasses look functional.
Another mistake involves the thickness of the lines. Beginners often draw the frames with a single, uniform line weight, which makes the glasses look like a wire outline. To improve your work, try these techniques:
- Vary your line weight by pressing harder on the bottom of the frames and lighter on the top to suggest light hitting the object.
- Add a subtle shadow beneath the bridge and the frames to lift them off the skin.
- Ensure the temple arms are drawn behind the ears or hair to show depth.
How to add realistic lens effects
Adding lenses adds a layer of sophistication to your drawing, but it must be done carefully to avoid obscuring the eyes. Use very light, diagonal cross-hatching to suggest the presence of glass without making the eyes behind them invisible. You should also add a tiny, bright white highlight on the upper corner of each lens, which mimics the reflection of light and immediately signals to the viewer that the material is transparent.
If you want to depict prescription glasses, you can draw a slight distortion of the eyes behind the lenses. For strong prescriptions, the eyes might appear slightly magnified or shifted inward, depending on the lens type. However, for most illustrations, simply drawing the eyes clearly and adding a faint, curved reflection line across the surface of the lens is sufficient to create a professional and convincing look that enhances your portrait.
Key facts
- Draw a horizontal guideline across the bridge of the nose to ensure both lenses are perfectly aligned.
- The top of the frames should generally follow the natural arch of the eyebrows for a balanced look.
- Use a vanishing point perspective to make the side arms, or temples, appear to recede toward the ears.
- Keep the lenses slightly wider than the width of the eyes to mimic realistic optical proportions.
- Add a small bridge piece between the lenses to connect them securely over the nasal bone.
- Lightly sketch the thickness of the frames before darkening them to allow for easy structural adjustments.
The bottom line
Drawing glasses requires careful attention to facial geometry and perspective. By establishing a central guideline and ensuring the frames follow the natural curvature of the face, you can create a realistic appearance. Always remember to layer the frames over the eyes and account for the angle of the head. With consistent practice of these structural steps, you will effectively integrate eyewear into any portrait drawing.
People also ask
How do you make glasses look three-dimensional on a drawing?
Add a slight curve to the outer edges of the lenses and draw the thickness of the frame rims. Including a subtle highlight on the glass surface helps suggest transparency and depth.
Should the glasses be drawn before or after the eyes?
It is best to draw the eyes first to establish the facial expression and gaze. The glasses should then be layered over the eyes, ensuring the pupils remain visible through the lenses.
What is the most common mistake when drawing glasses?
The most frequent error is drawing the frames too flat or ignoring the tilt of the head. If the head is turned, the lens closer to the viewer must appear slightly wider than the lens further away.
How do I draw the temple arms correctly?
The arms should start at the top corner of the frame and angle downward toward the ear. Ensure they follow the contour of the skull rather than floating away from the head.
Do glasses need to be perfectly symmetrical?
While the frames should be balanced, minor imperfections can make a drawing look more human. However, extreme asymmetry often looks like a technical error rather than a stylistic choice.
How do I represent the reflection on the lenses?
Use a small, sharp white mark or a light grey shape on the upper portion of the lens. This mimics the way light hits glass and prevents the lenses from appearing like empty holes.
This answer was created with the help of AI research tools and reference sources. Spotted an error? Let us know — we correct mistakes quickly. See our editorial policy.