How do you draw a face in proportion?
Short answer
Drawing a face in proportion relies on the "rule of thirds" and specific anatomical landmarks. By dividing the head into equal horizontal segments and aligning features along vertical axes, you create a balanced structure. Mastering these foundational measurements ensures that the eyes, nose, and mouth occupy their correct positions relative to one another.
On this page
How to measure facial proportions correctly
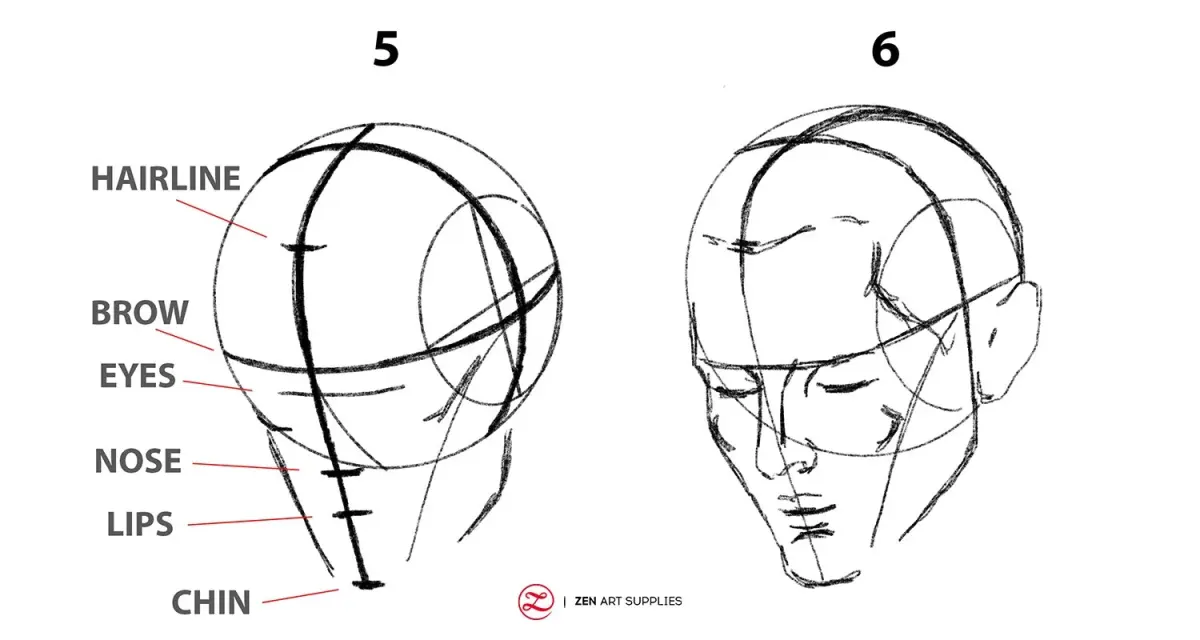
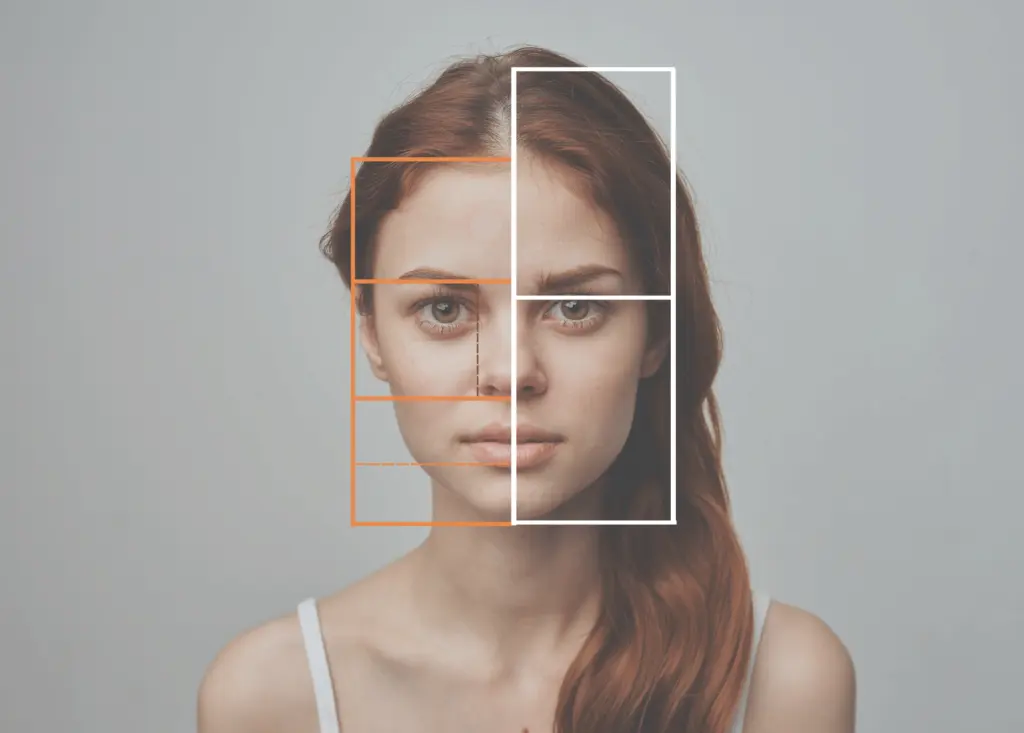
The human head is generally oval-shaped, and artists use a standardized grid to maintain symmetry. A fundamental rule is that the eyes are located exactly halfway between the top of the skull and the chin. Beginners often place the eyes too high, near the forehead, which distorts the perceived age and expression of the subject.
To establish these proportions, start by drawing a vertical center line and a horizontal line across the middle of the oval. The horizontal line marks the eye level. From here, you can divide the lower half of the face into three equal sections:
- The first section spans from the brow line to the bottom of the nose.
- The second section spans from the bottom of the nose to the mouth line.
- The third section spans from the mouth line to the chin.
How to place features on the face
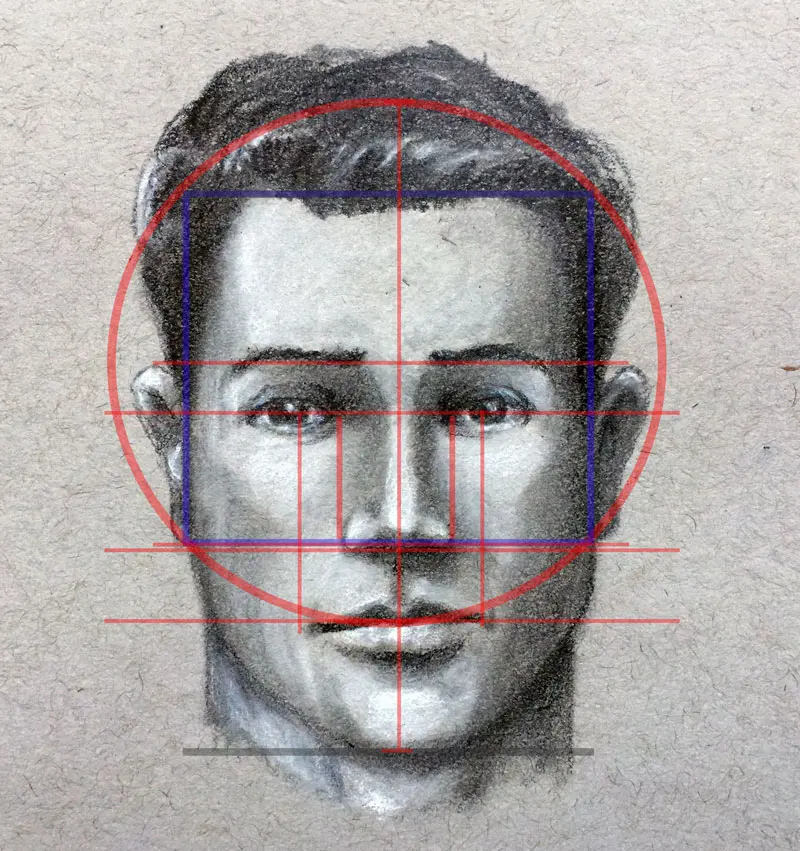
Once the basic grid is established, you must determine the width of the facial features. A classic rule of thumb is that the width of the head is approximately five eyes wide. This means there should be enough space for one eye between the two actual eyes, with one additional eye-width of space on each side near the temples.
The nose typically aligns with the inner corners of the eyes, forming a triangle that connects to the tear ducts. The mouth is slightly wider than the nose, with the corners of the lips usually aligning vertically with the centers of the pupils. Following these steps helps maintain consistency:
- Sketch the central axis to ensure bilateral symmetry.
- Mark the eye line at the halfway point of the head.
- Align the outer edges of the nostrils with the inner corners of the eyes.
- Extend vertical lines down from the pupils to locate the corners of the mouth.
Why faces look distorted in drawings
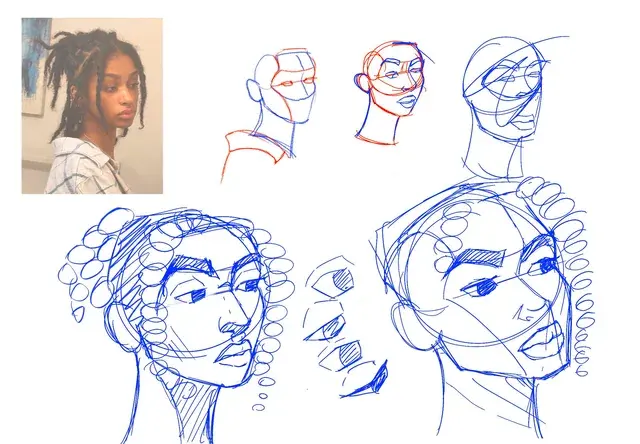
Distortion often occurs when an artist focuses on individual features rather than the relationship between them. If you draw a detailed eye before establishing the overall head shape, the scale will likely be off. This "feature-first" approach prevents the artist from seeing the face as a unified structure, leading to unbalanced compositions where the forehead is too small or the chin is too long.
Another common issue is failing to account for perspective or head tilt. When a head turns, the features shift along curved planes rather than flat lines. If you draw the features as if the face is perfectly frontal while the jaw is turned, the result will appear unnatural. Always map the underlying skull structure before adding surface details like eyelids, nostrils, or lip texture to ensure the form remains solid.
Common mistakes when drawing faces
One of the most frequent errors is ignoring the ears. The ears occupy the space between the brow line and the bottom of the nose. If they are drawn too high or too low, the face will look disjointed. Additionally, many beginners draw the eyes as perfect almonds, ignoring the fact that the upper eyelid usually covers a portion of the iris, which provides a more realistic, relaxed look.
Another mistake involves the hairline. Many artists place the hair directly against the skull, forgetting that hair has volume and sits above the cranium. To avoid these errors, keep these tips in mind:
- Keep the neck width proportional; a neck that is too thin makes the head look oversized.
- Ensure the jawline connects smoothly to the ears rather than appearing as a detached shape.
- Avoid drawing the mouth as a straight line; use a slight curve to mimic the natural shape of the teeth and gums underneath.
Best practice for improving portrait skills
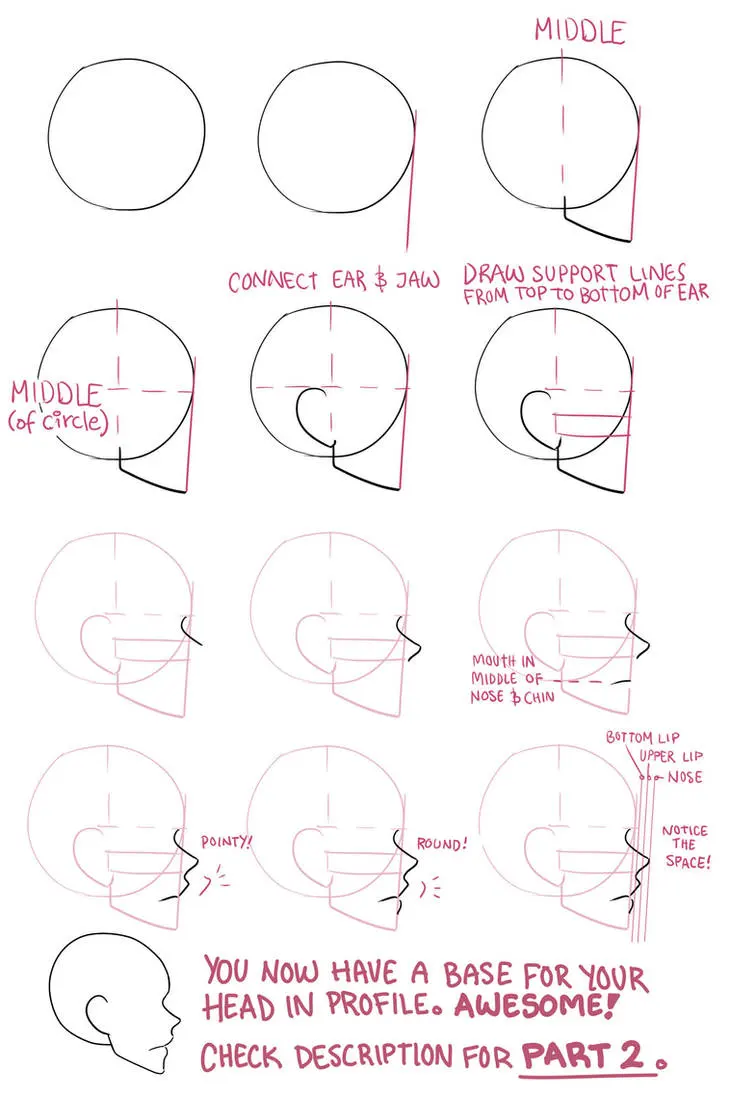
Consistent practice through "sight-sizing" is the most effective way to internalize facial proportions. This technique involves comparing the subject to your drawing at a distance to identify errors in scale. By constantly checking your work against the reference, you train your eye to spot deviations from the standard proportions. It is also helpful to practice drawing the skull from various angles, such as three-quarter views or profiles, to understand how the features rotate in space.
Finally, do not rely solely on memory; use anatomical references to understand the bone structure beneath the skin. Understanding where the zygomatic bone (cheekbone) and the mandible (jawbone) sit will naturally guide your placement of features. By focusing on these underlying structures, you transition from simply copying shapes to understanding the architecture of the human head. With patience and systematic measurement, you will eventually develop an intuitive sense of proportion that allows for more expressive and accurate portraiture.
Key facts
- The eyes are typically located exactly halfway between the top of the head and the chin.
- The width of the face is generally five eyes wide, with one eye-width of space between the two eyes.
- The bottom of the nose usually aligns with the bottom of the ears.
- The corners of the mouth typically align vertically with the centers of the pupils.
- The hairline is generally placed about one-third of the way down from the top of the head.
- Drawing a vertical centerline helps ensure symmetry and balance across both sides of the face.
The bottom line
Mastering facial proportions relies on understanding the standard anatomical landmarks that define the human head. By using the halfway eye line and aligning features like the nose and mouth with specific facial markers, you create a solid foundation for any portrait. Practice these measurements consistently to develop an intuitive sense of balance, ensuring your drawings remain accurate and realistic regardless of the specific subject you are portraying.
People also ask
How do I determine the correct shape of the jawline?
Start by drawing an oval or an inverted egg shape to represent the cranium and jaw. The jaw should taper gently toward the chin rather than forming a sharp point, which helps maintain a natural, organic appearance.
Why do my portraits often look flat?
Flatness usually results from a lack of shading or incorrect placement of shadows. Focus on the core shadows beneath the nose, lower lip, and chin to create the illusion of three-dimensional volume.
How do I place the ears correctly?
Ears generally occupy the space between the horizontal line of the eyebrows and the horizontal line of the bottom of the nose. Positioning them outside this range often makes the head look elongated or distorted.
What is the most common mistake when drawing eyes?
Beginners often place eyes too high on the skull, forgetting that the cranium takes up significant space above the brow line. Always measure the distance from the top of the head to the eye line to ensure it is centered.
How can I make the neck look proportional?
The neck should not be drawn as a straight cylinder; it typically starts behind the ears and curves inward toward the shoulders. Avoid drawing the neck too thin, as it must support the weight of the head.
Should I use a grid system for better accuracy?
A grid system is an excellent tool for beginners to map out proportions by breaking the face into smaller, manageable squares. It helps identify spatial relationships that the eye might otherwise overlook during freehand sketching.
This answer was created with the help of AI research tools and reference sources. Spotted an error? Let us know — we correct mistakes quickly. See our editorial policy.