How do you draw a chandelier step by step?
Short answer
Drawing a chandelier involves establishing a central axis and a series of concentric ellipses to define its tiered structure. By sketching a vertical guide, layering symmetrical arms, and detailing hanging crystals with light shading, you create depth. Consistent spacing and geometric precision are essential for achieving a balanced, elegant lighting fixture illustration.
On this page
How to draw a chandelier for beginners
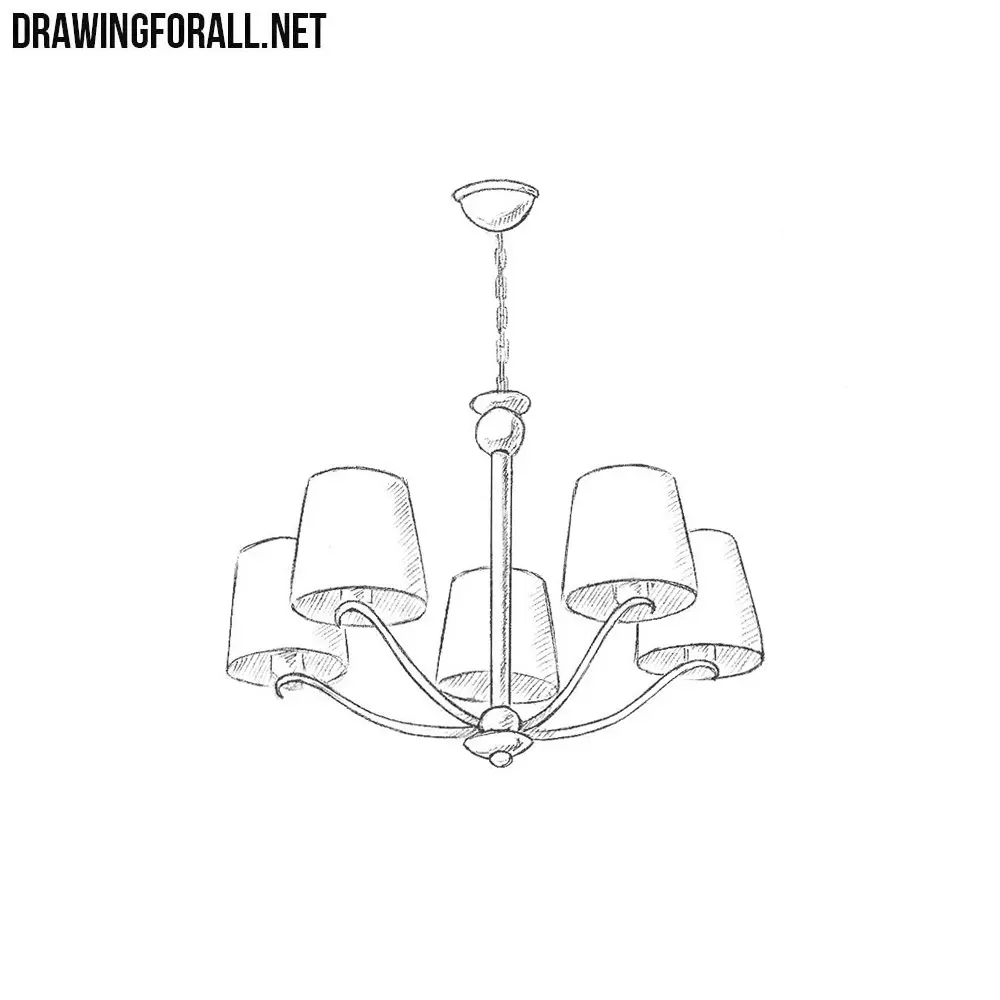
Start by drawing a faint vertical line down the center of your paper to serve as an axis for symmetry. At the top of this line, sketch a small circle or oval to represent the canopy that attaches to the ceiling. Below this, draw a vertical rod or chain descending toward the main body of the chandelier.
Next, establish the width of your chandelier by drawing a series of horizontal ellipses centered on your vertical line. These ellipses act as the framework for the tiers, helping you maintain consistent proportions as you add details. Keep your initial pencil strokes very light so they can be easily erased or adjusted as the structure takes shape.
- Draw a central vertical axis to ensure both sides remain perfectly symmetrical.
- Sketch horizontal ovals to define the tiers and the overall volume of the design.
- Connect the canopy to the main body with a light, straight line for the chain.
- Use a ruler if you struggle with freehand symmetry during these preliminary stages.
How to add arms and structure
Once your framework is established, focus on the arms that extend from the central column. Draw curved lines radiating outward from the center, ensuring they mirror each other on the left and right sides. These arms should typically curve upward or outward, ending in small circular platforms that will eventually hold the candles or light bulbs.
Pay attention to the spacing between these arms to ensure the chandelier looks balanced rather than crowded. If you are drawing a multi-tiered fixture, repeat this process for each level, making the arms on the lower tiers slightly wider than those on the upper tiers. This creates a natural, tapering silhouette that is characteristic of classic crystal chandeliers.
- Keep the curves consistent by sketching them in pairs rather than finishing one side completely.
- Use a light touch to ensure the arms appear delicate and graceful rather than heavy or rigid.
- Ensure the distance between the central column and the end of each arm is identical on both sides.
How to draw chandelier crystals and details
Crystals are the defining feature of most chandeliers and add significant visual interest to your drawing. Instead of drawing every individual facet, focus on suggesting the shapes of teardrops, diamonds, or prisms hanging from the arms. Use small, sharp triangles and ovals to represent these hanging elements, varying their sizes to create a sense of movement.
Connect these shapes to the arms using tiny, thin lines that represent the wires or metal links. You can also add "garlands" by drawing scalloped, dotted lines that drape between the arms. These details should be added after the main structure is finalized, as they rely on the underlying framework to look realistic and properly anchored.
- Use varying sizes of teardrop shapes to make the crystals look more natural and less uniform.
- Add small, quick dashes to represent the sparkle of the glass catching the light.
- Connect the crystals in clusters to create a denser, more luxurious appearance near the center.
Common mistakes when drawing chandeliers
One of the most frequent errors is failing to maintain symmetry, which causes the chandelier to look tilted or lopsided. Even a slight deviation in the angle of an arm can make the entire drawing feel unstable. Always check your work by holding the paper at a distance or looking at it in a mirror to spot imbalances.
Another common mistake is making the lines too dark too early in the process. When you commit to heavy, dark lines before the proportions are correct, it becomes difficult to fix errors without leaving messy smudges. Always keep your construction lines light until you are confident in the placement of every component, then go back to darken the final outlines.
- Avoid drawing lines that are too thick, as this makes the chandelier look heavy and industrial.
- Do not forget to account for the perspective of the tiers, which should appear slightly flatter as they get closer to eye level.
- Ensure the light bulbs or candles are aligned vertically with the center of each arm.
How to shade a chandelier for depth
Shading is the final step that transforms a flat outline into a three-dimensional object. Identify a consistent light source, such as from the top left, and apply shadow to the opposite sides of the central column and the arms. Use a soft graphite pencil to create smooth gradients, which helps the metal parts look polished and reflective.
For the crystals, use high-contrast shading by leaving small white highlights untouched. This simulates the way glass refracts light, giving the drawing a brilliant, sparkling quality. By darkening the areas behind the crystals and keeping the front edges bright, you add depth and volume to the entire fixture, completing the professional look of your illustration.
- Use a blending stump or a piece of tissue to soften the shadows on the metal arms.
- Keep the highlights on the crystals sharp and bright to maximize the appearance of transparency.
- Remember that the central column should have a core shadow to suggest its cylindrical shape.
Key facts
- Start by drawing a central vertical axis line to ensure your chandelier remains symmetrical on both sides.
- Use a series of stacked ovals or circles to establish the depth and perspective of the tiers.
- Connect the tiers with curved lines to represent the arms or chains supporting the light fixtures.
- Add small circles or teardrop shapes at the ends of arms to represent crystals or light bulbs.
- Apply shading on one side of each element to create a three-dimensional effect and indicate a light source.
- Use a fine-liner pen to emphasize the structural frame and a lighter pencil touch for delicate hanging crystals.
The bottom line
Drawing a chandelier requires a structured approach that prioritizes symmetry and perspective. By establishing a central axis and using geometric shapes to define tiers, you can build a complex design from simple components. Focus on the interplay between the structural frame and the decorative crystals, using shading to bring the object to life. With practice, these foundational steps will allow you to render intricate, elegant lighting fixtures.
People also ask
How do I make my chandelier look balanced?
Use a light pencil to sketch a vertical center line and horizontal guidelines for each tier. Measure the distance from the center line to the outer edges to ensure both sides match perfectly.
What is the best way to draw realistic crystals?
Draw small, angular shapes like diamonds or teardrops and leave a tiny white space inside each to represent light reflection. Adding a few sharp, jagged edges makes the glass look more authentic.
Should I draw the light bulbs or just the frame?
It depends on the style, but drawing small circles at the end of each arm provides a clear focal point. If you want a more elegant look, focus on the crystals and suggest the bulbs with subtle glowing halos.
How do I draw a chandelier seen from below?
Draw a large circle as your base and place smaller circles inside it to represent the tiers. The arms should radiate outward from the center like spokes on a wheel to create a worm's-eye view.
Why does my drawing look flat?
Your drawing likely lacks consistent shading or overlapping lines. Ensure that elements in the background are slightly smaller and lighter than those in the foreground to create depth.
What pens should I use for the final outline?
Use a technical pen with a 0.1 or 0.3 tip for fine details like chains and crystals. A thicker 0.5 pen can be used for the main structural arms to give the drawing visual weight.
This answer was created with the help of AI research tools and reference sources. Spotted an error? Let us know — we correct mistakes quickly. See our editorial policy.