How can I draw a crystal easily?
Short answer
Drawing a crystal is best achieved by starting with a simple geometric shape, such as a cube or a prism, and then adding faceted planes to create depth. By using light, shadow, and consistent line weight, you can transform a basic polygon into a realistic, shimmering gemstone with professional artistic flair.
On this page
How to draw a basic crystal shape
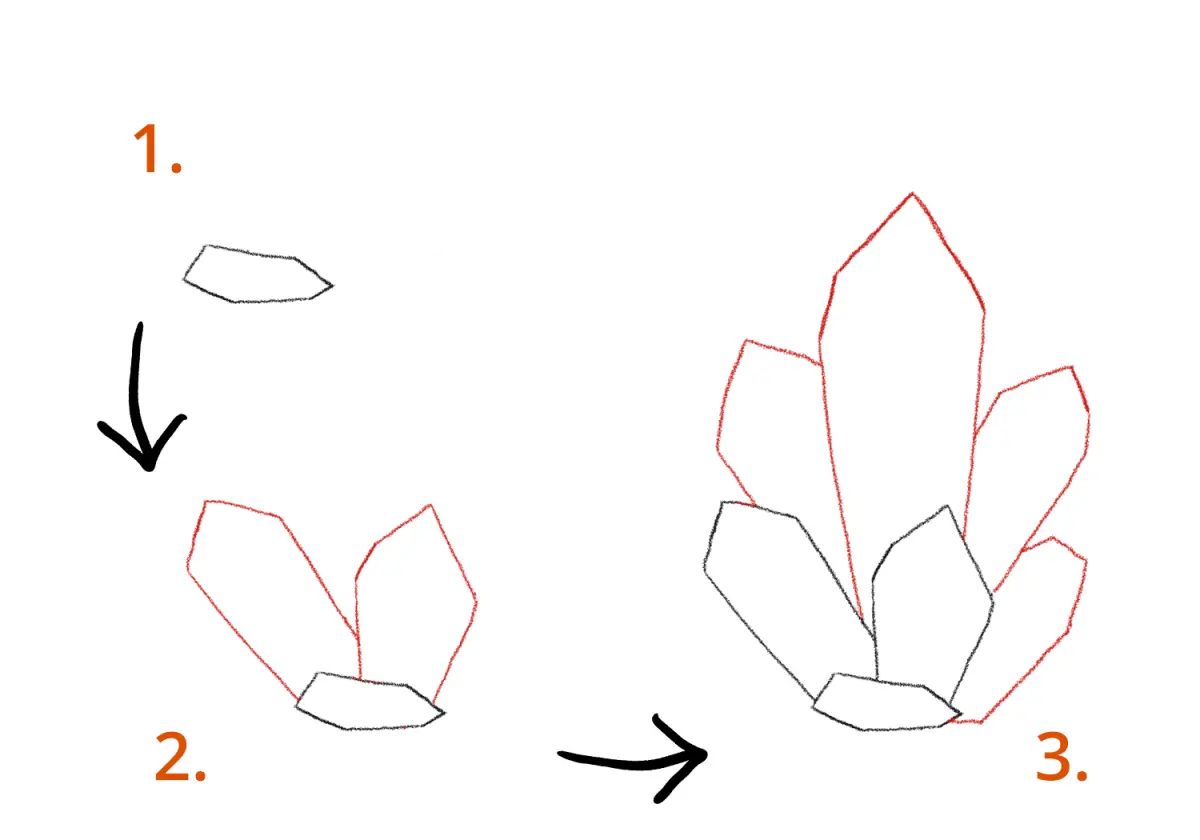
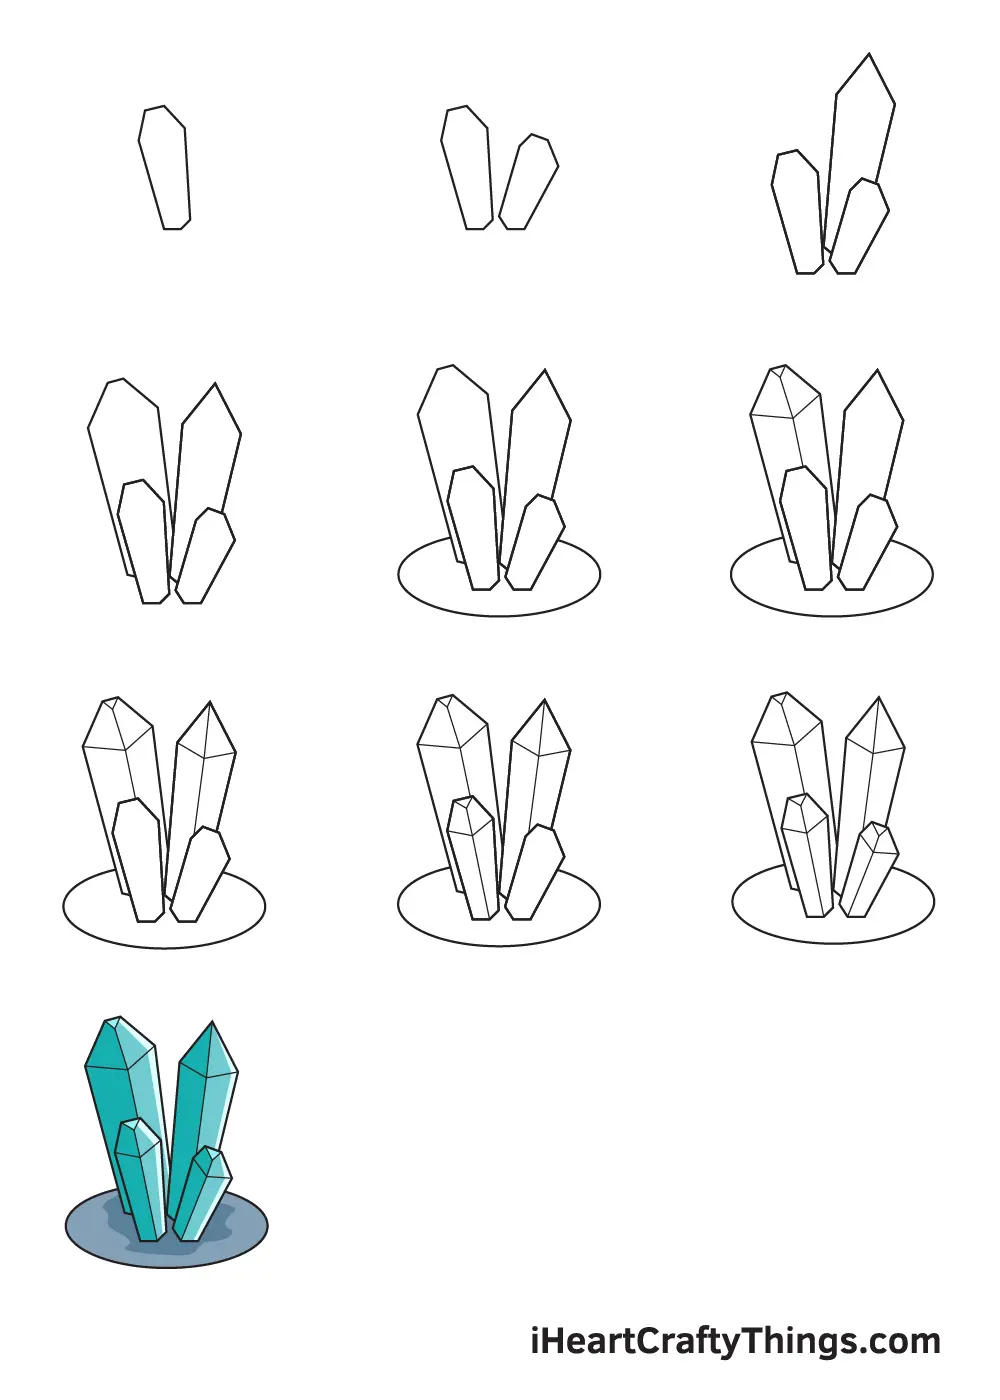
The most effective way to begin drawing a crystal is by focusing on its geometric foundation. Most natural crystals, such as quartz or diamonds, are based on prisms or hexagonal structures. Start by sketching a light, thin vertical line to act as the central axis of your crystal. From this axis, draw a series of interconnected polygons that radiate outward, ensuring the lines are straight and sharp. Using a ruler for your initial sketch can help maintain the precise angles necessary for a crystalline appearance.
Once you have established the basic silhouette, refine the edges to ensure they look crisp. Crystals are defined by their flat, planar surfaces, so avoid rounded corners at all costs. If you are drawing a cluster, overlap your shapes to create a sense of depth and complexity. Remember that the goal is to create a structure that looks solid rather than hollow. Keep your initial lines faint so they can be easily erased or covered later.
Best tools for drawing crystals
For beginners, the best tools are simple graphite pencils and a high-quality eraser. Use an HB pencil for the initial layout because it is light and easy to remove. Once the structure is set, switch to a 2B or 4B pencil to add darker lines and shading, which will give the drawing weight and dimension. A mechanical pencil is often superior to a standard wooden one because it maintains a sharp point, which is essential for drawing the thin, precise facets of a crystal.
In addition to pencils, consider these essential tools for a polished look:
- A clear plastic ruler to ensure your edges remain perfectly straight.
- A kneaded eraser, which allows you to lift graphite gently to create highlights.
- A blending stump or a soft cloth to smooth out transition areas in the shading.
- Heavyweight drawing paper, which holds up better to repeated erasing and layering of graphite.
Why crystals need shading and highlights
Shading is the most critical element in making a crystal look realistic. Because crystals are translucent or transparent, they do not have uniform shadows like opaque objects. Instead, they feature sharp transitions between light and dark areas. Identify a single light source before you begin shading. The facets facing away from the light should be significantly darker, while the facets facing the light should retain bright, white highlights. This contrast is what makes the crystal appear to glow.
To achieve a professional look, follow these steps for shading your facets:
- Identify which facets are the "top" faces and leave them mostly white to represent light reflection.
- Apply a mid-tone gray to the side facets that are turned away from the primary light source.
- Use a very dark, sharp line to define the edges where two facets meet.
- Add small, subtle white gaps between shaded areas to mimic the refraction of light through the mineral.
- Use your eraser to pull out thin, sharp highlights on the edges to simulate a polished, reflective surface.
Common mistakes when drawing crystals
One of the most frequent errors is drawing rounded or soft edges. Crystals are minerals formed by internal atomic structures that result in flat, sharp faces. If your edges look like they were drawn with a dull pencil or are curved, the object will look like a soft stone or a piece of glass rather than a crystal. Always redraw lines that have become soft, and use a sharp pencil tip to maintain the integrity of the vertices.
Another common mistake involves inconsistent shading. If the shading does not follow the geometry of the facets, the crystal will appear flat. Ensure that each individual facet has a consistent tone throughout its surface. If you shade one facet as a gradient, it will look like a sphere rather than a flat plane. Keep your shading flat within each facet, and only change the tone when moving to a different plane. This creates the distinct, faceted look that is characteristic of real-world mineral specimens.
How to add texture and detail
After you have mastered the basic shape and shading, you can add details to make your crystal look more authentic. Natural crystals often contain inclusions, cracks, or internal fractures that break up the light. You can draw these by adding very thin, jagged lines inside the facets. These lines should follow the internal structure of the crystal, appearing as if they are trapped deep within the mineral. Do not overdo these details, as too many lines can clutter the drawing and distract from the overall form.
To finalize your drawing and add a professional finish, focus on the following:
- Add a subtle cast shadow on the ground beneath the crystal to ground it in space.
- Use a white gel pen to add tiny, bright "sparkle" dots on the sharpest corners.
- Ensure that the lines defining the outer silhouette are slightly thicker than the interior lines.
- Review your work from a distance to see if the overall light direction remains consistent across all facets.
By following these steps, you will create a convincing representation of a crystal that captures its natural beauty and geometric precision.
Key facts
- Crystals are defined by their geometric, repeating internal structure which results in flat faces and sharp edges.
- The most common shape to draw is the hexagonal prism, which resembles a pencil point or a quartz crystal.
- Always use a ruler or straightedge to ensure the edges are perfectly crisp, as wobbly lines ruin the illusion of hardness.
- Start by drawing a long, thin rectangle to act as the central body of the crystal.
- Add a "cap" to the top by drawing a triangle or a multi-faceted point connecting to the corners of your rectangle.
- Use shading to distinguish between different faces, as each side of a crystal reflects light differently.
The bottom line
Drawing a convincing crystal relies on mastering geometric precision rather than artistic flair. By focusing on straight lines, sharp angles, and contrasting values, you can create the illusion of a solid, light-reflecting mineral. Start with a simple rectangular base, add a faceted cap, and use shading to define the planes. With practice, these structural fundamentals will allow you to render complex, sparkling clusters with ease and accuracy.
People also ask
What is the easiest crystal shape for beginners to draw?
The quartz-style hexagonal prism is the best starting point. It uses simple geometric shapes like rectangles and triangles that are easy to align.
Should I use a pencil or a pen for drawing crystals?
Use a graphite pencil first to sketch the geometric skeleton of the crystal. Once the proportions are correct, you can use a fine-liner pen to finalize the edges.
How do I make my crystal drawing look three-dimensional?
Apply varying levels of shading to each face of the crystal. If one side is dark and the adjacent side is light, the object will immediately gain depth.
Why do my crystal drawings look like blobs instead of sharp minerals?
This usually happens because the lines are curved or the angles are too soft. Keep your lines strictly straight and ensure your corners meet at precise points.
How many faces should a standard crystal have?
While crystals vary in nature, a simple representation typically features six sides for the body and a six-sided pyramid point. You can simplify this to three visible faces for a basic sketch.
Can I add cracks or inclusions to my drawing?
Yes, adding small, jagged lines inside the crystal adds realism. Keep these lines thin and follow the general direction of the crystal's growth to maintain consistency.
This answer was created with the help of AI research tools and reference sources. Spotted an error? Let us know — we correct mistakes quickly. See our editorial policy.