How can I draw arms easily?
Short answer
Drawing arms easily involves breaking the limb into simple geometric shapes like cylinders and spheres. By focusing on the shoulder, elbow, and wrist as pivot points, you can establish correct proportions before adding muscle detail. Consistent practice with basic anatomy ensures that your figures maintain a natural, balanced appearance in any pose.
On this page
How to simplify arm anatomy for drawing
The human arm is essentially a series of interconnected cylinders. To begin, visualize the upper arm (humerus) and the forearm (radius and ulna) as two distinct tubes connected by a hinge at the elbow. By sketching these as simple 3D forms, you establish the volume and perspective of the limb before worrying about complex muscle groups.
When mapping out the arm, use circles to represent the shoulder joint, the elbow, and the wrist. This skeletal framework acts as a guide to ensure your proportions remain accurate regardless of the action. Keep these shapes loose and light so you can easily adjust the length and angle of the arm as you refine your sketch.
- Draw a circle for the shoulder joint.
- Connect a cylinder for the upper arm ending in a smaller circle for the elbow.
- Attach a second cylinder for the forearm ending in a small circle for the wrist.
- Ensure the upper arm and forearm are roughly equal in length for a standard human proportion.
Why arm proportions matter for beginners
Understanding the relationship between the arm and the rest of the body is critical for creating believable figures. A common rule of thumb is that when the arm is hanging relaxed at the side, the elbow should align roughly with the bottom of the rib cage, while the fingertips reach the mid-thigh. If these landmarks are off, the arm will look either unnaturally long or stunted.
Artists often struggle because they focus on individual muscles before establishing the overall length. If the forearm is drawn too short, the entire silhouette of the character will look distorted. Always check your proportions by comparing the arm length to the torso height. By mastering these basic ratios early, you build a foundation that makes adding anatomical detail much more intuitive and visually satisfying.
How to draw arms in different poses
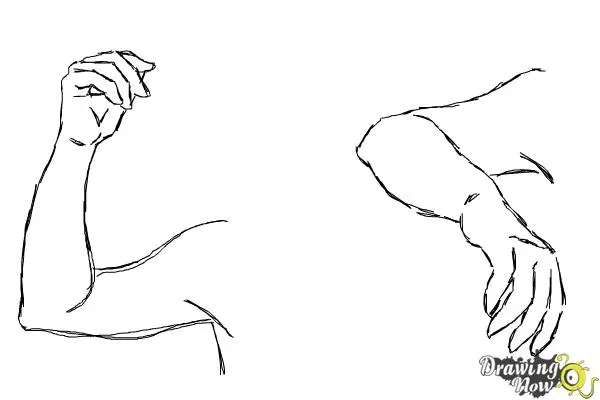
Drawing arms in motion requires an understanding of foreshortening, which occurs when an arm points toward or away from the viewer. When an arm is extended toward the camera, the upper arm appears shorter and wider, while the forearm might be obscured. To capture this, overlap your geometric shapes to suggest depth and distance within the two-dimensional space of your paper.
When the arm is bent, the bicep muscle contracts and shortens, causing it to bulge upward. The tricep on the underside of the arm stretches out to accommodate this movement. Use these simple observations to guide your shading and line work. By focusing on the flow of the outer contour rather than internal muscle lines, you can create a dynamic sense of energy and movement in your drawings.
- Use overlapping shapes to show depth.
- Keep lines curved to suggest muscle volume.
- Avoid perfectly straight lines, as human limbs have natural, subtle curves.
- Study the "S-curve" of the forearm to capture its natural silhouette.
Common mistakes when drawing arms
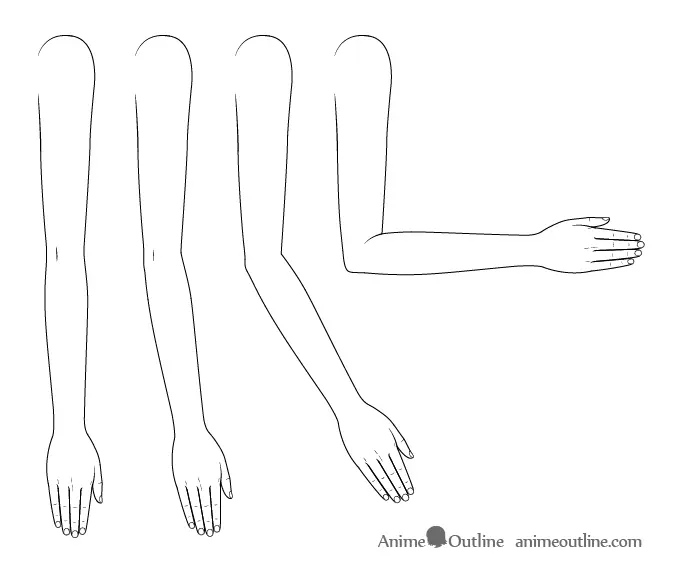
One of the most frequent errors is drawing the arm as a perfectly straight, uniform tube. In reality, the arm tapers significantly from the shoulder down to the wrist. The bicep creates a distinct bulge, and the forearm has a wide muscular mass near the elbow that narrows toward the hand. Ignoring this taper makes the arm look robotic rather than organic.
Another common mistake is placing the elbow too high or too low. If the elbow is misplaced, the entire range of motion for the arm becomes impossible. Always verify that your elbow joint acts as a true hinge, allowing the forearm to rotate and fold toward the shoulder. By checking these anatomical markers against your reference or your own body, you can quickly identify and correct errors before committing to final ink or color.
Best exercises to improve arm drawing
To improve quickly, perform daily "gesture drawings" where you sketch arms in various positions in under sixty seconds. This speed forces you to focus on the essential flow and structure of the limb rather than getting bogged down in unnecessary detail. Use photographs of athletes or dancers, as their movements clearly display how muscles shift and stretch under the skin during physical exertion.
Consistency is more important than spending hours on a single drawing. Try to fill a sketchbook page with different arm positions, focusing on the transition from the shoulder to the torso. As you become more comfortable with the basic cylinder method, begin to incorporate subtle anatomical landmarks like the bony protrusion of the elbow or the tendons near the wrist. With dedicated practice, the process of constructing arms will become second nature, allowing you to focus on the overall storytelling of your artwork.
Key facts
- The human arm is divided into three main segments: the upper arm (humerus), the forearm (radius and ulna), and the hand.
- The elbow joint aligns roughly with the bottom of the rib cage when the arm is resting at the side.
- Arms are not perfectly straight cylinders; they taper significantly from the shoulder toward the wrist.
- The forearm contains two bones that rotate around each other, allowing the palm to flip from face-up to face-down.
- Muscles in the arm operate in pairs, where one contracts while the opposing muscle relaxes to create movement.
- When drawing, simplify the complex muscle groups into basic geometric shapes like cylinders and spheres to establish proper proportions.
The bottom line
Drawing realistic arms requires a balance between anatomical knowledge and geometric simplification. By breaking the limb into cylinders and observing how joints like the elbow and wrist function, you can create natural-looking poses. Focus on the tapering of the forearm and the interaction of muscle groups during movement. With consistent practice of these proportions, you will develop the ability to draw arms that look structurally sound.
People also ask
How do I determine the correct length of an arm?
A common rule of thumb is that the fingertips should reach about halfway down the thigh when the arm is fully extended. The elbow should align with the waistline, while the wrist typically sits near the top of the hip bone.
What is the most common mistake when drawing arms?
Beginners often draw arms as uniform tubes without any taper or anatomical landmarks. Failing to account for the joints at the elbow and wrist makes the limb appear stiff, rubbery, or disconnected from the torso.
Should I draw the muscles before the skin?
It is helpful to understand the underlying bone and muscle structure, but you do not need to draw every individual fiber. Focus on the major masses, such as the bicep and the forearm flexors, to give the arm weight and volume.
How do I draw arms in a bent position?
When the arm bends, the bicep muscle bunches up and shortens, while the tricep on the back of the arm stretches. Use a curved line to represent the bicep and a straighter line for the tricep to show this tension.
Why do my drawn arms look like they are attached incorrectly?
This usually happens when the shoulder connection is ignored. The arm attaches to the torso via the scapula and clavicle, so ensure the shoulder mass is integrated into the chest and back muscles rather than just stuck onto the side.
How can I make arms look more realistic?
Incorporate subtle anatomical details like the bony protrusion of the elbow and the slight curve of the forearm. Varying your line weight—using thicker lines for shadows and thinner lines for highlights—will also add depth and realism to your drawing.
This answer was created with the help of AI research tools and reference sources. Spotted an error? Let us know — we correct mistakes quickly. See our editorial policy.