How do you center clay on a pottery wheel?
Short answer
Centering clay is the foundational skill in wheel-thrown pottery, requiring a combination of physical leverage, steady posture, and consistent moisture. By anchoring your elbows to your body or thighs and applying firm, balanced pressure, you force the spinning clay into the exact center of the wheel head to ensure structural symmetry.
On this page
How to center clay on a pottery wheel
Centering is the process of aligning a lump of clay with the rotational axis of the wheel head. Before beginning, ensure your clay is wedged thoroughly to remove air pockets and create a uniform consistency. A poorly wedged ball of clay will wobble, making it nearly impossible to achieve a stable center regardless of your technique.
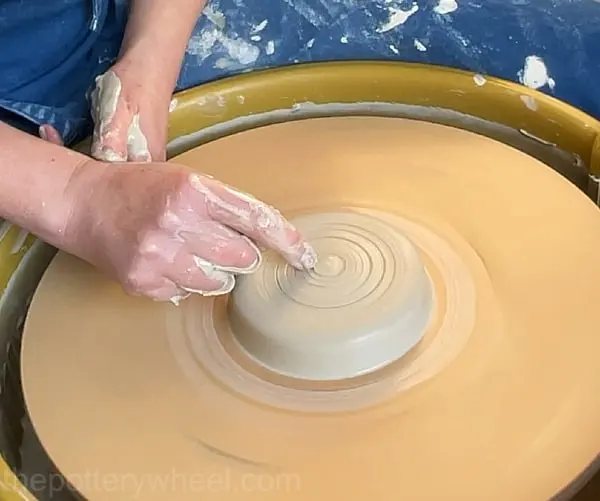
To start, firmly slap the clay into the center of the wheel head. Wet the clay and your hands with a small amount of water or slip to reduce friction. If the clay is too dry, your hands will drag, causing the clay to tear or pull off-center. If it is too wet, the clay becomes slippery and difficult to control.
- Securely anchor your elbows against your inner thighs or your hip bones to create a rigid frame.
- Lean your upper body weight into the clay to provide the necessary force.
- Use the heel of your dominant hand to push the clay toward the center while your other hand stabilizes the side.
- Slowly lift the clay into a cone shape, then push it back down into a puck to align the particles.
Why clay wobbles during centering
Wobbling occurs when the clay is not firmly attached to the wheel or when the potter’s pressure is inconsistent. If your hands move independently of each other, the clay will be pulled in two different directions, resulting in a lopsided mass. Maintaining a locked, unified posture is the most effective way to counteract the centrifugal force of the wheel.
Another common cause of instability is a lack of sufficient lubrication. As the wheel spins, friction generates heat and drags the clay, which can cause it to "grab" your skin and pull it off-center. Always keep a sponge or a small bowl of water nearby to keep the surface of the clay slick. If the clay begins to feel sticky, stop and add just enough water to restore a smooth glide.
- Ensure the wheel is spinning at a high, consistent speed.
- Keep your posture low to maximize your leverage over the clay.
- Do not remove your hands from the clay abruptly, as this can cause a sudden shift in balance.

Best tools for centering clay
While many potters prefer to center using only their hands, certain tools can assist beginners who struggle with physical strength. A wooden rib or a metal scraper can provide a rigid edge that helps smooth the clay and push it into a centered position. These tools act as an extension of your arm, offering more stability than soft skin.
However, relying too heavily on tools can hinder your ability to "feel" the clay. Developing the tactile sensitivity to detect off-center vibrations through your palms is a critical skill for advanced throwing. Use tools sparingly to refine the shape, but try to master the initial centering process using your own body mechanics to build long-term control and muscle memory.
- Use a sturdy wooden rib to scrape the bottom of the clay ball to ensure it is fully adhered to the wheel.
- Keep a chamois cloth handy to smooth the rim if you are moving on to pulling walls.
- Always clean your tools immediately after use to prevent clay buildup that can affect future performance.
How long does it take to learn centering
Most beginners require several weeks of consistent practice to center clay reliably. Because centering is a physical skill, it relies heavily on muscle memory and the ability to maintain a steady, braced position. You should expect to spend your first few sessions simply failing to center, which is a normal part of the learning curve in ceramics.
The time it takes to master this skill depends on the amount of clay used. Smaller balls of clay, typically one to two pounds, are significantly easier to center than larger masses. Start with smaller amounts to build confidence, then gradually increase the weight as your strength and technique improve. Consistent, short practice sessions are far more effective than one long, exhausting session.
- Practice with one pound of clay until you can center it in under thirty seconds.
- Gradually increase the weight by half-pound increments.
- Focus on the feeling of the clay vibrating against your hands to identify the off-center points.
Common mistakes when centering clay
The most frequent mistake is failing to brace your elbows. Without a fixed point of leverage, your arms will naturally move with the clay, making it impossible to force the mass into the center. Additionally, many beginners use too much water, which weakens the clay and makes it prone to collapsing or becoming "soupy" and unworkable.
Another error is trying to center the clay too quickly. Centering is a gradual process of coaxing the clay into submission rather than forcing it in one violent movement. If you feel the clay fighting back, stop, re-wet the surface, and reset your stance. Patience and steady, constant pressure are the keys to achieving a perfectly centered piece of clay every time.
Key facts
- Centering is the process of using physical force to align a lump of clay with the exact center of a spinning pottery wheel.
- Always use a generous amount of water or slip as a lubricant to prevent the clay from dragging against your hands.
- Keep your elbows locked firmly against your thighs or hips to create a stable, immovable fulcrum for your arms.
- The wheel should spin at a high speed, typically between 150 and 200 revolutions per minute, for effective centering.
- A common mistake is using too little water, which causes friction that pulls the clay off-center and strains your wrists.
- You know the clay is centered when it appears perfectly still and motionless while the wheel is rotating at full speed.
The bottom line
Centering is the fundamental skill in pottery that requires patience, proper body mechanics, and consistent lubrication. By locking your elbows and using the wheel's momentum, you transform a chaotic lump into a stable, balanced foundation. While it may feel frustrating at first, mastering this step is essential for every subsequent technique, as a well-centered piece of clay is the prerequisite for throwing uniform, symmetrical vessels every time.
People also ask
Why does my clay wobble when I try to center it?
Wobbling usually occurs because your hands are not braced properly or your body weight is shifting. Ensure your elbows are locked against your legs to maintain a steady, unmoving pressure against the clay.
How much clay should I use for a beginner project?
Beginners should start with one to two pounds of clay. Using too much clay makes it physically difficult to exert enough force to center the mass properly.
Should I use a sponge or my bare hands to center?
Using your bare hands allows for better tactile feedback, but a damp sponge can help keep the clay lubricated without adding too much water. Many potters use a sponge during the initial stages and switch to bare hands for the final refinement.
What is "coning" and why is it important?
Coning involves pushing the clay up into a tall mound and then pressing it back down into a puck shape. This process aligns the clay particles and removes air bubbles, making the material more uniform and easier to center.
Can I re-center clay if it starts to dry out?
If the clay becomes too dry or stiff, it will be nearly impossible to center. You must wedge the clay thoroughly before placing it on the wheel to ensure it has a consistent, pliable moisture level.
How do I know if the clay is truly centered?
Stop the wheel and look at the clay from above; if it is not centered, you will see uneven ridges or a spiral pattern. When centered, the clay will feel completely smooth and stationary under your palms.
This answer was created with the help of AI research tools and reference sources. Spotted an error? Let us know — we correct mistakes quickly. See our editorial policy.