How can I draw an igloo easily?
Short answer
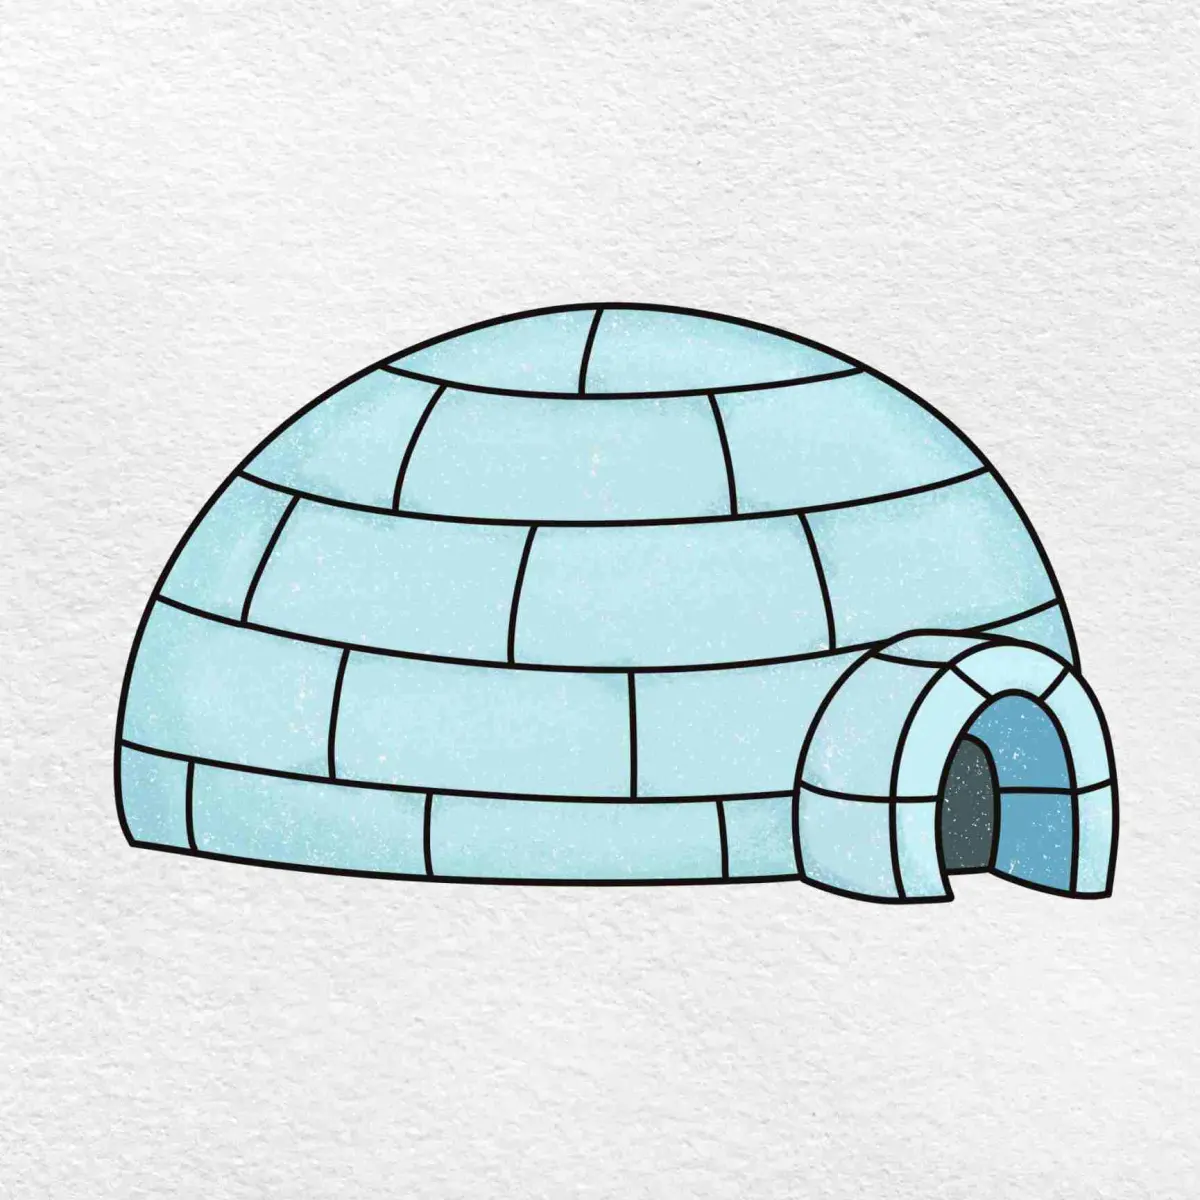
Drawing an igloo is best achieved by sketching a wide, shallow arch as the base and layering curved, brick-like shapes in a spiral pattern. By focusing on perspective and adding subtle shading to the blocks, you can create a three-dimensional effect that reflects the structure's iconic, rounded dome shape.
On this page
How to draw an igloo step by step
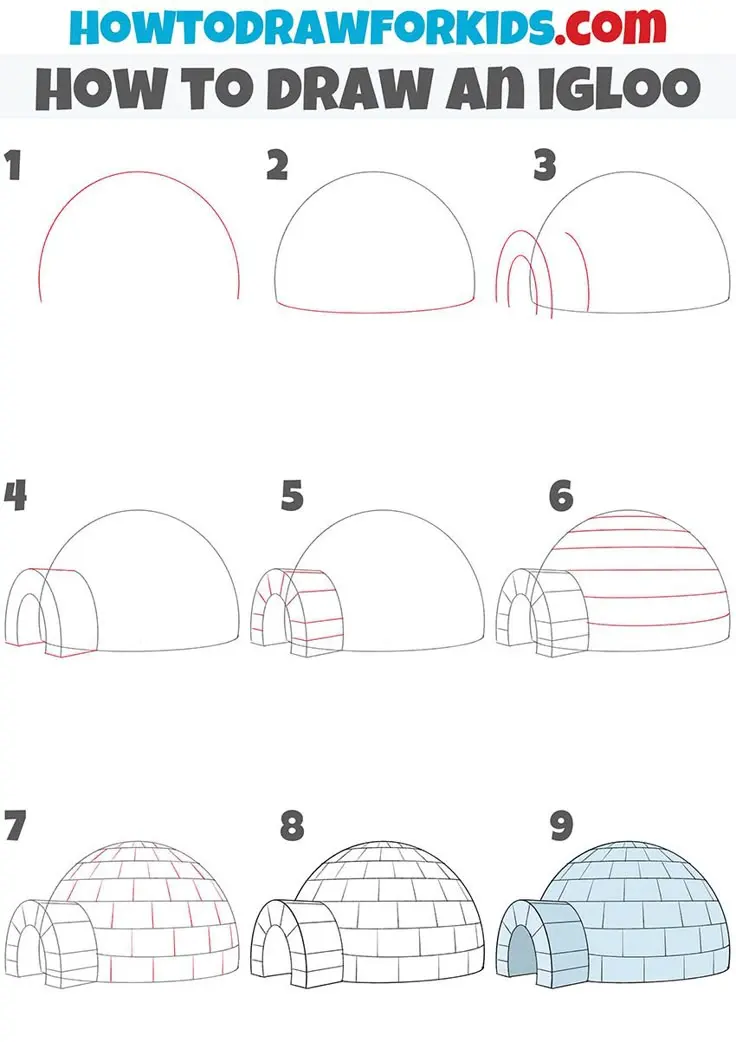
To draw an igloo effectively, start by sketching a large semi-circle on your paper. This serves as the primary silhouette for the dome. Once the outline is set, draw a smaller, arched doorway at the base of the structure. This opening should look like a tunnel extending slightly outward from the main dome.
After establishing the basic frame, add the block patterns. Start from the bottom and work your way up toward the center of the dome. Use these steps to guide your drawing:
- Draw horizontal, slightly curved lines across the dome to represent the layers of snow blocks.
- Add vertical lines between the horizontal ones, staggering them like bricks on a wall.
- Ensure the blocks become smaller as they reach the top to create a sense of depth.
- Add a light dusting of shading on the side opposite your light source to give the structure volume.
Best drawing techniques for beginners
The most effective way to make an igloo look realistic is to master the concept of the spiral. Because igloos are built by stacking blocks in a continuous upward curve, your lines should never be perfectly straight. Each row of blocks should follow the curvature of the dome, which helps the viewer understand the three-dimensional nature of the building. Using a soft graphite pencil allows you to sketch these curves lightly before committing to darker ink lines.
If you struggle with the perspective, try drawing a faint grid over your semi-circle first. This grid acts as a map for where your blocks should sit. Remember that the blocks near the bottom are closest to the viewer and should appear larger and more detailed than the ones near the apex. By varying the line weight—using thicker lines for the base and thinner ones for the top—you can easily create a professional-looking illustration.
What tools are needed for sketching
You do not need specialized equipment to create a high-quality drawing of an igloo. A standard set of drawing pencils ranging from HB to 2B is sufficient for both outlining and shading. A kneaded eraser is particularly useful because it can lift graphite off the page without damaging the paper, allowing you to fix mistakes in your block layout without leaving messy smudges.
For those who want to add texture, consider using a blending stump or a piece of tissue to smooth out the shading on the snow blocks. This creates a soft, icy appearance that contrasts well with the sharp lines of the block edges. If you prefer to add color, light blue or cool gray markers work best to mimic the reflective quality of packed snow. Keep your colors muted to maintain a realistic, wintry atmosphere throughout your final piece.
Common mistakes when drawing an igloo
A frequent error is drawing the blocks as perfect squares or rectangles. In reality, snow blocks are slightly rounded due to the pressure and the nature of the dome structure. If you draw rigid, perfectly straight boxes, the igloo will look more like a brick building than a traditional Inuit dwelling. Always ensure your lines have a slight arc to match the overall shape of the dome.
Another common mistake is neglecting the doorway's perspective. Many beginners draw the door as a flat shape on the front of the dome, which makes the igloo look two-dimensional. To fix this, draw the tunnel entrance as a separate, smaller cylinder or arch that attaches to the main structure. This adds depth and shows that the entrance is a distinct feature. Avoid making the doorway too large, as a real igloo entrance is intentionally small to retain heat inside the living space.
Why shading is important for snow structures
Shading is essential because it defines the form of the igloo against a white background. Without shadows, the structure will appear flat and lack the cold, solid texture of compressed ice. By identifying a single light source, such as the sun or a moon, you can place shadows on the opposite side of each block. This simple technique makes the blocks pop and highlights the individual construction units.
Focus on these areas for the most impact:
- The underside of the entrance tunnel, which should be the darkest area.
- The crevices between the blocks, which should have thin, sharp shadows.
- The side of the dome facing away from the light, which should feature a soft, gradual gradient.
- The ground directly beneath the igloo, which helps anchor the structure to the landscape.
By applying these shading principles, you transform a simple line drawing into a convincing representation of a winter shelter. Take your time to build up the tones slowly, as it is easier to darken a light shadow than it is to lighten a dark one.
Key facts
- An igloo is constructed using blocks of compressed snow, which acts as an excellent insulator due to trapped air pockets.
- The base of an igloo is typically a circle, which provides the structural integrity needed to support a dome shape.
- When drawing, start with a wide, flattened oval at the bottom to represent the circular base and ground perspective.
- Draw the blocks in a spiral pattern, making each layer slightly smaller and more tilted inward as you move toward the top.
- A keystone block is placed at the very center of the roof to lock the structure together and prevent collapse.
- Adding a small, arched tunnel entrance at the base helps block wind and keeps the interior warmer than the outside air.
The bottom line
Drawing an igloo requires a focus on perspective and structural logic. By starting with a circular base and layering blocks in a spiral pattern, you create a convincing dome. Remember to taper the blocks as you reach the peak and include a low, arched entrance for authenticity. With these simple steps, you can easily depict the iconic, snow-built shelters used by Arctic cultures for generations.
People also ask
Why are igloos shaped like domes?
The dome shape is structurally efficient because it distributes the weight of the snow blocks evenly. This geometry allows the structure to withstand heavy winds and the weight of accumulating snow without collapsing.
How thick should the walls of an igloo be?
In reality, walls are typically 1 to 2 feet thick to provide sufficient insulation. When drawing, you can represent this by drawing double lines for the blocks to show depth and thickness.
Do igloos have windows?
Traditional Inuit igloos do not have glass windows, but sometimes a thin slab of translucent ice is inserted into the wall to let in soft light. In a drawing, you can show this as a lighter-colored block near the top.
What is the purpose of the tunnel entrance?
The tunnel acts as a cold trap, preventing wind from blowing directly into the living space. It also creates a lower area where cold air settles, keeping the elevated sleeping platform warmer.
Should I draw the blocks in straight rows?
No, the blocks should be drawn in a spiral or staggered brick pattern. Drawing them in straight horizontal rows is a common mistake that makes the structure look unrealistic and unstable.
What is the best way to show snow texture?
Use light, short, dashed lines or small dots on the surface of the blocks to suggest texture. Avoid heavy, dark shading, which can make the snow look like stone or dirty ice.
This answer was created with the help of AI research tools and reference sources. Spotted an error? Let us know — we correct mistakes quickly. See our editorial policy.