What is decoupage?
Short answer
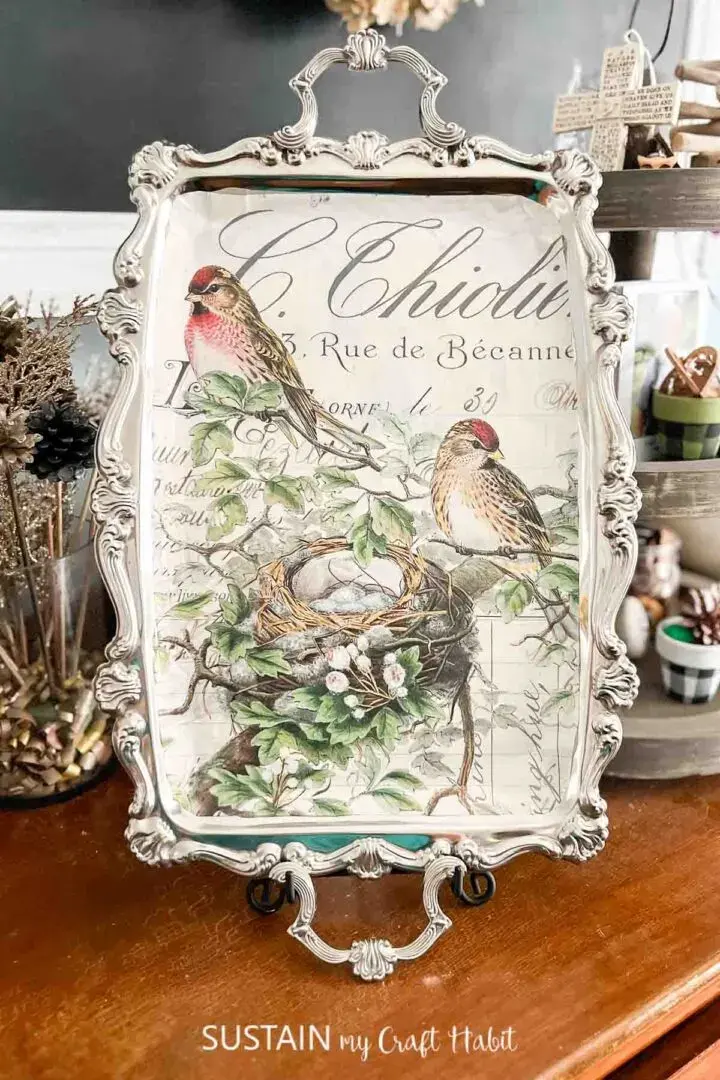
Decoupage is a decorative craft involving the application of paper cutouts onto surfaces like wood, glass, or metal. By layering these images with specialized adhesives and protective sealants, artists create a seamless, painted-on appearance. Originating in 18th-century Europe, this versatile technique allows for the artistic transformation of furniture and household objects.
On this page
What is the history of decoupage?
The term decoupage is derived from the French verb découper, meaning "to cut out." While the craft gained widespread popularity in 18th-century Venice, its origins are often traced back to East Siberian tomb art, where nomadic tribes used felt cutouts to decorate burial items. Chinese artisans later refined the practice in the 12th century, using vibrant paper cutouts to embellish lanterns, windows, and boxes.
During the 1700s, European aristocrats developed a craze for l'art du pauvre (the art of the poor), which involved imitating expensive lacquered furniture from the Far East. By meticulously cutting out engravings and prints, then layering them onto furniture with many coats of varnish, they achieved a high-end, hand-painted look at a fraction of the cost. Notable figures such as Marie Antoinette and Lord Byron were known to practice the craft, cementing its status as a sophisticated hobby for the elite throughout the Victorian era.
How to start decoupage for beginners
Starting a decoupage project requires minimal investment, making it an accessible hobby for newcomers. You primarily need a base object, decorative paper, a decoupage medium like Mod Podge, and a soft-bristled brush. Beginners often find success by starting with small, flat items such as wooden picture frames, coasters, or small boxes before attempting complex, curved surfaces.
To begin your first project, follow these essential steps:
- Prepare your surface by sanding it smooth and wiping away any dust or debris.
- Cut your chosen images or paper patterns precisely using sharp scissors or a craft knife.
- Apply a thin, even layer of adhesive to the back of the paper and press it firmly onto the object.
- Smooth out any air bubbles or wrinkles using a brayer or your fingers, working from the center outward.
- Once dry, apply several thin coats of sealer over the entire piece, allowing for drying time between layers.
What supplies do you need?
Selecting the right materials is crucial for achieving a professional finish. While specialized decoupage glues are the industry standard because they act as both adhesive and sealer, some crafters prefer using diluted white craft glue. For the decorative element, almost any paper works, though thin materials like napkins, tissue paper, and wrapping paper are generally easier to manipulate than thick cardstock.
When gathering your supplies, consider these specific items to ensure success:
- High-quality brushes: Use synthetic flat brushes to minimize visible bristle marks.
- Precision cutting tools: A sharp X-Acto knife or fine-tipped embroidery scissors are best for intricate details.
- Sandpaper: Fine-grit sandpaper (220-grit or higher) is necessary for smoothing edges and prepping surfaces.
- Sealer: A clear acrylic spray or polyurethane finish provides extra durability for high-use items.
- Brayer: A small rubber roller helps eliminate bubbles and ensures a tight bond between the paper and the surface.
Common mistakes when decoupaging
The most frequent issue encountered by beginners is the formation of air bubbles or wrinkles beneath the paper. This often happens when too much glue is applied at once or when the paper is not smoothed out immediately. To prevent this, apply a light, consistent layer of adhesive and work slowly, checking for trapped air as you press the paper down.
Another common error is failing to allow sufficient drying time between coats of sealer. If the layers are applied too quickly, the moisture can cause the paper to lift or the finish to become cloudy. Additionally, avoid over-brushing the paper while it is wet, as delicate materials like napkins can easily tear when saturated with glue. Always clean your brushes immediately after use, as dried decoupage medium can permanently damage the bristles of your tools.
How long does it take to finish a project?
The time required to complete a decoupage project depends largely on the complexity of the design and the number of layers applied. A simple coaster might take only an hour of active work, plus a few hours for the sealer to cure. Larger furniture pieces, however, can take several days due to the need for multiple coats of varnish and extended drying periods between each application.
Patience is the most important element in achieving a durable, professional-looking result. While you might be tempted to rush the process, allowing each layer to dry completely is vital for preventing tackiness and ensuring a smooth, glass-like surface. Most projects require at least three to five coats of sealer for adequate protection, with each coat needing several hours to harden. By planning for a multi-day timeline, you ensure that your finished piece remains beautiful and functional for years to come.
Key facts
- The term decoupage comes from the French verb découper, meaning "to cut out."
- Popularized in 18th-century Venice, the craft was known as l’arte del povero, or "the art of the poor," because it allowed artisans to imitate expensive inlaid furniture.
- You can use almost any paper, including napkins, tissue paper, wrapping paper, or photocopies, provided the ink is sealed.
- Always apply a base coat of acrylic paint to your surface to ensure the paper colors remain vibrant rather than dull.
- Use a soft, flat brush to apply adhesive and work from the center outward to push out air bubbles.
- A final coat of clear polyurethane or specialized decoupage varnish is essential to protect the finished piece from moisture and wear.
The bottom line
Decoupage is a versatile decorative craft that involves transforming ordinary objects by adhering paper cutouts to their surfaces and sealing them with varnish. By mastering simple techniques like careful smoothing and layered sealing, you can effectively mimic expensive artistic finishes on furniture, glass, or home accessories. It remains a highly accessible hobby that rewards patience and attention to detail, turning inexpensive items into personalized, artistic treasures.
People also ask
What is the best glue to use for decoupage?
While specialized products like Mod Podge are popular because they act as both glue and sealer, you can use a mixture of two parts white school glue to one part water. Ensure the mixture is smooth and free of lumps before applying it to your project.
Can I decoupage on glass?
Yes, glass is an excellent surface for decoupage. To achieve the best results, apply the paper to the back of a clear glass plate so the image shows through the front, which protects the design from daily use.
How do I prevent wrinkles in the paper?
To minimize wrinkles, apply a thin layer of adhesive to the surface first and let it become slightly tacky before placing the paper. If a wrinkle appears, gently lift the edge of the paper and smooth it down again with a damp sponge or a brayer.
Is decoupage permanent?
When sealed correctly with several coats of varnish, decoupage is quite durable and can last for many years. However, it is not waterproof and should be kept away from excessive heat, direct sunlight, and standing water.
What are the most common mistakes beginners make?
The most frequent errors include using too much glue, which causes the paper to tear, and failing to let each layer of sealer dry completely. Rushing the drying process often leads to a sticky or cloudy finish that ruins the aesthetic.
Can I use decoupage on fabric?
You can decoupage onto fabric using a specialized textile medium mixed with your glue. Once dry, the fabric should be heat-set with an iron to ensure the design remains flexible and can withstand light hand washing.
This answer was created with the help of AI research tools and reference sources. Spotted an error? Let us know — we correct mistakes quickly. See our editorial policy.