How do you paint a pine tree in watercolor?
Short answer
Painting a pine tree in watercolor requires building layers from light to dark using a dry-brush technique. Focus on creating a central vertical axis, then apply short, horizontal strokes to suggest needles. By varying the pressure and color intensity, you can effectively capture the tree's dense texture and layered, triangular silhouette.
On this page
What supplies do I need for painting pine trees?
To paint a convincing pine tree, you should select a round brush with a fine point, such as a size 6 or 8. Natural hair brushes, like sable, hold more water and pigment, but synthetic alternatives provide the necessary "snap" for creating sharp, needle-like marks. Choose cold-press watercolor paper, which has a slight texture that helps catch the pigment, making it easier to simulate the rough bark and foliage of a pine.
For your palette, focus on mixing various greens rather than using a single tube color. Start with a base of Sap Green or Hookers Green, then add touches of Burnt Sienna or Indigo to create depth. You will need:
- A round watercolor brush (size 6 or 8)
- Cold-press watercolor paper (140lb/300gsm)
- Artist-grade watercolor paints (Sap Green, Indigo, Burnt Sienna)
- Two jars of clean water for rinsing brushes
- A paper towel for controlling brush moisture
How to structure a pine tree in watercolor?
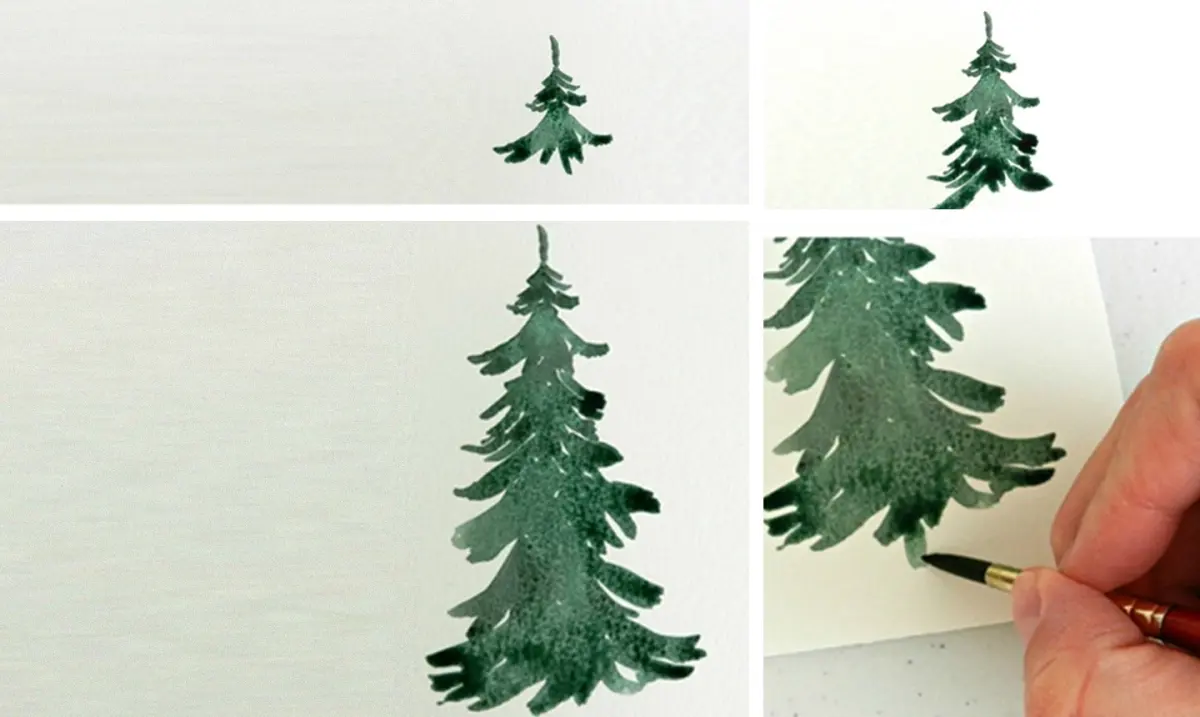
A pine tree is defined by its triangular shape and layered structure. Begin by lightly sketching a faint vertical line to act as the trunk, which serves as your guide for symmetry. Pine trees are widest at the bottom and taper to a point at the top, so visualize a series of stacked, irregular triangles as you work.
When you begin painting, work from the top of the tree downward. The branches near the peak are short and close together, while the lower branches are longer and more spread out. By keeping the top light and the base darker, you create a sense of scale and volume. Follow these steps to establish the form:
- Paint a thin, light-colored vertical line for the trunk.
- Use short, horizontal strokes starting from the center and moving outward.
- Leave small gaps between the branches to allow light to filter through.
- Gradually increase the length of your strokes as you descend the trunk.
How to create realistic pine needle texture?
The key to a realistic pine tree is the "dry-brush" technique. This involves using a brush that is damp but not saturated with water, allowing the bristles to splay slightly. When you drag this brush across the paper, the texture of the grain breaks up the paint, creating the appearance of thousands of individual needles.
Vary your brush pressure to create organic, jagged edges rather than perfectly straight, uniform lines. If the paint is too wet, the branches will look like solid blocks of color rather than needles. If you find your brush is too loaded with water, dab it onto a paper towel before touching the paper. This technique is essential for capturing the airy, feathery quality of pine foliage, especially on the outer edges of the branches.
Common mistakes when painting pine trees?
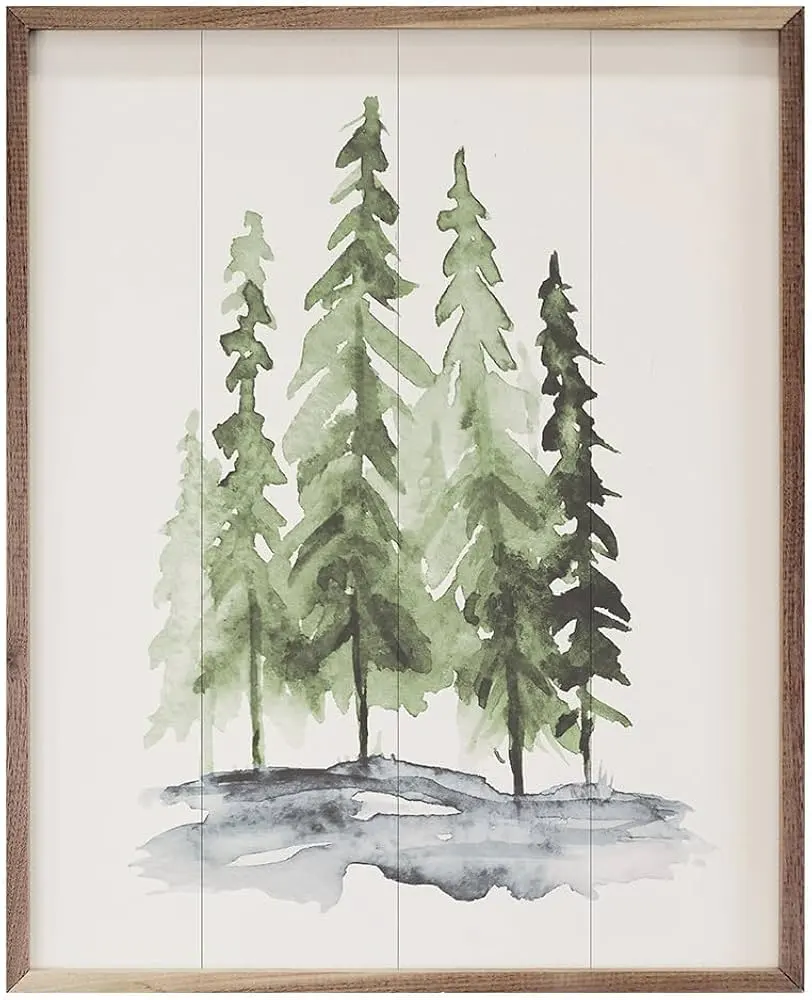
One of the most frequent errors is painting a tree that looks too symmetrical or "stiff." Nature is rarely perfectly balanced, so avoid making every branch on the left mirror the one on the right. Instead, stagger your branches and vary their lengths to make the tree appear more natural and wind-blown.
Another common mistake is using a single, flat shade of green. A pine tree viewed from a distance has shadows, highlights, and variations in color due to the density of the needles. If you use only one color, the tree will appear flat and two-dimensional. Always mix your greens on the palette first, adding blues for shadows and yellows or browns for areas catching the sunlight. Avoid these pitfalls:
- Overworking the paint, which muddies the colors.
- Using too much water, causing the branches to bleed into one another.
- Creating a tree that is too uniform in shape, lacking the characteristic "pine" silhouette.
How to add depth and shadows to pine trees?
To give your pine tree a three-dimensional appearance, you must focus on the contrast between light and shadow. After your initial layer of green has dried, mix a darker, more concentrated version of your green using Indigo or a touch of black. Apply this darker pigment to the underside of the branches and toward the center of the tree where the foliage is densest.
Adding a final, subtle layer of "negative space" can also enhance the effect. By painting the background sky or distant trees around the edges of your pine, you define the silhouette more clearly. If the tree still looks too light, use a "glazing" technique to add a thin, transparent wash of dark green over the shadowed areas. This process builds depth without obscuring the texture you previously created, resulting in a professional, layered look that captures the true essence of a pine tree.
Key facts
- Use a round brush with a fine point to create the tapered needles characteristic of pine branches.
- Mix a palette of sap green, Prussian blue, and a touch of burnt umber to achieve a realistic, deep forest green.
- Start your painting with a light vertical line to act as the trunk, ensuring the tree remains balanced and upright.
- Apply paint using a "dabbing" motion to mimic the texture of pine needles rather than using smooth, continuous strokes.
- Work from the top of the tree downward, making the branches wider and more pronounced as you reach the base.
- Allow layers to dry completely before adding shadows to prevent the colors from bleeding into a muddy mess.
The bottom line
Painting a pine tree requires a balance of structure and organic texture. By using a dabbing technique with a round brush and varying your green pigment mixtures, you can successfully capture the layered, needle-filled appearance of the tree. Focus on maintaining an irregular silhouette to ensure your work looks natural, and always remember that layering darker colors over dry, lighter washes is essential for depth.
People also ask
How do I create the appearance of depth in a pine tree?
Paint the branches closer to the viewer with a darker, more saturated green and use a lighter, diluted wash for the branches in the back. This contrast creates a sense of three-dimensional volume.
What is the best paper to use for watercolor trees?
Use 140-pound (300 gsm) cold-pressed watercolor paper. Its textured surface holds pigment well and prevents the water from pooling too much.
Should I paint the trunk before or after the needles?
It is best to paint the trunk first as a guide, but keep it light. You can refine the trunk’s color and texture once the foliage is established.
How do I prevent the tree from looking like a green triangle?
Vary the length and angle of your brushstrokes to create an irregular, organic silhouette. Real pine trees have gaps and uneven branch growth, so avoid perfect symmetry.
Can I use white paint to add highlights to the needles?
Avoid using opaque white paint, as it looks chalky. Instead, use the "negative painting" technique by leaving small areas of the white paper untouched to represent light hitting the needles.
Why does my green paint look dull when it dries?
Watercolor paint lightens significantly as it dries. Mix your colors slightly darker than you want the final result to be to account for this shift.
This answer was created with the help of AI research tools and reference sources. Spotted an error? Let us know — we correct mistakes quickly. See our editorial policy.