How do you paint a boat with watercolor?
Short answer
Painting a boat with watercolor requires careful planning of light and shadow, particularly regarding reflections on the water. Use masking fluid to preserve white highlights, build colors in thin, transparent layers, and focus on the structural geometry of the hull. Always work from light to dark to maintain luminosity and clarity.
On this page
How to paint a boat in watercolor for beginners
Beginners should start by sketching the basic geometric shapes of the boat, such as the hull, mast, and deck, using a light graphite pencil. Focus on the silhouette rather than intricate details, as watercolor is best suited for capturing the mood and light of a nautical scene. Keep your paper at a slight incline to allow the paint to flow naturally, which helps in creating smooth, even washes for the sky and water.
When choosing materials, opt for cold-press watercolor paper with a weight of at least 140 pounds (300 gsm) to prevent warping when wet. Use a round brush for general shapes and a smaller detail brush for rigging or reflections. Always test your colors on a scrap piece of paper before applying them to your main work, as watercolor dries significantly lighter than it appears when wet.
What supplies do you need for watercolor boats
To achieve professional results, you need a basic palette of high-quality pigments. Essential colors include Cerulean Blue, Ultramarine, Burnt Sienna, and a neutral gray for shadows. These colors allow you to mix the varied tones required for weathered wood, reflective water, and atmospheric skies. Ensure your brushes are synthetic or sable, as these hold enough water to cover large areas without leaving streaks.
- Watercolor paper (140 lb cold-press).
- A set of artist-grade watercolor paints.
- Two water containers: one for rinsing and one for clean water.
- Masking fluid for preserving white highlights on the hull.
- A palette for mixing colors.
- Painter’s tape to secure the paper to a board.
How to paint realistic boat reflections
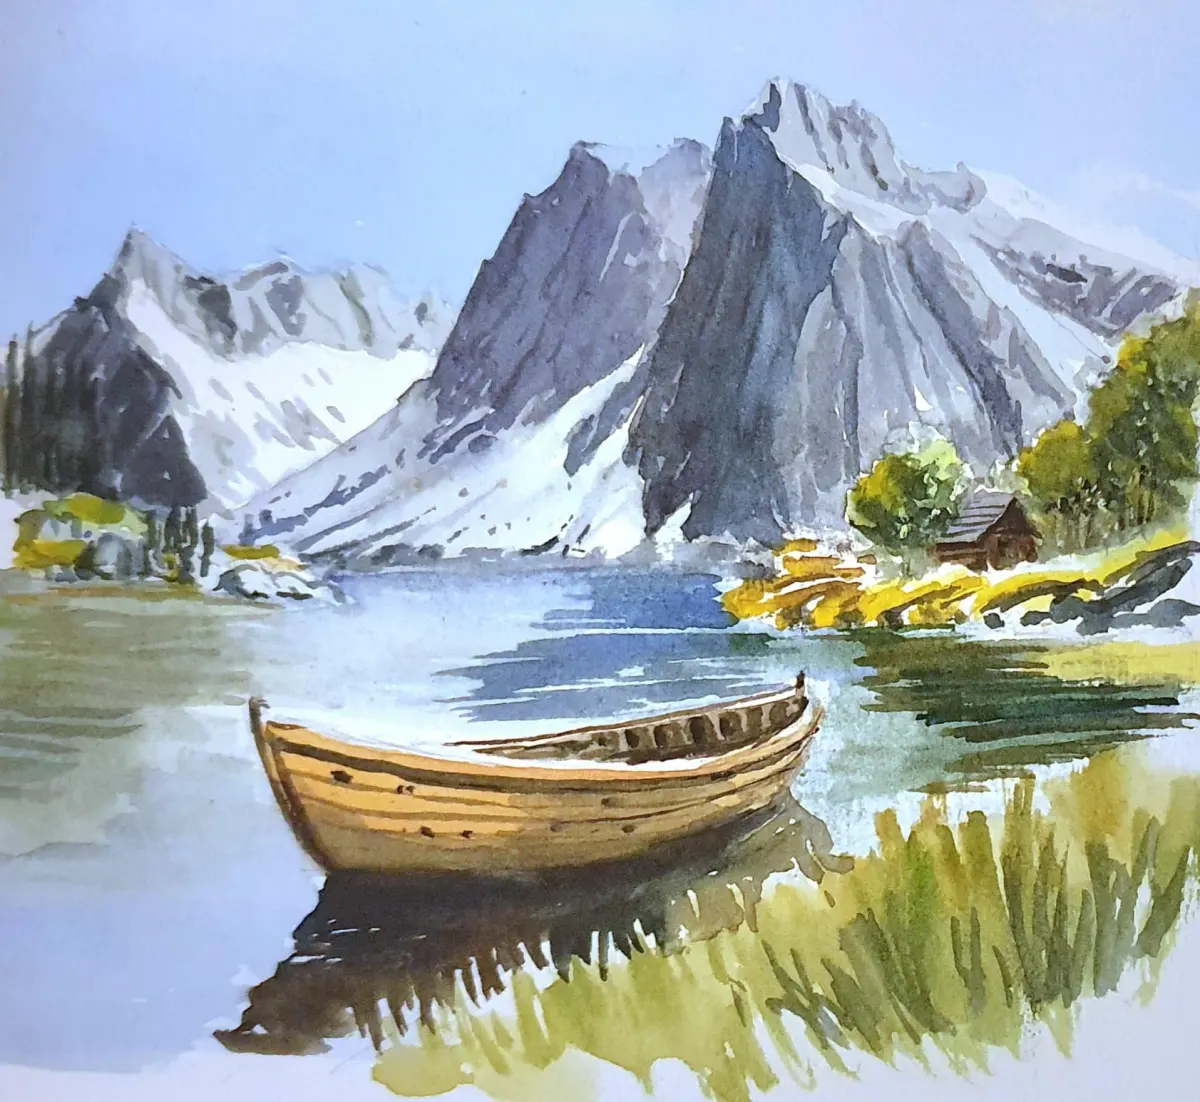
Reflections are the most critical element in making a boat appear as though it is floating on water. To capture this, paint the water surface first using horizontal strokes, leaving the area directly beneath the boat slightly lighter. Once the initial wash is dry, apply darker, vertical strokes that mimic the shape of the boat above. These reflections should be slightly distorted and darker than the boat itself to create depth.
When painting the water, use a "wet-on-wet" technique to allow colors to bleed into one another, creating a soft, fluid look. If the reflection looks too sharp, gently soften the edges with a damp, clean brush. Remember that the water surface is rarely a flat mirror; incorporate small ripples by using a dry-brush technique, where very little paint is on the brush, to catch the texture of the paper.

Common mistakes when painting boats in watercolor
One of the most frequent errors is overworking the painting by applying too many layers, which results in a muddy, dull appearance. Watercolor thrives on transparency; if you lose the white of the paper, the painting loses its light. Avoid "scrubbing" the paper with your brush, as this damages the fibers and prevents the paint from settling evenly. Instead, apply bold, confident strokes and leave them alone to dry.
Another common mistake is neglecting the perspective of the boat. Even a simple boat has a vanishing point, and if the lines of the deck or hull are skewed, the entire structure will look unstable. Always use a ruler or a steady hand to align the horizontal lines of the boat with the horizon line of the water. If the boat looks like it is sliding off the water, it is likely because the perspective lines are inconsistent.
How long does it take to paint a boat
The time required depends on the complexity of the scene, but a small study can be completed in 45 to 60 minutes. A more detailed landscape involving multiple boats and complex rigging may take several hours or even multiple sessions. The drying time between layers is the most significant factor, as rushing the process often leads to unwanted color bleeding. Patience is essential for maintaining crisp edges and vibrant colors.
- Allow at least 15 minutes for the initial wash to dry completely.
- Dedicate 20 minutes to sketching and applying masking fluid.
- Spend 30 minutes layering shadows and adding detail work.
- Use a hair dryer on a low, cool setting if you must speed up the drying process.
- Finalize the painting by removing masking fluid and adding small, sharp highlights with a white gouache pen if necessary.
By following these steps and allowing the medium to do the work, you will create a vibrant, professional-looking watercolor painting.
Key facts
- Use heavy-weight, cold-press watercolor paper (at least 300 gsm) to prevent buckling when applying water-heavy washes.
- Masking fluid is essential for preserving crisp white highlights on hulls, rigging, and reflected sunlight on water.
- Start by painting the sky and water with large, wet-on-wet washes before focusing on the detailed structure of the boat.
- Use a "dry brush" technique—applying paint with a damp rather than soaking brush—to create texture on weathered wood or rusted metal.
- Limit your palette to three or four primary colors to ensure color harmony and prevent the painting from looking muddy.
- Always paint from the background to the foreground, leaving the most intricate details of the boat for the final layers.
The bottom line
Painting a boat in watercolor requires a methodical approach that balances loose, atmospheric washes with precise, controlled details. By prioritizing the background, preserving white highlights with masking fluid, and utilizing varied brush techniques, you can capture the essence of a vessel on the water. Mastery comes from patience, allowing layers to dry completely, and resisting the urge to over-paint, which ensures the final artwork remains vibrant and clear.
People also ask
Should I paint the boat or the water first?
It is generally best to paint the sky and water first using broad, soft washes. Once the background is dry, you can layer the boat on top, which helps the vessel appear grounded in its environment.
How do I make the water look realistic?
Use horizontal brushstrokes and vary the intensity of your blues and greens. Leave small gaps of white paper between strokes to represent the sparkle of light on the surface.
What brushes are best for painting boats?
A large mop brush is ideal for the initial background wash, while a small round brush with a fine point is necessary for rigging and railings. A flat brush works well for painting the straight lines of a hull.
How do I fix a mistake if I use too much paint?
If the paint is still wet, you can lift it off by dabbing the area with a clean, dry paper towel or a thirsty brush. If the paint is dry, you can sometimes gently scrub the area with a damp brush, though this may damage the paper surface.
Why does my watercolor painting look dull?
Dullness often results from overworking the paint or mixing too many colors together. Try to keep your brushstrokes confident and avoid layering more than three times in the same spot.
Can I use white paint for highlights?
While you can use opaque white gouache for final highlights, it is better to preserve the white of the paper by using masking fluid or careful brushwork. This keeps the painting looking transparent and luminous.
This answer was created with the help of AI research tools and reference sources. Spotted an error? Let us know — we correct mistakes quickly. See our editorial policy.