How do you draw a school bus?
Short answer
Drawing a school bus involves sketching a long, rectangular body with a slightly smaller rectangular cabin on top. Focus on creating a horizontal, boxy profile. Add circular wheels at the base, rectangular windows along the side, and a prominent front bumper. Use bold yellow coloring to complete the iconic, recognizable school bus appearance.
On this page
How to draw a school bus step by step
To begin your drawing, start with the main chassis of the vehicle. Sketch a large, elongated rectangle that serves as the body. On top of this rectangle, place a smaller, slightly shorter rectangle toward the front to represent the driver’s cabin and the passenger compartment. Ensure the lines are straight and clean to establish the bus's sturdy, industrial look.
Once the frame is set, follow these steps to add the essential features:
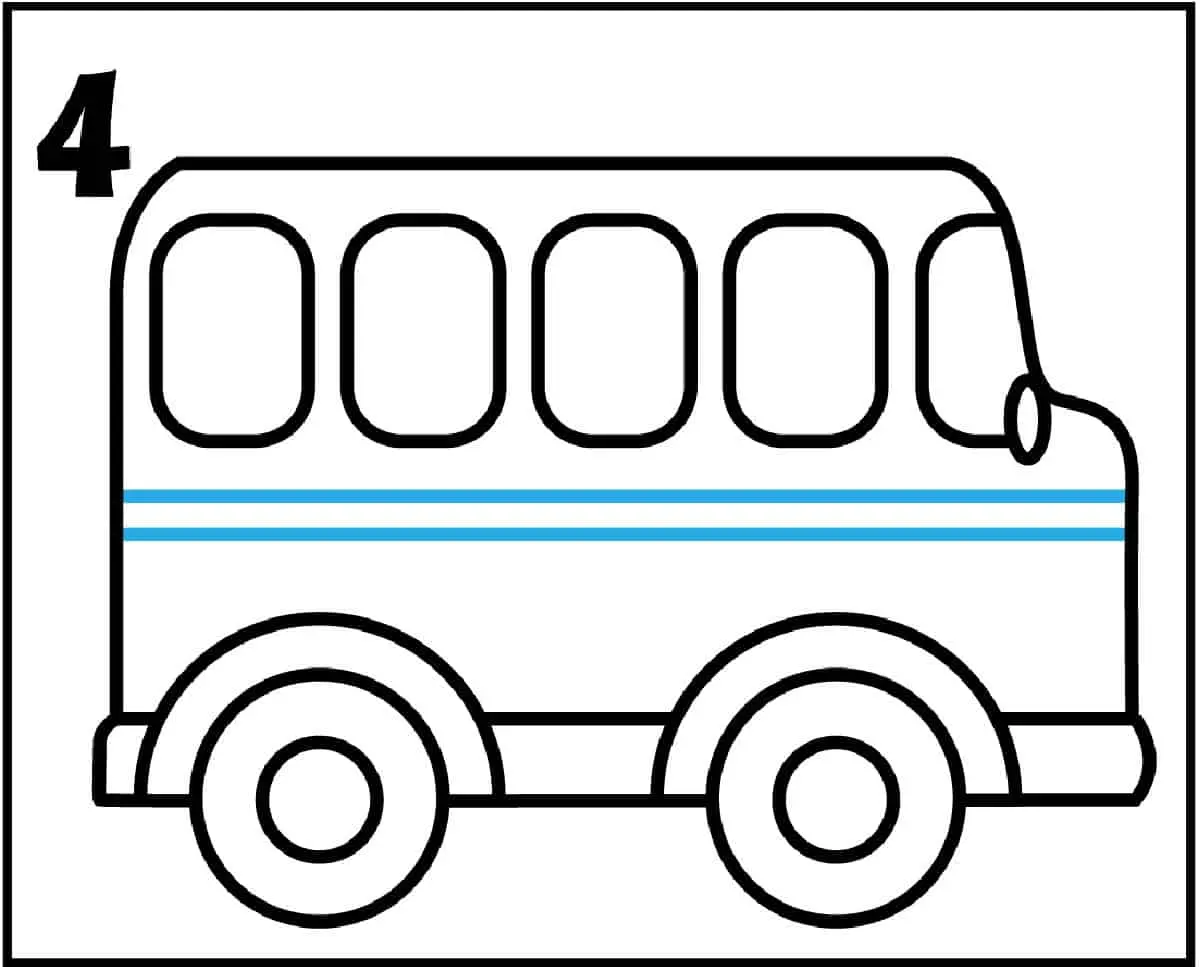
- Draw two large circles at the bottom of the long rectangle for the wheels.
- Add a series of evenly spaced, smaller vertical rectangles along the side of the bus to represent the windows.
- Sketch a small rectangle at the front for the radiator grille and two small squares for the headlights.
- Draw a horizontal line across the middle of the side panels to indicate the rub rails, which are the protective metal strips found on real buses.
Best drawing tools for beginners
For those new to sketching vehicles, using a graphite pencil with an HB lead is ideal. This allows you to make light, preliminary marks that can be easily erased if you make a mistake. A ruler is an essential tool for beginners, as it helps maintain the rigid, geometric lines that define the shape of a school bus.
Once your proportions are correct, you can move on to outlining and coloring. Fine-liner pens or markers are excellent for tracing over your pencil lines to give the drawing a professional, finished look. If you intend to add color, alcohol-based markers or colored pencils work best for achieving the distinct, vibrant yellow hue associated with North American school buses. Always test your colors on a scrap piece of paper first to ensure they match the desired shade.
How to get the proportions right
The most common challenge when drawing a school bus is maintaining the correct length-to-height ratio. A school bus is significantly longer than it is tall, so avoid making the body too compact. If the rectangle is too short, the bus will look like a van or a small shuttle rather than a standard yellow school bus.
To ensure accuracy, use the wheels as a unit of measurement. A standard school bus usually has enough space between the front and back wheels to fit approximately three or four more wheels in between. By keeping this spacing in mind, you can ensure that the bus appears long and authentic. Always check your horizontal lines against the edge of your paper to ensure the vehicle does not appear tilted or distorted.
Common mistakes when drawing buses
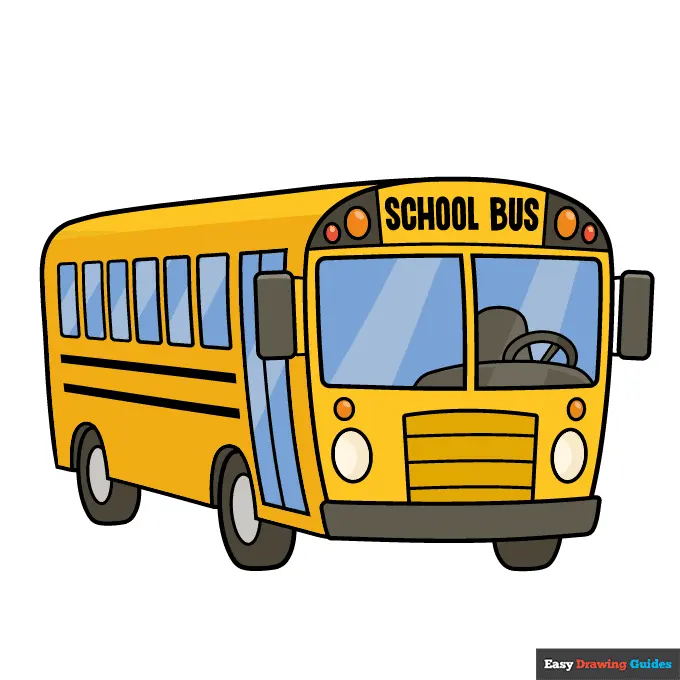
One frequent error is failing to include the specific safety features that define a school bus. Beginners often forget to draw the stop sign on the driver’s side or the cross-view mirrors that extend from the front corners. These details are vital for making the drawing look like a genuine school bus rather than a generic yellow box on wheels.
Another mistake is placing the windows too high or too low on the body panels. The windows should be centered vertically on the upper half of the main rectangle. Additionally, avoid drawing the wheels too small. Wheels on a bus are substantial and should be positioned slightly recessed into the wheel wells to provide a sense of depth and weight to the vehicle.
Why color choice matters for realism
The color yellow is synonymous with school buses due to a 1939 conference where the color "National School Bus Glossy Yellow" was chosen for high visibility. When coloring your drawing, aim for a bright, warm yellow. Using a flat, solid color can sometimes look dull, so consider adding subtle shading along the bottom of the bus to give it a three-dimensional appearance.
To enhance the final image, use a darker gray or black for the tires and the window frames. Adding a slight reflection on the windows with a white gel pen can make the glass look realistic. By focusing on these small details, you transform a simple geometric sketch into a recognizable and well-executed illustration. Always take your time with the final coloring stage to ensure the lines remain sharp and the yellow is applied evenly across the entire surface of the bus.
Key facts
- Standard North American school buses are painted a specific color known as National School Bus Glossy Yellow.
- The rectangular body of a bus is typically twice as long as it is tall, providing a stable geometric foundation.
- Always include the iconic "STOP" sign on the driver’s side, which extends horizontally when the bus is parked.
- Buses feature large, panoramic windows along the side, usually arranged in a repeating grid pattern.
- The front hood of a traditional bus is long and squared-off, distinct from the flat-front "transit-style" design.
- Adding dual rear wheels provides a sense of weight and realism, as these are necessary to support the vehicle's size.
The bottom line
Drawing a school bus effectively relies on mastering its distinct rectangular silhouette and iconic yellow color. By focusing on the repeating window pattern, the functional safety equipment like the stop arm, and the heavy-duty wheels, you can create a recognizable and accurate representation. Practice using a straightedge to maintain clean lines, as the bus’s rigid, boxy structure is the most important element for achieving a realistic look.
People also ask
Why are school buses yellow?
They are painted yellow because this specific hue is the most visible color to the human eye, especially in low-light conditions like dawn or dusk. This high-visibility choice helps motorists identify the bus quickly to improve student safety.
What are the main parts of a school bus exterior?
Key components include the long rectangular body, the front hood or flat nose, the large windshield, and the flashing red and amber signal lights. You should also include the side-mounted stop arm and the crossing control arm at the front bumper.
How do I draw the windows correctly?
Draw a long horizontal rectangle along the side of the bus and divide it into equal vertical segments. Ensure these windows are spaced evenly to maintain the structural look of a standard passenger vehicle.
Should I draw the bus from the side or the front?
A side profile is the easiest way to capture the length and the iconic window pattern of the bus. A front-facing view is more challenging because it requires accurate perspective to show the width of the hood and the placement of the headlights.
What is the purpose of the crossing arm?
The crossing arm is a safety device that extends from the front bumper to force students to walk far enough in front of the bus so the driver can see them. It is a critical detail that adds authenticity to your drawing.
How can I make my drawing look more professional?
Use a straightedge to ensure the long lines of the bus body are perfectly horizontal. Adding small details like side mirrors, door handles, and the black rub rails along the side will significantly improve the overall accuracy of your work.
This answer was created with the help of AI research tools and reference sources. Spotted an error? Let us know — we correct mistakes quickly. See our editorial policy.