How do you draw a ribcage step by step?
Short answer
Drawing a ribcage requires constructing a cage-like structure that tapers from the top toward the bottom. By sketching a central sternum, attaching twelve pairs of curved ribs, and anchoring them to the thoracic spine, you create a realistic form. Focus on the anatomical slant of the ribs to ensure structural accuracy.
On this page
How to draw a ribcage step by step
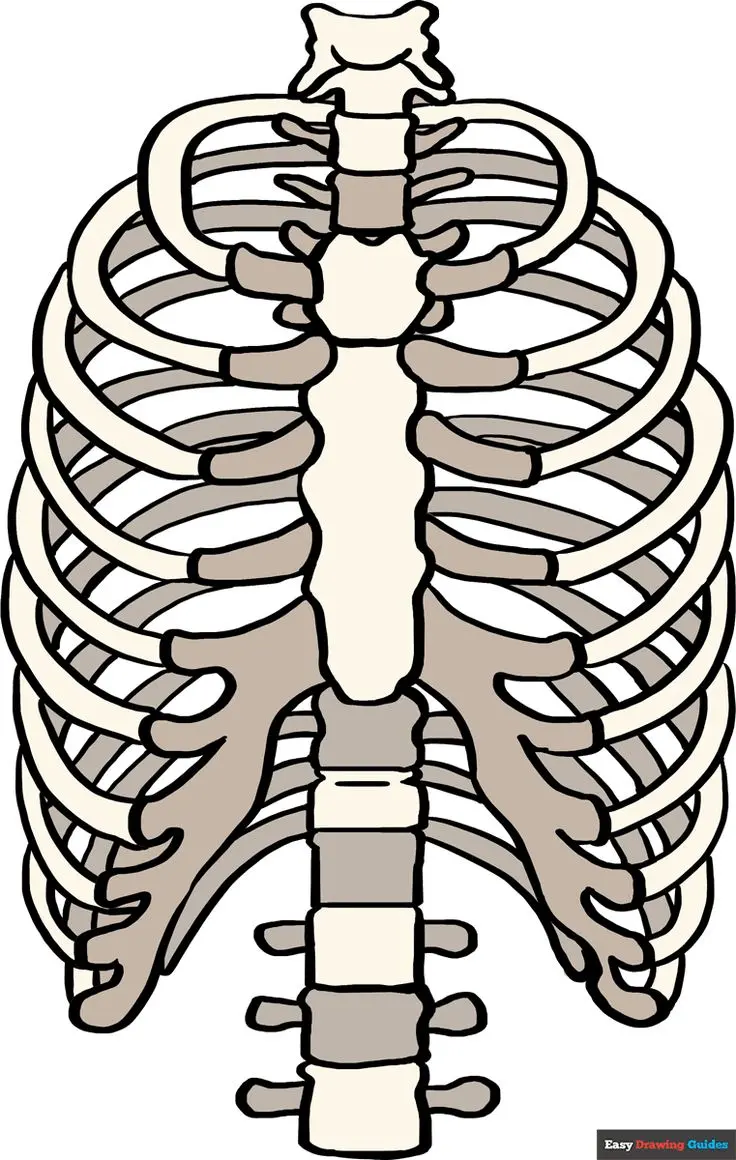
To begin, draw a vertical line representing the sternum, which acts as the central anchor for the ribcage. At the top of this line, sketch a small, shield-shaped bone known as the manubrium. From here, draw a series of twelve curved lines extending outward on both sides to represent the ribs. These lines should arc downward toward the spine, creating a barrel-like volume that protects the internal organs.
- Start with a central vertical line for the sternum.
- Outline the manubrium at the top and the xiphoid process at the bottom.
- Sketch twelve pairs of ribs, starting wide at the top and narrowing toward the waist.
- Connect the ribs to the thoracic vertebrae at the back of the torso.
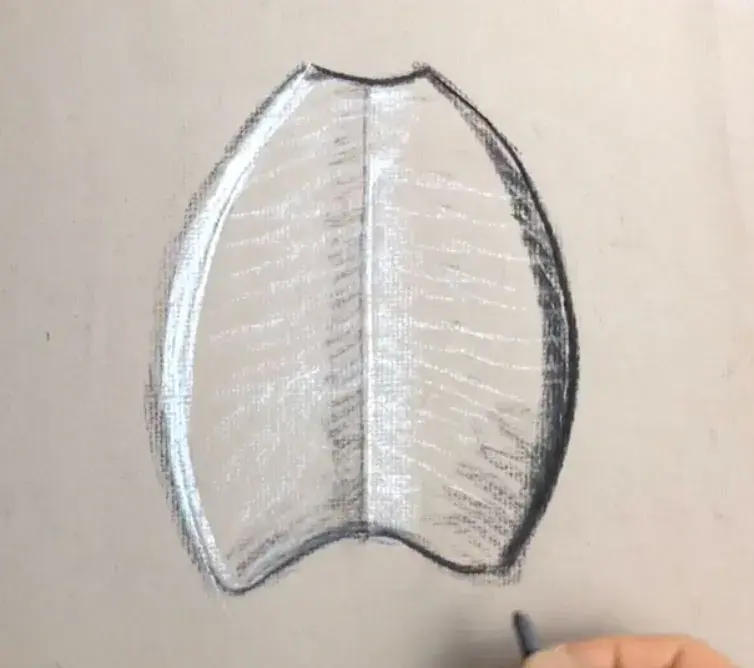
- Add thickness to the rib edges to give the drawing a three-dimensional appearance.
Ensure the spacing between each rib remains consistent, though the curvature should become more pronounced as you move toward the middle of the chest. The bottom ribs, often called floating ribs, do not attach directly to the sternum and should be drawn with a slightly shorter, more flexible arc to reflect their true anatomical position.
What is the anatomy of the human ribcage
The human ribcage consists of 24 individual ribs, arranged in 12 pairs, which form a protective enclosure for the heart and lungs. The first seven pairs are known as "true ribs" because they attach directly to the sternum via costal cartilage. The next three pairs are "false ribs," which connect to the cartilage of the rib above them rather than the sternum itself. The final two pairs, the floating ribs, remain unattached at the front, providing flexibility for the lower torso.
Understanding these connections is vital for realistic illustration. The sternum serves as the rigid front pillar, while the thoracic spine acts as the structural foundation at the back. By visualizing the ribcage as a flexible cage rather than a solid box, you can better represent how the torso moves and breathes. The angle of the ribs is not horizontal; they slope downward from the spine toward the front, a feature that defines the characteristic shape of the human chest.
Common mistakes when drawing a ribcage
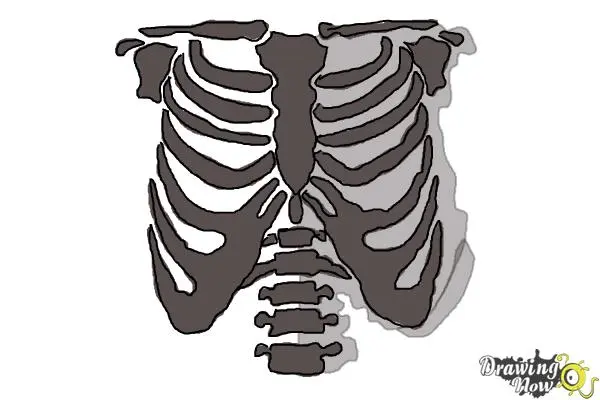
A frequent error is drawing the ribs as perfectly horizontal lines, which makes the chest look static and unnatural. In reality, the ribs have a distinct downward slope, which changes depending on the person's posture and breathing. Another common mistake is failing to account for the thickness of the bones. If you draw the ribs as thin, flat lines, the ribcage will lack the structural integrity required to support the muscles of the chest and back.
- Drawing the ribcage too wide or too narrow for the hips.
- Neglecting the downward angle of the ribs as they move toward the sternum.
- Making the ribs look like straight bars instead of curved, organic shapes.
- Forgetting to include the costal cartilage that connects the ribs to the sternum.
- Misplacing the sternum so that it does not align with the center of the torso.
Focusing on these details will prevent the drawing from looking like a flat diagram. Always check the proportions of the ribcage against the rest of the torso to ensure it fits naturally within the body's frame.
Best tools for drawing anatomical structures
For beginners, a simple graphite pencil set ranging from HB to 4B is ideal for capturing both the light structure and the deeper shadows of the ribcage. HB pencils are perfect for the initial, light construction lines that define the cage’s volume. The softer 4B pencils allow you to add weight to the ribs, emphasizing the depth where the bones overlap or recede into the back. Using a kneaded eraser is also essential, as it allows you to lift graphite gently to create highlights on the rounded surfaces of the bones.
If you prefer digital tools, use a pressure-sensitive tablet to control the thickness of your lines. Varying your line weight—thicker for the foreground ribs and thinner for those further away—creates an immediate sense of depth. Whether working on paper or a screen, keep your strokes fluid. The ribcage is a series of curves, not straight lines, so avoid rigid, mechanical marks that make the anatomy look stiff and lifeless.
How to add shading to a ribcage drawing
Shading is the final step that transforms a flat outline into a three-dimensional object. Identify a primary light source, such as one coming from the upper right, and apply shadows to the opposite side of each rib. Because each rib is a rounded, bone-like structure, you should use a soft gradient of shadow to suggest its cylindrical shape. The area where the ribs meet the sternum and the spine should be the darkest, as these points create natural recesses.
Pay close attention to the cast shadows that one rib might throw onto the one below it. These small, dark slivers of shadow are what provide the most realism, as they indicate the physical space between the bones. By layering your shading, you can define the volume of the entire ribcage, making it appear as if it is housing the lungs and heart beneath the surface. Always blend your shadows smoothly to ensure the transitions look natural and professional.
Key facts
- The human ribcage consists of 24 ribs, organized into 12 pairs that attach to the thoracic vertebrae.
- True ribs (pairs 1–7) attach directly to the sternum via costal cartilage.
- False ribs (pairs 8–10) connect to the cartilage of the rib above them rather than the sternum.
- Floating ribs (pairs 11–12) do not attach to the sternum at all, ending in the abdominal musculature.
- The sternum, or breastbone, is a flat, T-shaped bone located in the center of the anterior chest wall.
- When drawing, visualize the ribcage as a flexible, cage-like cylinder that tapers slightly toward the bottom.
The bottom line
To draw an accurate ribcage, begin by sketching a central vertical line for the sternum and a cylinder to define the volume. Map out the 12 pairs of ribs, curving them downward from the spine toward the front. Focus on the transition between the true, false, and floating ribs to achieve a natural look. Mastering these proportions ensures a realistic foundation for any anatomical drawing.
People also ask
How many ribs are in the human body?
An average adult human has 24 ribs, arranged in 12 pairs. Both men and women typically possess the same number of ribs.
What is the function of the ribcage?
The primary purpose of the ribcage is to protect vital organs such as the heart and lungs. It also provides structural support for the upper body and facilitates breathing.
Why are some ribs called floating ribs?
Floating ribs are the 11th and 12th pairs, which do not have a bony or cartilaginous connection to the sternum. They are anchored only to the spine, allowing for greater mobility during respiration.
Should I draw the ribs as individual bones or a solid mass?
For artistic purposes, start by drawing a simplified cage shape to establish volume. Once the structure is set, add individual rib lines to suggest the underlying anatomy without over-detailing every segment.
Where does the ribcage end on the human torso?
The ribcage typically ends at the level of the upper abdomen, just below the solar plexus. The bottom edge of the cage forms the costal arch, which slopes downward toward the spine.
What is the most common mistake when drawing a ribcage?
A frequent error is drawing the ribs too boxy or rigid. Remember that the ribcage is curved and organic, and its shape changes slightly as the torso twists or bends.
This answer was created with the help of AI research tools and reference sources. Spotted an error? Let us know — we correct mistakes quickly. See our editorial policy.