How do you draw a realistic skull?
Short answer
Drawing a realistic skull requires mastering the underlying geometric structure before adding anatomical details. Begin by constructing a sphere and a box for the jaw, then map the eye sockets, nasal cavity, and teeth. Focus on light and shadow to create volume, ensuring the proportions align with standard human cranial anatomy.
On this page
How to structure the basic skull shape
The foundation of a realistic skull drawing is a simple geometric construction. Start by drawing a circle to represent the cranium and attach a rectangular or trapezoidal shape below it to serve as the jaw. This simple framework ensures that the proportions remain accurate before you begin adding complex features like the cheekbones or the brow ridge.
Divide the circle into four quadrants using a vertical line for symmetry and a horizontal line for the brow. The eye sockets should sit directly below the horizontal line, spaced about one eye-width apart. By establishing these landmarks early, you prevent the common error of making the skull look lopsided or distorted.
- Sketch a light circle for the brain case.
- Add a vertical line through the center to maintain symmetry.
- Draw a horizontal line across the center for the brow ridge.
- Attach a box-like structure for the maxilla and mandible.
- Refine the transition between the cranium and the jaw.
Best shading techniques for realistic depth
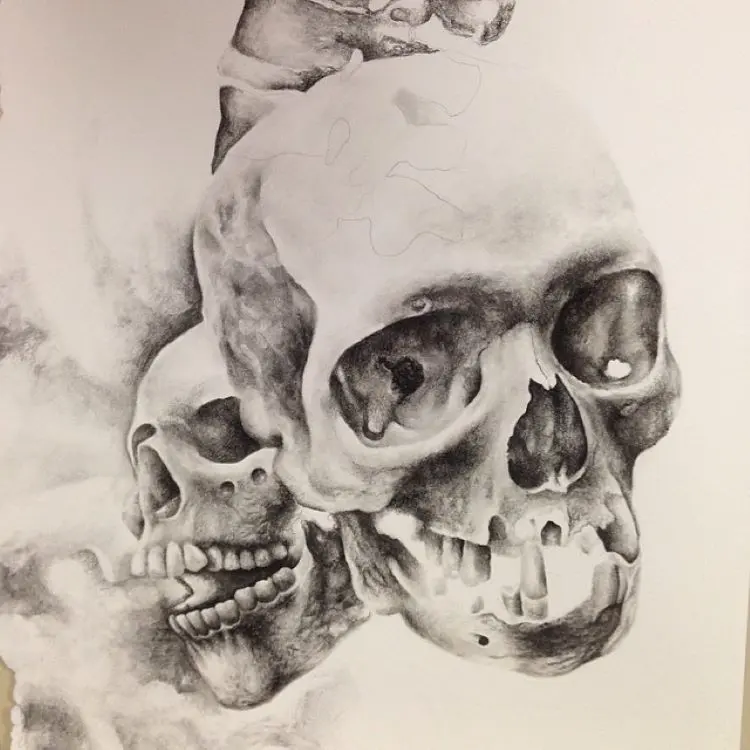
Shading is the most critical element in transforming a flat outline into a three-dimensional object. A skull is composed of curved, bony surfaces that react to light in specific ways. Always identify your light source first to determine where the highlights and deep shadows will fall across the cheekbones, temples, and jawline.
Use a range of graphite pencils, such as 2H for initial light sketches and 4B or 6B for deep shadows. Build your values gradually, starting with soft mid-tones and layering darker values in the crevices. The deepest shadows typically appear inside the eye sockets, the nasal cavity, and the space between the teeth, which provides the necessary contrast to make the bone appear solid.
- Use cross-hatching or smooth blending to transition between light and shadow.
- Keep highlights crisp on the forehead and the bridge of the nose.
- Apply darker pressure in the deepest recesses to increase the sense of depth.
- Use a kneaded eraser to lift graphite for subtle reflected light on the chin.
How to draw accurate skull proportions
Human skulls follow consistent anatomical proportions that are vital for realism. The distance from the top of the cranium to the bottom of the eye sockets is roughly equal to the distance from the eye sockets to the bottom of the chin. Maintaining these ratios prevents the skull from appearing too elongated or overly compressed.
The teeth are often drawn incorrectly by beginners who treat them as individual blocks. Instead, view the upper and lower teeth as two curved, continuous arches that fit within the jaw structure. Ensure that the teeth are slightly angled toward the center, following the natural curve of the alveolar process, which creates a more organic and anatomically correct appearance.
- Measure the width of the cranium compared to its height.
- Align the cheekbones with the lower edge of the nasal cavity.
- Ensure the jaw hinge connects near the level of the eye sockets.
- Check that the teeth are not perfectly vertical but follow a slight curve.
Common mistakes when drawing skulls
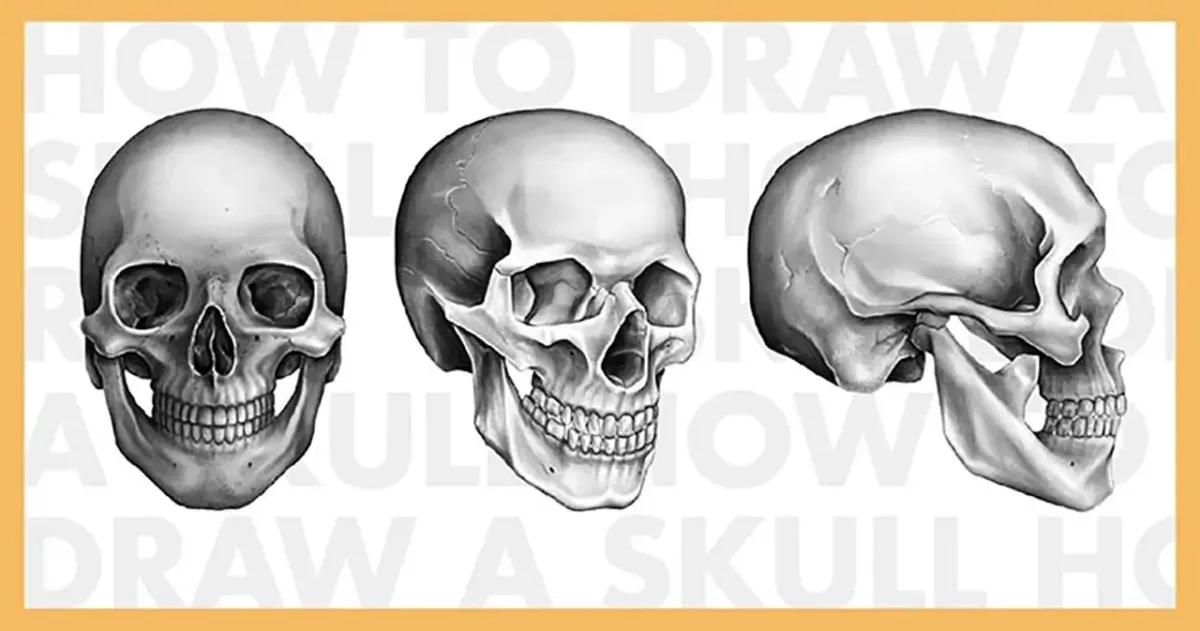
One frequent error is drawing the eye sockets as perfect circles. In reality, the orbits are irregular, somewhat rectangular shapes with rounded corners that tilt slightly inward. Another mistake is omitting the zygomatic arch, which is the bridge of bone connecting the cheekbone to the side of the skull. Without this structure, the skull looks like it is missing a vital component of the face.
Artists often struggle with the transition between the cranium and the jaw, sometimes making the jaw appear disconnected. Remember that the mandible is a separate bone that rotates at the temporomandibular joint. By clearly defining the jaw hinge and the angle of the mandible, you ground the skull in a realistic, functional anatomy that feels heavy and substantial rather than like a floating mask.
- Avoid drawing the teeth as individual, uniform rectangles.
- Do not make the nasal cavity a simple triangle; it has complex internal structures.
- Ensure the brow ridge is prominent, as it creates the primary shadow for the eyes.
- Do not ignore the slight asymmetry present in all natural skeletal structures.
How long does it take to master skull drawing
Mastering the skull requires consistent practice and an understanding of cranial anatomy. A beginner might spend several hours on a single study to get the proportions correct, while an experienced artist can sketch a convincing skull in under thirty minutes. The time invested in learning the bone landmarks significantly reduces the time needed for future drawings.
Focus on quality over speed during your initial learning phase. Spend time observing real skeletal references or high-quality anatomical casts to understand how light interacts with bone texture. By studying the specific anatomy of the temporal lines, the mastoid process, and the occipital bone, you will eventually be able to draw a skull from memory with high accuracy and artistic confidence.
Key facts
- The human skull is divided into two main parts: the neurocranium, which houses the brain, and the viscerocranium, which forms the facial structure.
- A standard adult skull is roughly egg-shaped, with the widest point located near the parietal bones toward the back of the cranium.
- The eye sockets, or orbits, are positioned roughly halfway down the total height of the head, not at the top.
- The zygomatic bones (cheekbones) create a distinct horizontal bridge that connects the upper jaw to the temporal bone.
- Use the "Loomis Method" to establish correct proportions, placing the brow line, nose line, and chin line at equal intervals.
- Always sketch the mandible (jaw) as a separate, movable structure attached to the skull at the temporomandibular joint.
The bottom line
Drawing a realistic skull requires moving beyond surface details to understand the underlying skeletal architecture. By mastering the proportions of the cranium and jaw, you create a solid foundation for your artwork. Focus on the three-dimensional volume of the orbits and cheekbones rather than just outlines. With consistent practice of these anatomical principles, you will gain the ability to render complex bone structures with professional accuracy.
People also ask
How do I measure the correct proportions of a skull?
Divide the height of the head into thirds: from the hairline to the brow, from the brow to the bottom of the nose, and from the nose to the chin. This classic canon of proportion ensures your drawing remains anatomically grounded.
Should I start with the teeth or the eye sockets?
Start by defining the large masses like the cranium and the jaw before adding details. Drawing the orbits first helps anchor the rest of the facial features in the correct spatial relationship.
Why does my skull drawing look flat?
You are likely missing the "wrap-around" perspective of the forms. Use cross-contour lines to show how the surface curves around the temple and jaw to create a three-dimensional effect.
How do I draw the nasal cavity correctly?
The nasal opening is shaped like a rounded heart or an inverted triangle. It sits deep within the skull, so use dark shading to emphasize the depth of the cavity.
What is the most common mistake when drawing teeth?
Beginners often draw individual teeth as separate white blocks. Instead, treat the teeth as a single curved cylinder that fits inside the horseshoe-shaped alveolar process of the jaw.
How do I make the skull look aged?
To show age, emphasize the loss of teeth and the resulting resorption of the alveolar bone. You can also add more prominent suture lines and a thinner, more fragile appearance to the bone structure.
This answer was created with the help of AI research tools and reference sources. Spotted an error? Let us know — we correct mistakes quickly. See our editorial policy.