How do you draw a skull?
Short answer
Drawing a skull requires mapping the basic geometric shapes of the cranium and jaw before refining anatomical details. By establishing a central axis and balancing the proportions of the eye sockets, nasal cavity, and teeth, you can construct a realistic representation. Focus on light and shadow to define the bone's complex, hollow structure.
On this page
How to structure the basic skull shape
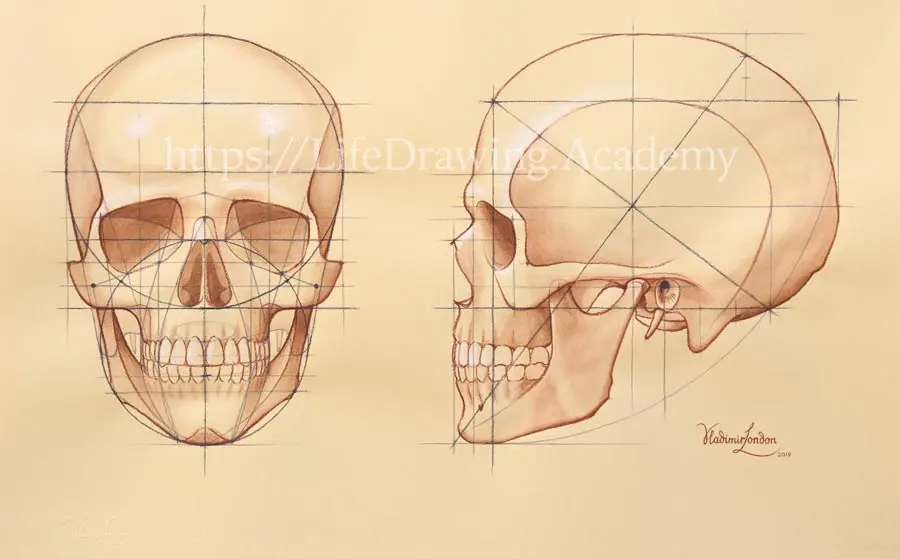
The foundation of a realistic skull begins with simple geometry rather than intricate detail. Start by drawing a circle to represent the cranium and a slightly flattened square or trapezoid beneath it for the jaw. A vertical line should divide the face down the center to ensure bilateral symmetry, while a horizontal line across the middle of the circle helps place the eye sockets.
Maintain these proportions to avoid a distorted appearance:
- The eye sockets should sit roughly halfway between the top of the skull and the bottom of the chin.
- The nasal cavity is typically triangular and positioned directly below the horizontal eye line.
- The jawbone connects to the cranium near the base of the circular cranium, not the top.
Keep your initial guide lines light so they can be erased or blended into the final shading later.
Best drawing tools for beginners
For those new to anatomical drawing, graphite pencils offer the most control over value and texture. A set ranging from 2H to 6B allows you to transition from light, structural sketching to deep, dramatic shadows. Use a 2H pencil for your initial layout, as it produces faint lines that do not indent the paper surface.
Consider these essential items for your kit:
- A kneaded eraser, which can be shaped to lift highlights or clean up small, precise areas.
- Smooth-finish drawing paper, which prevents the grain from interfering with fine lines.
- A blending stump or tortillon to soften shadows and create the smooth, bone-like appearance of a skull.
Using high-quality materials helps you focus on technique rather than fighting against smudging or paper texture.
How to draw realistic eye sockets and nose
The eye sockets, or orbits, are not perfectly round; they are irregular, boxy shapes that sit deep within the skull. When drawing them, focus on the thick edges of the bone rim, which catch the light. The nasal cavity is essentially a dark, inverted heart shape, divided by the thin vomer bone in the center.
To achieve depth in these areas, follow these steps:
- Establish the outer rim of the sockets with a medium-weight line.
- Fill the interior of the orbits with a dark tone, leaving the upper brow ridge lighter to suggest volume.
- Keep the nasal cavity as one of the darkest points in your drawing to create a sense of depth.
Avoid drawing flat, dark holes; instead, treat the eye sockets as three-dimensional voids that recede into the skull.
Why symmetry is essential for skulls
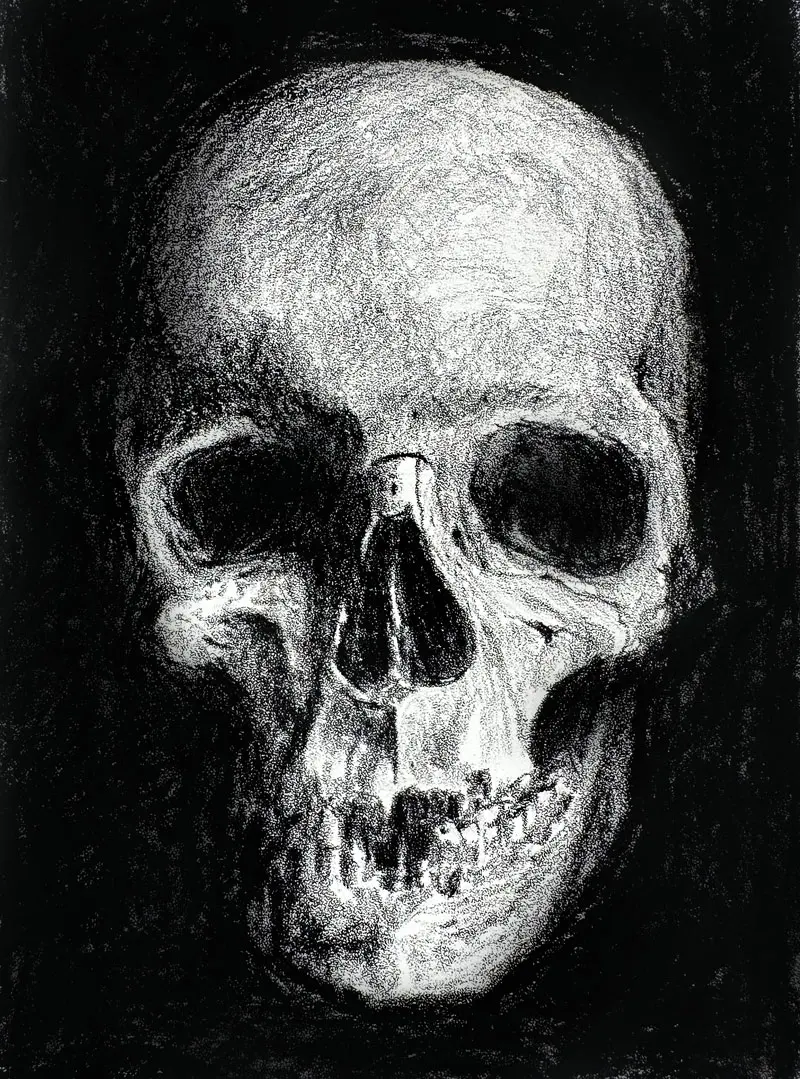
Symmetry is the primary factor that distinguishes a professional-looking skull from a sloppy sketch. Because the human skull is naturally balanced, even a slight tilt in the teeth or an uneven eye socket will make the entire drawing look "off." Always refer back to your central vertical axis line throughout the process to verify that both sides of the cranium match.
Common mistakes when balancing the skull include:
- Drawing the jaw wider on one side than the other, which makes the skull look like it is twisted.
- Misaligning the teeth so they do not center on the vertical axis, creating a lopsided grin.
- Failing to account for the perspective; if the skull is turned, the side further away should appear slightly compressed.
Periodically flip your paper or look at your drawing in a mirror to spot these imbalances quickly.
How to add texture and shading
The final stage of drawing a skull is applying value to mimic the smooth, hard surface of bone. Bone is not perfectly white; it has subtle variations in tone and texture, especially around the cheekbones and the jaw hinge. Use your darker pencils to emphasize the areas where the skull curves away from the light source, such as the temples and the underside of the jaw.
Follow these tips for realistic shading:
- Use cross-hatching or circular strokes to build up layers of graphite, creating a smooth transition between light and shadow.
- Leave the brightest areas, such as the bridge of the nose and the brow ridge, nearly white to represent the highlight of the bone.
- Add small, irregular pits or cracks near the jawline to suggest the texture of aging bone.
By carefully observing how light hits a curved surface, you can transform a flat, two-dimensional outline into a convincing, solid object that feels heavy and authentic.
Key facts
- The human skull is primarily composed of two main sections: the cranium, which houses the brain, and the facial skeleton.
- Start your sketch with a circle for the cranium and a slightly flattened shape below it for the jaw to establish correct proportions.
- The eye sockets are positioned roughly halfway down the total height of the head, not at the top of the skull.
- Use the "rule of thirds" for the face: the distance from the hairline to the brow, the brow to the nose, and the nose to the chin should be equal.
- A common mistake is drawing teeth as individual rectangles; instead, treat the teeth as a curved, unified arch that recedes into the jaw.
- Always establish a central vertical axis line to ensure the left and right sides of the skull remain symmetrical during the drawing process.
The bottom line
Drawing a realistic skull requires a disciplined approach to anatomical structure rather than artistic guesswork. By beginning with simple geometric shapes and strictly adhering to proportional landmarks like the eye sockets and jawline, you create a solid foundation. Focus on the interplay of light and shadow to define the bone's volume, and always prioritize accuracy over detail to achieve a convincing, professional-looking anatomical illustration.
People also ask
Should I use a reference image when drawing a skull?
Yes, using a real anatomical reference is essential for capturing the complex geometry of bone structures. Without a reference, artists often miss the subtle curves of the zygomatic arch and the depth of the nasal cavity.
What is the best pencil grade for sketching a skull?
Start with an HB or H pencil for light construction lines that are easy to erase. Once the proportions are correct, switch to a softer 2B or 4B pencil to build up the dark shadows in the eye sockets and nasal cavity.
How do I make the skull look three-dimensional?
Focus on the light source and apply consistent shading across the curved surfaces of the cranium. Use cross-hatching or smooth blending to emphasize the transition from the bright forehead to the shadowed sides of the face.
Why does my skull drawing look like a cartoon?
This usually happens when the features are too large or the proportions are exaggerated. Stick to anatomical measurements, such as ensuring the jaw hinge aligns roughly with the bottom of the cheekbone.
How do I draw realistic teeth on a skull?
Avoid drawing individual lines for every tooth, which can look like a picket fence. Instead, draw the overall shape of the upper and lower dental arches first, then lightly suggest the gaps between teeth with minimal, soft strokes.
Is it better to draw the skull from the front or the side?
Beginners should start with a front-facing view to practice symmetry and basic facial landmarks. A three-quarter view is more dynamic but requires a better understanding of how the skull’s volume recedes in perspective.
This answer was created with the help of AI research tools and reference sources. Spotted an error? Let us know — we correct mistakes quickly. See our editorial policy.