How do you draw a realistic nose?
Short answer
Drawing a realistic nose requires understanding it as a three-dimensional structure rather than a series of lines. By focusing on light, shadow, and the underlying cartilage, you can construct a believable form. Use simple geometric shapes to map proportions before refining the details, ensuring the nose integrates naturally with the rest of the face.
On this page
How to map the anatomy of a nose
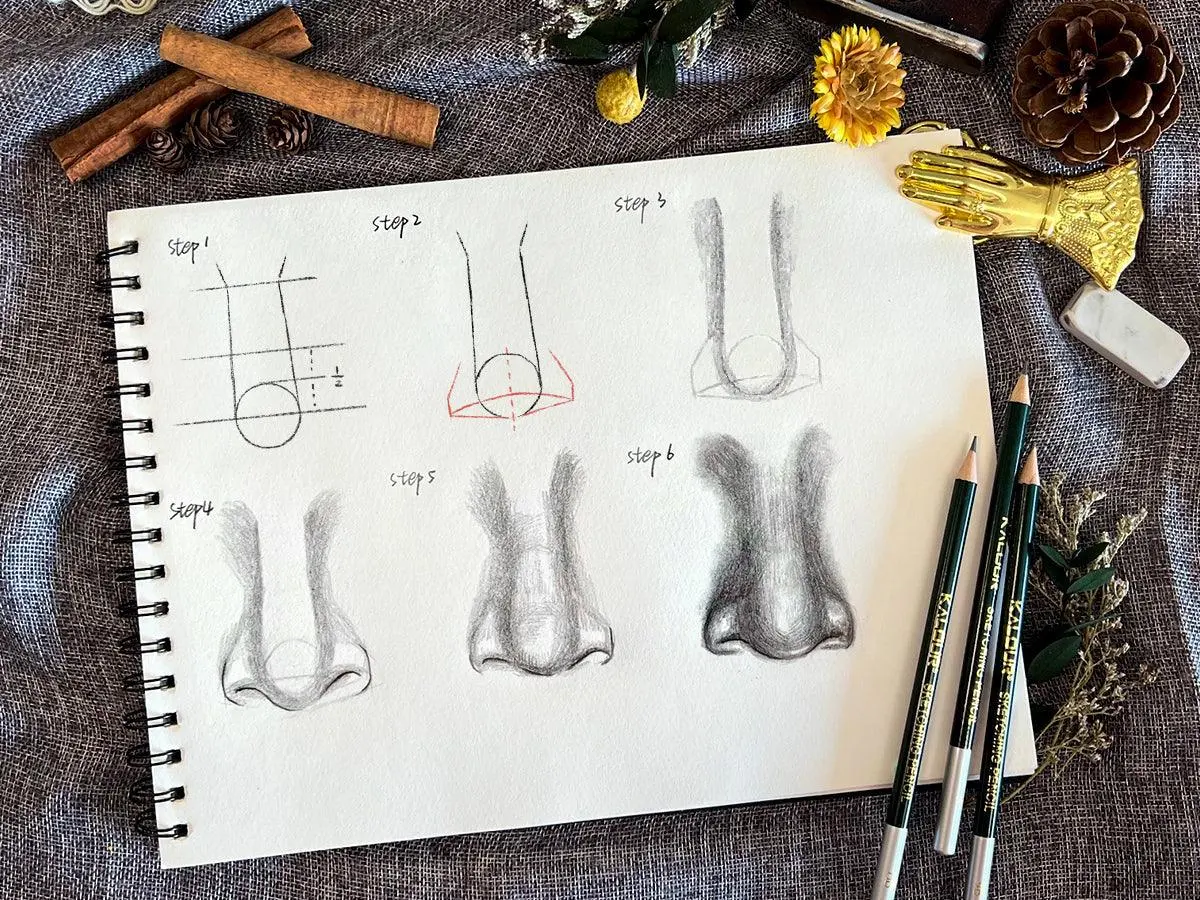
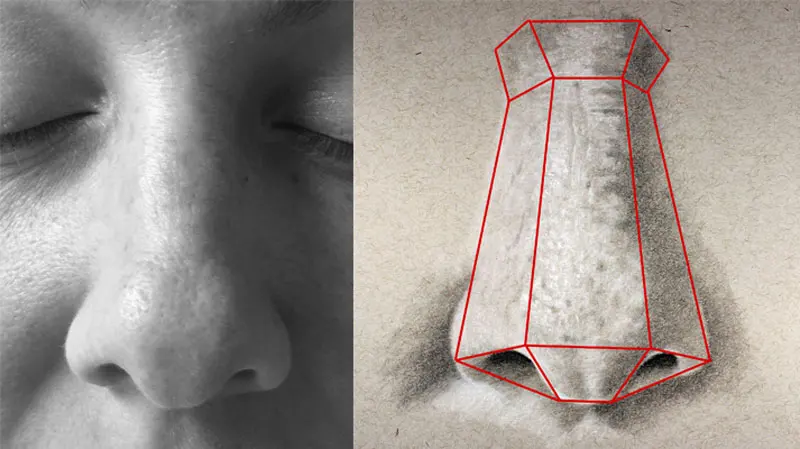
The human nose is essentially a complex geometric form composed of a bridge, a tip, and two nostrils. To begin, visualize the nose as a trapezoidal prism sitting on the face. The top of this prism connects to the brow ridge, while the base sits between the nostrils. By establishing these basic planes, you create a foundation that prevents the nose from looking flat or distorted.
When drawing, focus on the three primary masses: the central bridge and the two smaller spheres representing the nostrils. You can map these using light construction lines that establish the overall width and length. Remember that the width of the nose at the nostrils typically aligns with the inner corners of the eyes. Following this rule of thumb helps maintain facial harmony and anatomical accuracy across different subjects.
- Draw a vertical line to represent the center of the face.
- Sketch a circle for the nasal tip and two smaller circles for the nostrils.
- Connect these shapes to the brow line using straight, angled lines to define the bridge.
- Lightly erase the construction lines once the basic structure is established.
Why shading creates realistic depth
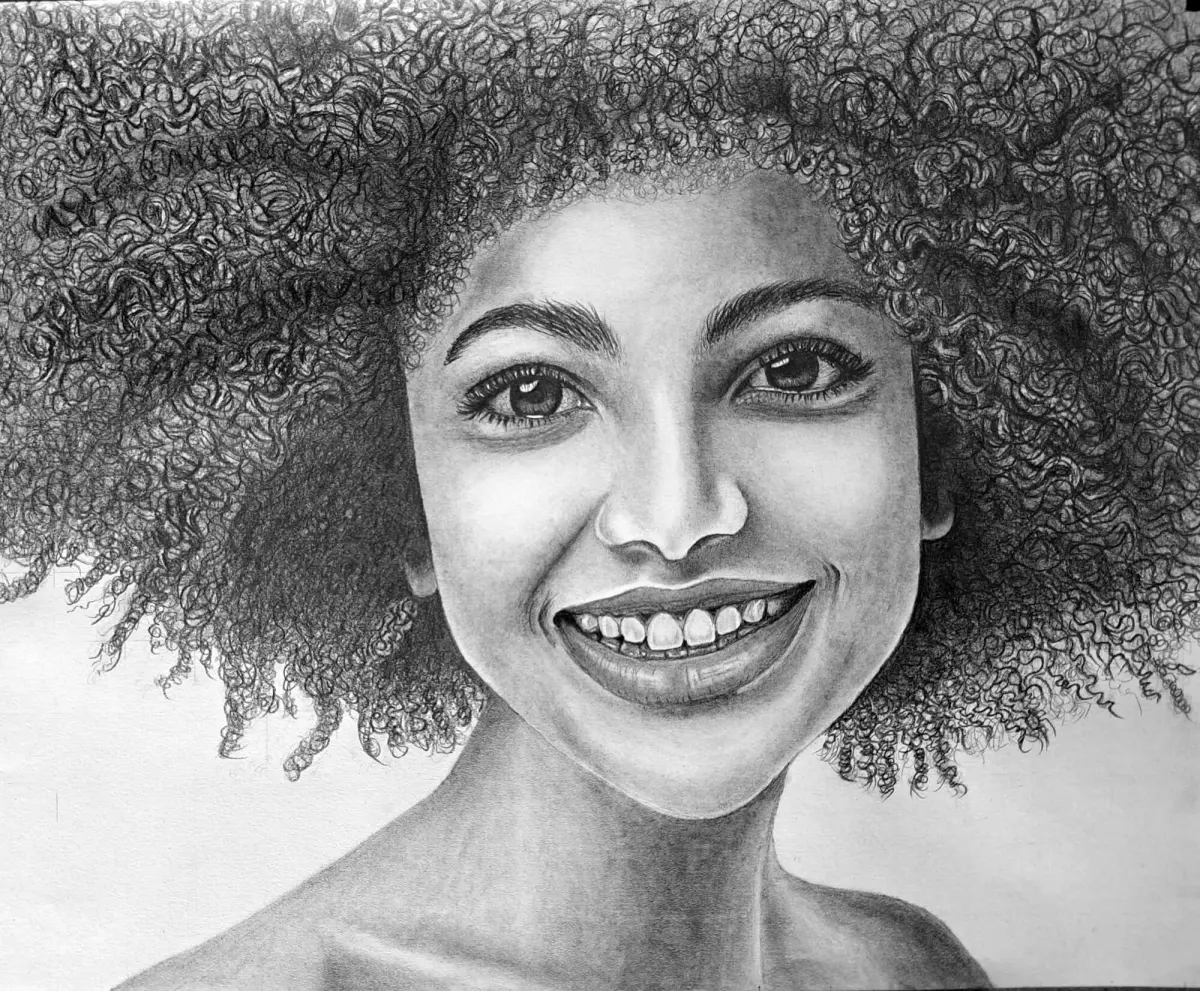
Shading is the most critical element in turning a flat sketch into a three-dimensional object. Because the nose protrudes from the face, it naturally catches light on one side while casting a shadow on the other. Identify your light source early in the process and remain consistent with your highlights and shadows. The bridge of the nose often catches the most light, while the underside of the tip and the nostrils remain in deeper shadow.
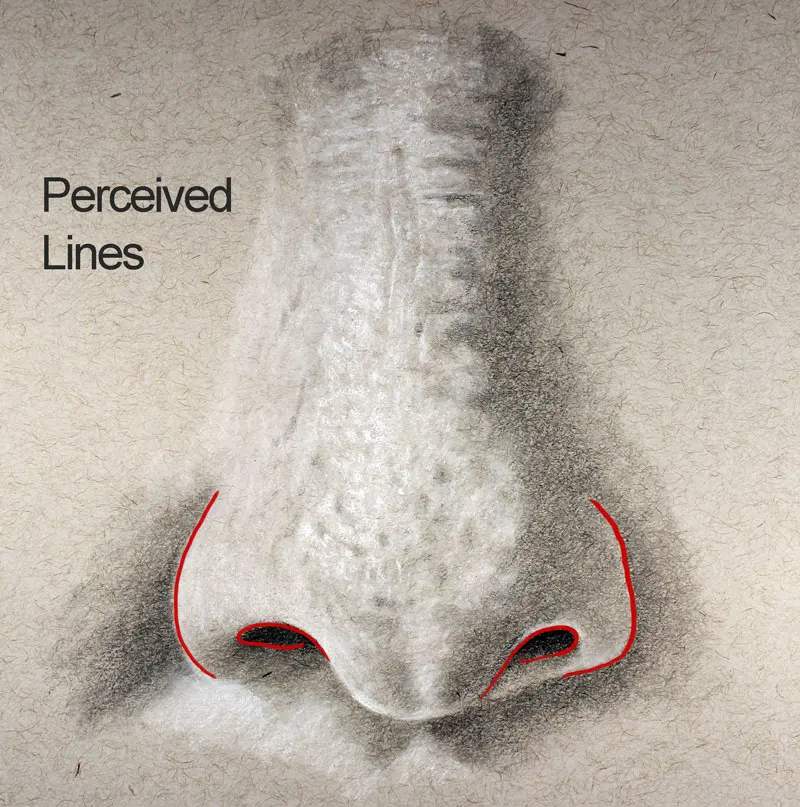
Avoid using harsh, dark outlines, as these make the nose appear like a sticker rather than a part of the face. Instead, use soft transitions—known as gradients—to show how the skin curves around the cartilage. A subtle shadow cast by the nose onto the upper lip can significantly increase the sense of volume. Keep your pencil strokes light and build up the darkness gradually to maintain control over the final appearance.
Common mistakes when drawing noses
One of the most frequent errors is drawing the nostrils as dark, disconnected circles. In reality, nostrils are complex, curved openings that are rarely perfectly round. If you draw them too dark or too distinct, the nose will look cartoonish rather than realistic. Focus on the shadow inside the nostril rather than the outline of the nostril itself, as this creates a more natural, recessed look.
Another mistake is failing to account for the surrounding facial features. Beginners often isolate the nose, forgetting that it connects to the cheeks and the upper lip. The transition between the nose and the cheek should be subtle, usually indicated by a soft shadow rather than a hard line. If the transition is too sharp, the nose will appear detached from the skull. Always check your work by squinting at your drawing to see if the values blend together harmoniously.
Best tools for drawing noses
Achieving realism is much easier when you use the right materials. For beginners, a set of graphite pencils ranging from 2H to 4B is ideal. Use the harder 2H pencil for light construction lines and initial mapping, as it leaves a faint mark that is easy to erase. The softer 4B pencil is perfect for adding depth and dark shadows to the nostrils and the underside of the nasal tip.
- Use a kneaded eraser to lift graphite and create soft highlights on the bridge of the nose.
- Employ a blending stump or a piece of tissue to smooth out shadows and create realistic skin textures.
- Opt for smooth, acid-free drawing paper to ensure your graphite blends evenly without catching on the grain of the paper.
- Keep a sharpener nearby, as a dull pencil will make it impossible to render the fine details of the nostrils and the nasal septum.
How to practice drawing noses effectively
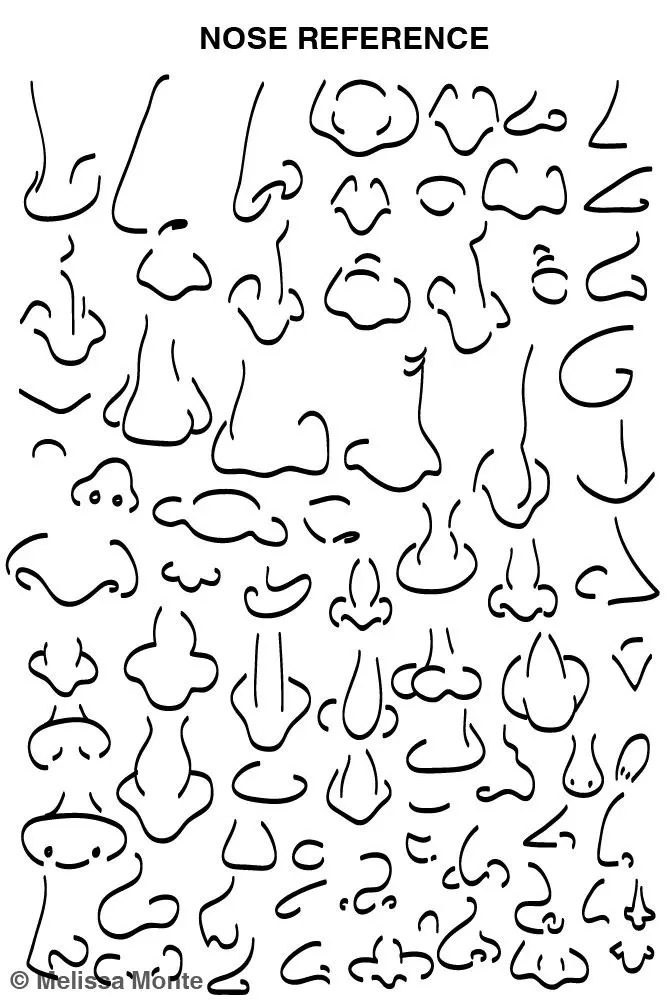
Improvement comes from consistent observation and repetition. Spend time sketching noses from different angles, such as profile, three-quarter, and front-facing views. Photographs are excellent references, but drawing from life—using a mirror to observe your own nose—is even better for understanding how light hits the planes of the face. Try to draw one nose every day for a week, focusing on a different aspect each time, such as shading or structural accuracy.
Do not be discouraged if your early attempts look stiff or incorrect. Realism is a skill developed through trial and error rather than innate talent. Compare your drawings to your reference photos to identify where your proportions or shadows went wrong. By analyzing these differences, you train your eyes to see the world like an artist, allowing you to replicate the subtle nuances of the human face with increasing precision and confidence.
Key facts
- The nose is primarily a three-dimensional structure composed of a central bridge, two side planes, and a rounded tip.
- Use a circle to represent the tip and two smaller circles for the nostrils to establish the base proportions.
- Avoid drawing hard outlines for the bridge; instead, use subtle shading to suggest the transition between planes.
- The nostrils should be drawn as elongated, curved shapes rather than simple circles or dark holes.
- Lighting is critical; identify a single light source to determine where highlights on the bridge and tip should be placed.
- Soften your edges using a blending stump or a kneaded eraser to create a natural, fleshy appearance rather than a rigid, geometric look.
The bottom line
Drawing a realistic nose requires moving away from outlines and focusing on the underlying geometric planes and light sources. By constructing the structure with simple circles and using soft shading to define the bridge and nostrils, you create volume. Remember that shadows, not lines, define the shape. Consistent practice with light and shadow will transform your drawings from flat sketches into lifelike, three-dimensional facial features.
People also ask
How do I determine the correct width of the nose?
A standard rule of thumb is that the width of the nose should align with the distance between the inner corners of the eyes. Use light vertical guide lines dropped from the tear ducts to ensure your drawing remains proportional to the rest of the face.
Should I use lines to define the sides of the nose?
Avoid drawing continuous dark lines down the sides of the nose, as this makes it look flat and cartoonish. Instead, use soft shading or subtle gradients to indicate the change in plane where the nose meets the cheeks.
How do I make the nostrils look realistic?
Nostrils are rarely perfectly symmetrical or circular. Draw them as curved, teardrop-like shapes that taper toward the outer edges and ensure they are partially obscured by the flare of the nasal wings.
What is the best way to shade the tip of the nose?
The tip is usually the most prominent point and often catches the most light. Keep the center of the tip lighter and use darker, rounded shading underneath to create the illusion of volume and depth.
How do I draw a nose from a side profile?
Focus on the silhouette, which follows a curved line from the bridge down to the tip. The nostril will appear as a single, elongated shape tucked under the downward curve of the nasal tip.
Why does my nose drawing look like it is floating on the face?
This usually happens when the connection between the nose and the upper lip is ignored. Add a subtle shadow beneath the nose, known as the philtrum area, to ground the feature and provide a sense of depth.
This answer was created with the help of AI research tools and reference sources. Spotted an error? Let us know — we correct mistakes quickly. See our editorial policy.