How do you draw a realistic ear?
Short answer
Drawing a realistic ear requires observing the complex interplay of cartilage folds and shadows. By establishing a basic "C" shape and mapping the internal structures like the helix, antihelix, and tragus, you can create depth. Focus on light sources to define the curves, ensuring the ear sits properly between the eyebrow and nose.
On this page
How to structure the basic shape of an ear
The human ear is essentially a complex, flattened oval or "C" shape attached to the side of the skull. To begin, draw a light vertical line to establish the tilt of the ear, which usually mirrors the angle of the jawline. Sketch a simple elongated oval that spans the distance from the level of the eyebrow to the bottom of the nose. This proportion is a reliable anatomical constant for most adults.
Once the outer boundary is established, divide the ear into three primary sections: the upper lobe, the middle concha, and the lower earlobe. Keep your initial lines very light, as you will need to erase or refine them as you add the internal cartilage structures. Avoid drawing a perfect circle, as the ear is naturally asymmetrical and tapers toward the bottom.
- Draw a light vertical guide line at a slight angle.
- Outline the outer rim, known as the helix, as a large "C" shape.
- Mark the position of the earlobe at the bottom, ensuring it is rounded rather than pointed.
- Verify the length aligns with the brow and nose lines on your portrait.
What are the essential parts of the ear anatomy
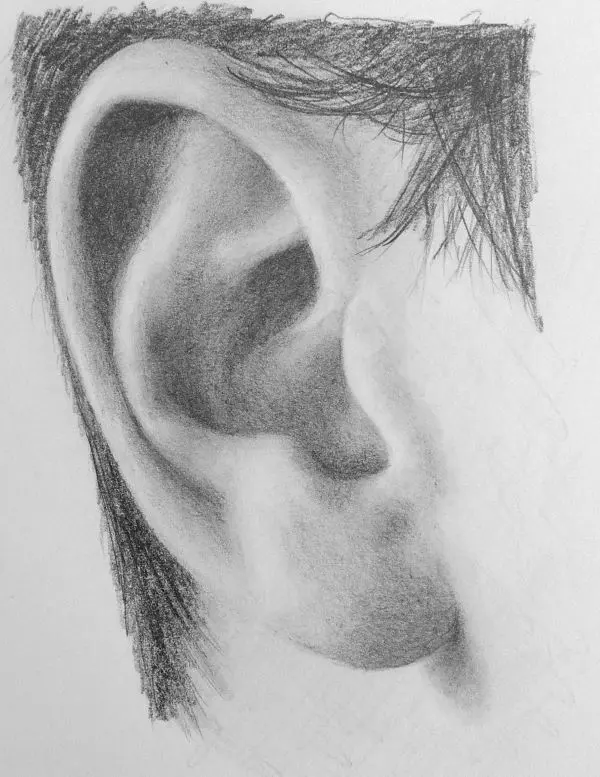
Understanding the specific anatomy of the ear prevents the common "blob" appearance often found in beginner sketches. The helix is the outer folded rim that wraps around the entire structure. Inside this, the antihelix forms a "Y" shape that branches out toward the top. The tragus is the small, triangular bump that partially covers the ear canal, located near the cheek.
The concha is the deep, bowl-like hollow located in the center of the ear, which acts as the primary focal point for shadows. Beneath the concha, the earlobe provides a soft, fleshy conclusion to the structure. By identifying these specific landmarks, you move from drawing a generic shape to capturing the unique character of a human ear. Focus on the negative space within these folds to ensure the proportions remain accurate throughout the process.
- Helix: The prominent outer rim.
- Antihelix: The internal ridge that branches into a "Y".
- Tragus: The small flap protecting the ear canal.
- Concha: The deep, central cavity.
- Lobe: The soft, bottom portion of the ear.
How to shade for a realistic appearance
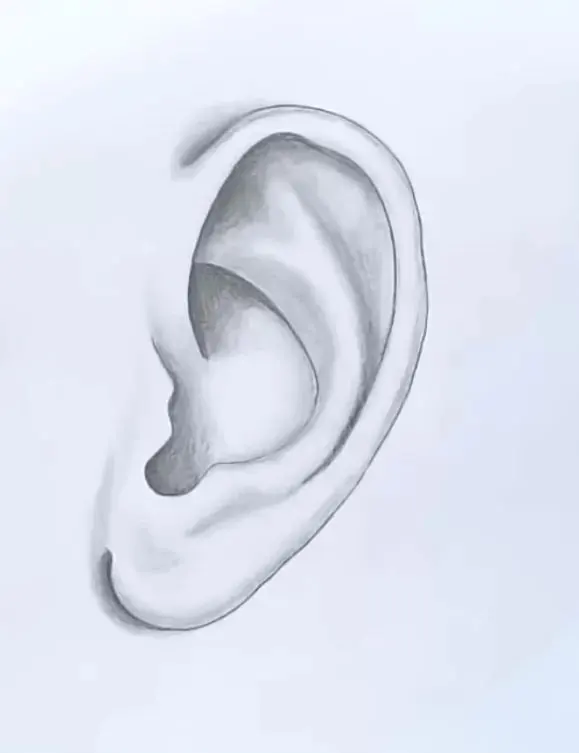
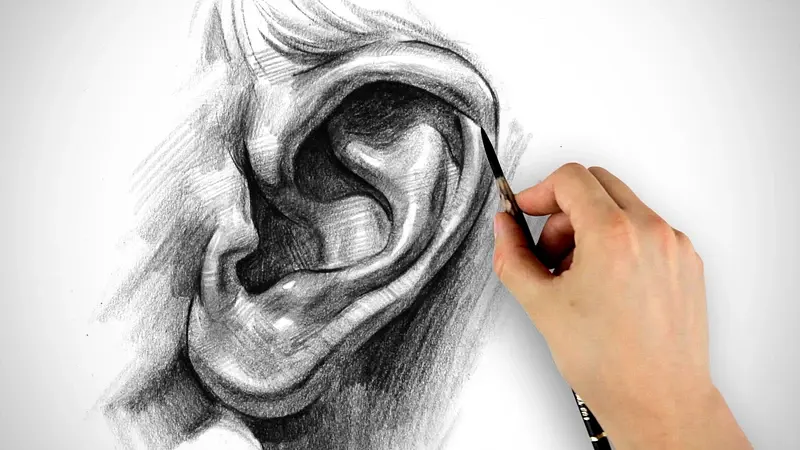
Shading is the most critical step in transforming a flat line drawing into a three-dimensional form. Because the ear is composed of cartilage, it has many overlapping folds that create small, deep shadows. Identify your light source early; if the light comes from above, the underside of the helix and the interior of the concha will be the darkest areas. Use a range of pencil grades, starting with an HB for outlines and moving to a 4B or 6B for the deepest recesses.
Avoid smudging your graphite with your fingers, as this creates a muddy look that obscures fine detail. Instead, use a blending stump or a piece of tissue to smooth out transitions between light and shadow. Always leave a few small areas of white paper untouched to represent highlights on the highest points of the cartilage. This contrast between deep shadow and bright highlight is what gives the ear its realistic, fleshy texture.
Common mistakes when drawing ears
One of the most frequent errors is drawing the ear too flat against the head. Remember that the ear protrudes significantly, meaning the outer helix should cast a shadow onto the side of the skull. Another common mistake is neglecting the thickness of the cartilage. If you draw the ear as a thin, paper-like object, it will look unnatural; always indicate the volume of the folds by drawing the inner edge of the helix as a double line.
Beginners also often struggle with the placement of the tragus. It should not be drawn as a separate floating shape but rather as a structure that emerges from the side of the face and tucks under the helix. Finally, do not over-detail the earlobe. While the rest of the ear is rigid, the lobe is soft and should be rendered with subtle, soft shading rather than sharp, definitive lines that suggest bone or hard cartilage.
Best tools for drawing ears
For those starting out, a standard set of graphite pencils ranging from 2H to 6B is sufficient to capture the full tonal range of the ear. Use the harder 2H pencils for the initial light mapping and the softer 4B or 6B pencils for the deep shadows in the concha. A kneaded eraser is essential, as it allows you to lift graphite off the page to create subtle highlights or correct small mistakes without damaging the paper surface.
Choose a smooth, medium-weight drawing paper that can handle multiple layers of graphite without tearing. If you are aiming for high realism, consider using a fine-tipped mechanical pencil for the intricate folds of the antihelix. This allows for precise control over small, dark lines that define the structure. By keeping your tools clean and your pencils sharp, you ensure that your drawings remain crisp and professional, allowing you to master the nuances of ear anatomy with confidence and ease.
Key facts
- The ear is roughly the height of the nose, typically positioned between the eyebrow line and the base of the nose.
- Use a "C" shape as the foundational structure before adding the complex inner folds.
- The antihelix creates a Y-shape structure inside the main bowl of the ear.
- The tragus is the small, triangular flap of cartilage that partially covers the ear canal.
- Shading the deep cavity, known as the concha, provides the necessary depth to make the ear look three-dimensional.
- Avoid drawing a complete outline; use broken lines to suggest the cartilage's soft, organic edges.
The bottom line
Drawing a realistic ear requires viewing it as a collection of interconnected cartilage folds rather than a single shape. By anchoring the ear between the brow and nose lines, you ensure anatomical accuracy. Focus on the Y-shaped antihelix and the deep concha bowl to establish volume. Use soft, directional shading to define the contours, avoiding harsh outlines that flatten the overall appearance of your drawing.
People also ask
Does the ear change shape when a person turns their head?
While the anatomy remains the same, the perspective shifts significantly. From a profile view, the ear appears as a complex, elongated shape, while from a front view, it is often partially obscured by the cheekbone.
How do I make the ear look less like a flat sticker on the side of the head?
Focus on the shadows cast by the upper rim, known as the helix, onto the antihelix. Proper placement of these shadows creates the illusion of depth and physical volume.
Should I draw every single fold I see in a reference photo?
No, over-detailing can make an ear look cluttered or aged. Focus on the primary structural landmarks and use subtle shading to imply the smaller, secondary folds.
What is the most common mistake beginners make?
Beginners often draw the ear too high or too far back on the skull. Always align the top of the ear with the brow line and the bottom with the nose base.
How do I handle the earlobe?
The lobe is soft tissue, unlike the rest of the ear which is cartilage. Keep the shading on the lobe soft and rounded to distinguish its fleshy texture from the firmer parts.
Is there a specific angle that is easiest to start with?
The three-quarter view is often considered the most forgiving for beginners. It allows you to see both the side profile and the front-facing depth of the ear simultaneously.
This answer was created with the help of AI research tools and reference sources. Spotted an error? Let us know — we correct mistakes quickly. See our editorial policy.