How do you draw an ear step by step?
Short answer
Drawing an ear involves constructing a basic oval shape and mapping the complex internal cartilage structures. By breaking the ear down into the outer rim, the inner bowl, and the lobe, you can accurately capture its anatomy. Consistent practice with these structural landmarks will help you master realistic human ear proportions.
On this page
How to draw an ear step by step
To begin, lightly sketch a vertical oval that is slightly wider at the top than the bottom. This serves as the foundational boundary for the entire ear structure. Divide the oval into three equal horizontal sections to help place the major components correctly. The top section will contain the upper curve, the middle section houses the central bowl, and the bottom section accommodates the earlobe.
Once the proportions are set, follow these steps to refine the shape:
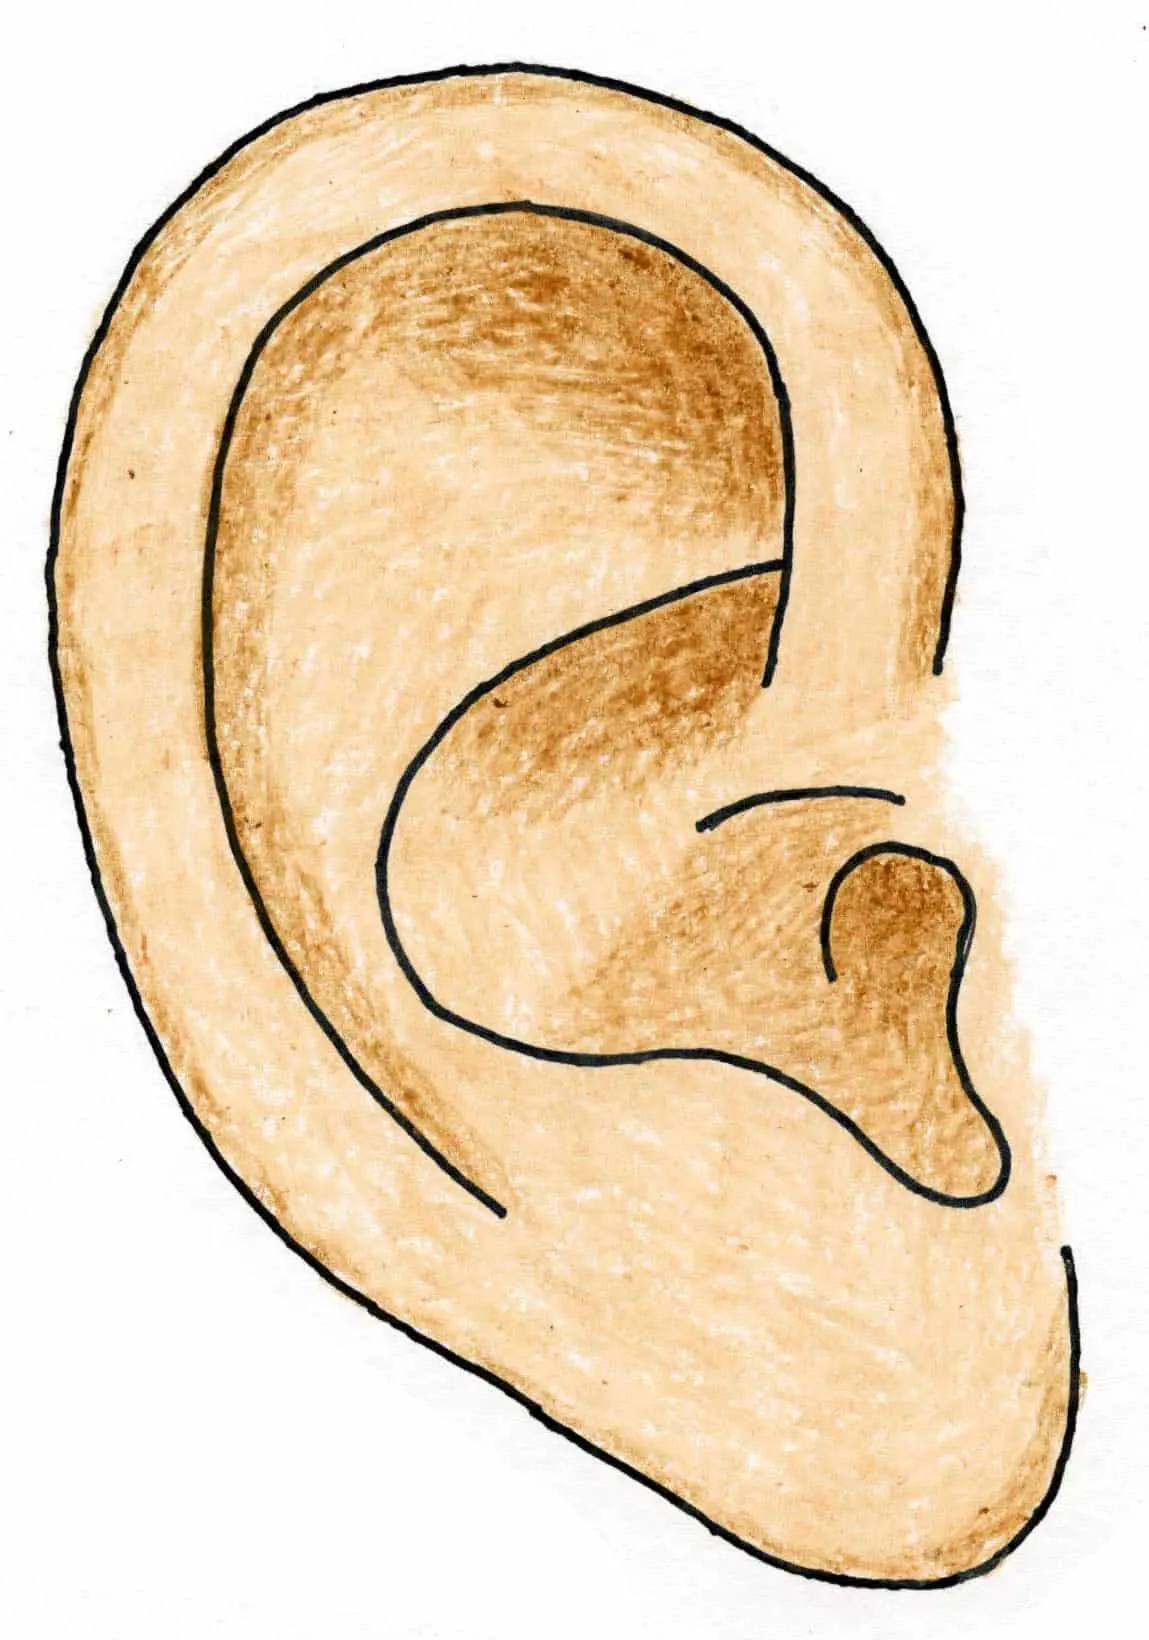
- Draw the helix, which is the outer folded rim, starting from the top and curving down to the lobe.
- Sketch the antihelix, a Y-shaped cartilage structure located inside the helix.
- Define the tragus, the small bump of cartilage that partially covers the ear canal opening.
- Add the concha, the deep bowl-like depression that leads into the ear canal.
- Finish by shaping the soft, fleshy lobe at the base of the ear.
What are the basic ear proportions
The human ear is typically positioned between the eyebrow line and the base of the nose when viewed from the side profile. While individual anatomy varies, the ear is generally about two-thirds the height of the head in a standard portrait drawing. Keeping these measurements in mind prevents the common error of placing the ear too high or too far back on the skull.
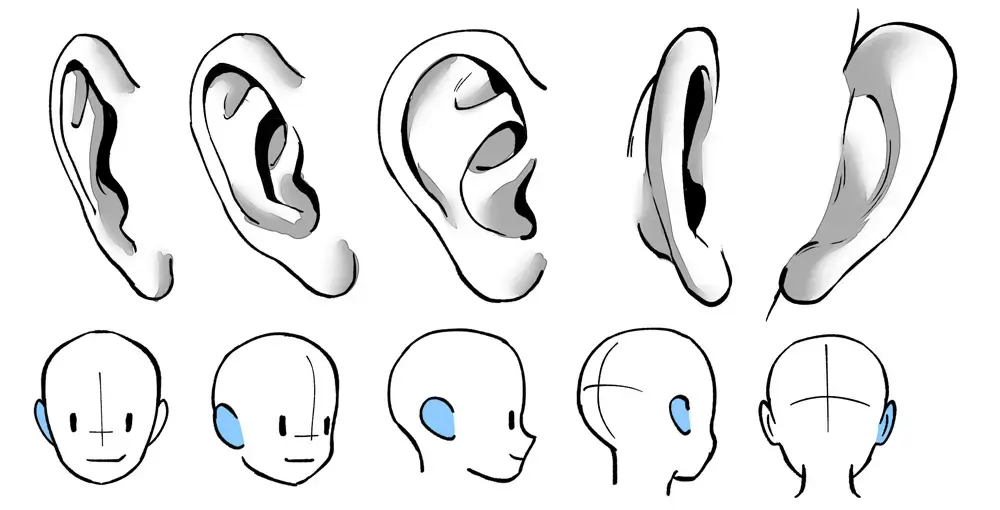
When drawing the ear in perspective, remember that the angle of the ear often aligns with the angle of the jawline. If the head is tilted, the ear must be tilted at the same degree to maintain anatomical accuracy. Use light construction lines to ensure the ear is not floating too far from the head, as it should appear firmly attached to the side of the cranium.
Best tools for drawing ears
For beginners, a standard HB graphite pencil is ideal for establishing the initial construction lines. Because the ear consists of delicate curves and soft transitions, a harder lead allows you to sketch without leaving heavy indentations on the paper. You can switch to a 2B or 4B pencil later to add depth and shadow to the deeper recesses of the concha.
A kneaded eraser is an essential tool for this process because it allows you to lift graphite gently to create highlights. Ears have complex surfaces where light hits the ridges of the cartilage, creating bright spots against the darker, shadowed interior. By dabbing the paper with a kneaded eraser, you can soften the edges of your drawing and create a more realistic, three-dimensional appearance.
Why ear shading is important
Shading is what transforms a flat, outline-based drawing into a convincing anatomical feature. The ear is essentially a series of overlapping planes and folds, each casting a small shadow onto the surface below it. Focus on identifying the darkest areas, typically found inside the concha and under the helix, to create a sense of depth.
To achieve a professional look, apply these shading techniques:
- Use a blending stump or a soft tissue to smooth out transitions between light and shadow.
- Keep the edges of the cartilage ridges sharp, while softening the transition into the deeper bowl.
- Observe how the light source hits the ear to determine where the highlights should be placed.
- Avoid using pure black; instead, build up layers of gray to maintain a natural skin tone appearance.
Common mistakes when drawing ears
A frequent error is drawing the ear as a flat, two-dimensional shape rather than a complex structure with depth. Many artists forget that the ear is actually a collection of cartilage folds that project outward from the head. To fix this, pay close attention to the way the helix curves forward and how the tragus overlaps the ear canal opening.
Another common mistake is neglecting the connection between the ear and the jaw. The ear should not look like a separate appendage glued to the side of the head; it must transition smoothly into the cheek and the mastoid bone behind it. By adding subtle shading where the ear meets the skin of the face, you create a seamless integration that makes the entire portrait look more believable and structurally sound.
Key facts
- The ear is roughly shaped like the letter "C" or a human kidney bean.
- On a standard adult face, the top of the ear aligns with the brow line, while the bottom aligns with the base of the nose.
- The outer rim of the ear is called the helix, which curls inward to form a protective ridge.
- The triangular depression located near the top of the inner ear is known as the triangular fossa.
- The earlobe is the only part of the ear that contains no cartilage, consisting instead of connective tissue and fat.
- A common mistake is drawing the ear too flat; always remember to shade the inner cavities to create depth and volume.
The bottom line
Drawing a convincing ear requires mastering the "C" shape and understanding the internal cartilage structures. By aligning the ear between the brow and the nose and using shading to define the deep concha bowl, you create a sense of three-dimensional space. Focus on the relationship between the outer helix and inner ridges to ensure your drawing remains anatomically grounded and visually balanced on the head.
People also ask
Does the ear change size as we age?
Yes, ears continue to grow throughout a person's life. This is primarily due to the gradual breakdown of collagen and elastin fibers in the cartilage, which causes the ears to lengthen and widen over time.
How do you determine the correct angle for the ear?
The ear should not be drawn perfectly vertical. It is usually tilted slightly backward, following the angle of the jawline, which typically sits at about a 15 to 20-degree angle relative to the vertical axis of the head.
What is the most difficult part of the ear to draw?
Many artists find the antihelix, the inner ridge that splits into two branches, the most challenging part. It requires careful observation of light and shadow to distinguish it from the deeper concha bowl.
Should the ear be drawn as a separate shape from the head?
No, the ear should be integrated into the head. Draw a small connection point where the helix meets the skull to ensure the ear looks like it is attached to the head rather than pasted on.
How much detail is necessary for a realistic ear?
You do not need to draw every single wrinkle. Focus on the major landmarks like the helix, the tragus, and the concha, as these define the shape and provide enough information for the viewer's brain to perceive a realistic ear.
Can drawing ears from the front look different than from the side?
Absolutely, because ears are angled against the side of the head, they appear much thinner or more compressed when viewed from the front. From a profile view, the full "C" shape and the depth of the ear canal become visible.
This answer was created with the help of AI research tools and reference sources. Spotted an error? Let us know — we correct mistakes quickly. See our editorial policy.