How do you draw a realistic glass?
Short answer
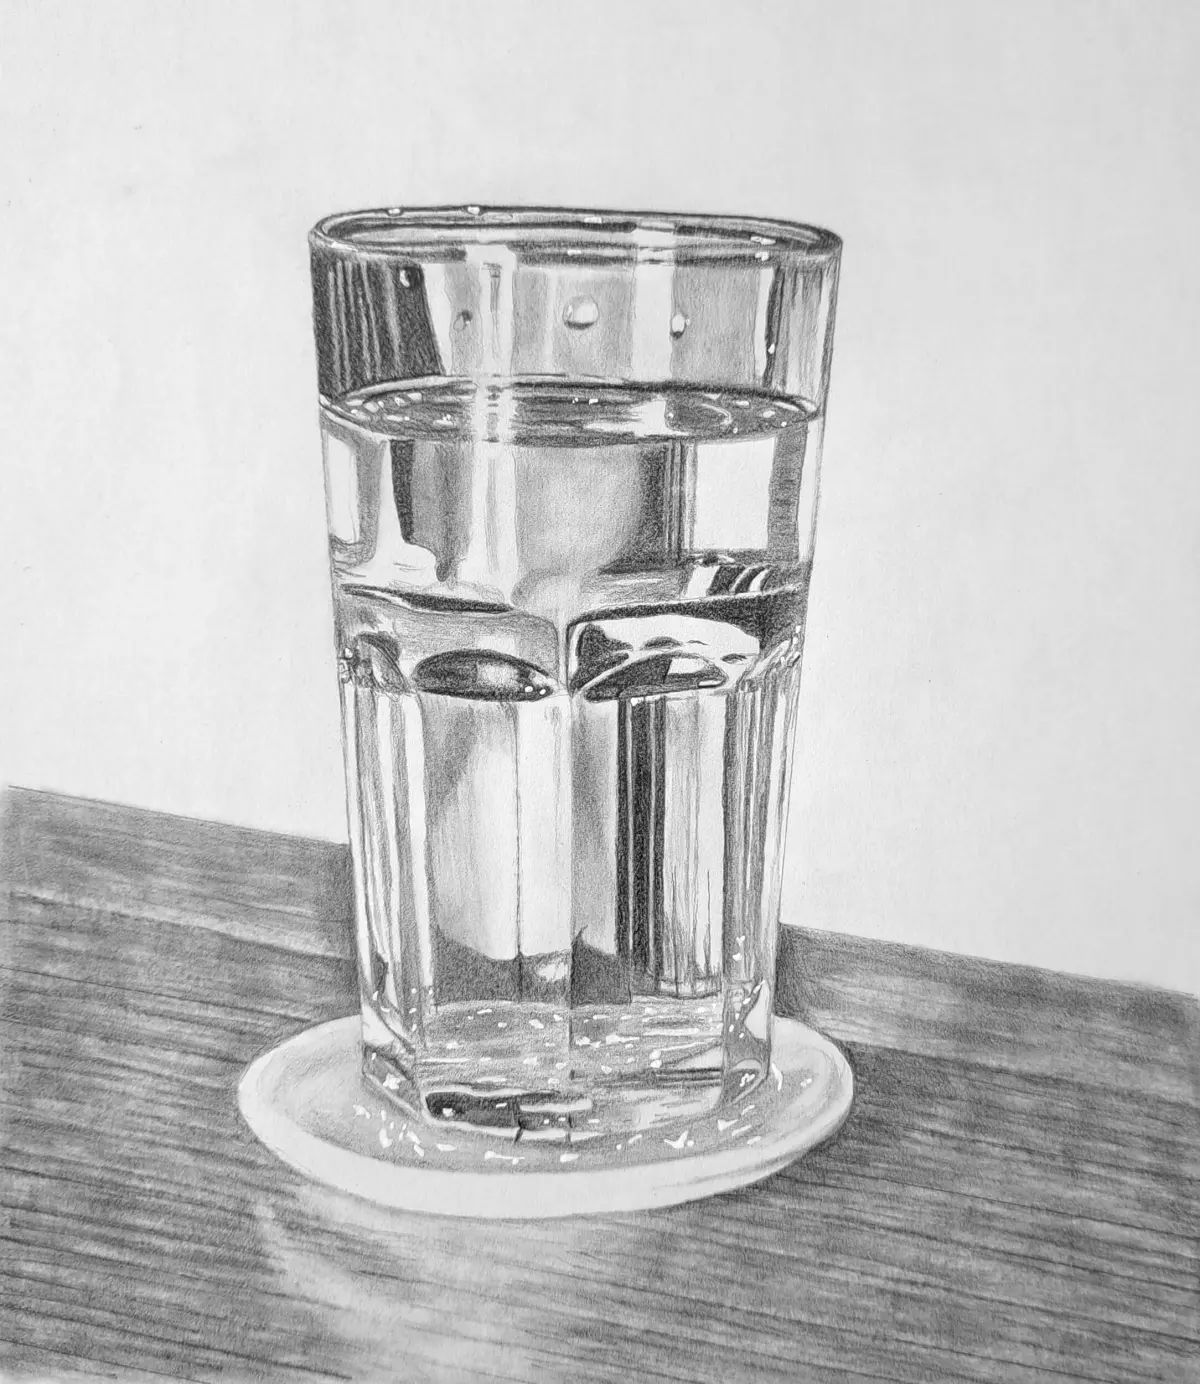
Drawing realistic glass requires capturing light, transparency, and distortion rather than the object's solid form. Focus on high-contrast highlights, sharp reflections, and the way light bends through the glass walls. By layering values and maintaining clean, crisp edges, you can create the illusion of a transparent, three-dimensional vessel on paper.
On this page
What materials are needed for drawing glass?
To achieve a photorealistic effect, you need tools that allow for high contrast and precise detail. Graphite pencils are the standard, but you should use a full range of grades, from 4H for light sketching to 6B for deep, rich shadows. Glass is defined by the absence of color and the presence of light, so a high-quality kneaded eraser is essential for lifting highlights and creating sharp, clean lines within dark areas.
Smooth-surface paper, such as Bristol board, is superior to textured drawing paper for this task. The lack of "tooth" allows for seamless blending and crisp edges, which are critical for mimicking the smooth, non-porous surface of glass. Additionally, keep a blending stump or tortillon handy to soften transitions between shadows and mid-tones, ensuring the glass looks fluid rather than jagged or matte.
- Graphite pencils (4H to 6B)
- Kneaded eraser or precision pen eraser
- Smooth Bristol board or high-quality vellum
- Blending stumps for smooth gradients
- A sharp craft knife for sharpening pencils to a needle point
How to observe glass for drawing
The secret to drawing glass lies in looking at what is behind and around the object rather than the object itself. Glass is essentially a lens; it captures the environment and distorts it. When observing a glass, look for the "refractive index," which causes shapes and colors behind the glass to appear shifted or magnified. Pay close attention to how light hits the rim and the base, as these areas often hold the brightest highlights.
Avoid the common pitfall of drawing the glass as a solid, opaque shape. Instead, treat the glass as a collection of light and dark shapes. If you squint your eyes, the details of the room behind the glass will blur, making it easier to see the abstract patterns of light and shadow. Map these shapes out lightly before committing to dark values, as glass is defined by its transparency and the way it interacts with its immediate surroundings.
Step by step guide to drawing a glass
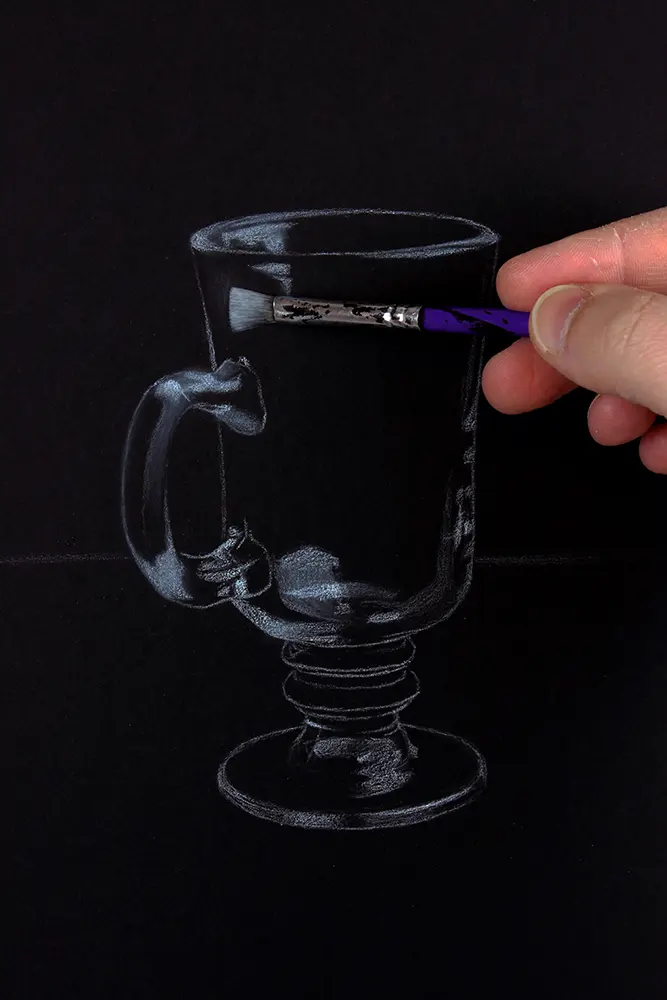
Drawing glass is a process of layering values from the outside in. Start by establishing the outer contour with a light pencil, ensuring the symmetry of the vessel is accurate. Once the outline is set, identify the darkest shadows, which are usually found at the base or where the glass is thickest. Use your darkest pencil to block these in, as they provide the necessary contrast to make the highlights pop.
- Sketch the basic silhouette using a light 2H pencil to ensure symmetry.
- Identify the primary light source and mark where the brightest highlights will fall.
- Fill in the darkest shadows first to establish the overall value range.
- Use a blending tool to create smooth transitions between the shadows and mid-tones.
- Use a kneaded eraser to lift out the sharpest highlights on the rim and sides.
- Add subtle reflections of the surrounding environment to give the glass depth.
Why glass looks distorted in drawings
Glass distortion occurs because light travels at different speeds through air and glass, causing it to bend. This phenomenon, known as refraction, means that lines passing through a glass of water will appear broken or shifted. When drawing a glass filled with liquid, you must mimic this displacement to maintain realism. If you draw a straw inside a glass, the part submerged in water should appear wider and slightly offset from the part above the water line.
Another factor is the curvature of the glass itself. The rounded surface acts as a convex or concave mirror, warping the reflections of the room. To draw this effectively, follow the contours of the glass with your shading. If the glass is cylindrical, your shading strokes should be slightly curved to suggest volume. Ignoring these physical laws will result in a drawing that looks flat or "off," even if the shading is technically perfect.
Common mistakes when drawing glass
One of the most frequent errors is over-outlining the object. In reality, glass edges are often defined by light rather than a dark line; if you draw a heavy, dark contour around the entire glass, it will look like a cartoon or a solid plastic object. Instead, use thin, broken lines to suggest the edges, allowing the background colors and light to define the shape. Remember that the edge of a glass is often a thin, bright highlight.
Another mistake is failing to maintain consistent highlights. Every highlight on the glass must relate to the same light source. If you place a highlight on the left side of the glass but the light is coming from the right, the brain will perceive the image as incorrect. Always double-check your light source before finalizing your highlights, and ensure that the darkest shadows are truly deep enough to create the necessary contrast. Consistency in light direction is the final key to achieving a truly professional and realistic glass drawing.
Key facts
- Glass is defined by its transparency, meaning you must draw the objects behind the glass as clearly as the glass itself.
- Highlights are the most important element; use a white gel pen or kneaded eraser to create sharp, bright spots where light hits the surface.
- Refraction causes objects viewed through glass to appear distorted, shifted, or magnified, so avoid drawing straight lines through the vessel.
- Shadows cast by glass are rarely solid black; they often contain light patterns or "caustics" caused by light focusing through the curved surface.
- The rim of a glass is usually an ellipse, not a circle, and its thickness should be indicated by a double line or a subtle highlight.
- Use a high-contrast range of values, from deep shadows in the base to pure white highlights, to achieve a convincing three-dimensional look.
The bottom line
Drawing realistic glass requires a focus on light and distortion rather than the object's outline. By mastering the placement of sharp highlights, deep shadows, and the refraction of background elements, you can convincingly simulate transparency. Remember that glass is essentially a collection of reflected light and distorted shapes; prioritize high contrast and precise edges to bring your drawing to life with a professional, crystalline finish.
People also ask
Should I use a blending stump for glass?
Use blending stumps sparingly to smooth gradients, but avoid over-blending, which can make the glass look like soft plastic. Keep your edges crisp to maintain the hard, reflective quality of the material.
How do I draw the liquid inside a glass?
Draw the liquid level as a horizontal ellipse that aligns with the perspective of the rim. Remember that the liquid will distort any objects placed behind it more intensely than the empty glass.
Why does my glass drawing look flat?
A flat appearance usually results from a lack of contrast or missing highlights. Ensure you have deep, dark shadows to anchor the object and bright, sharp highlights to represent the reflective surface.
How do I handle reflections on the surface?
Observe the environment and add subtle, distorted shapes that mirror the surrounding light sources. Keep these reflections faint so they do not distract from the primary form of the glass.
Is it better to draw the glass first or the background?
Draw the background objects first with light pressure, then layer the glass details and highlights over them. This approach ensures the transparency remains consistent throughout the composition.
What pencils are best for drawing glass?
Use a range of pencils from 2H for light construction lines to 4B or 6B for the deepest shadows. A mechanical pencil is excellent for adding the fine, sharp details required for highlights and rim edges.
This answer was created with the help of AI research tools and reference sources. Spotted an error? Let us know — we correct mistakes quickly. See our editorial policy.