How do you draw a hockey stick?
Short answer
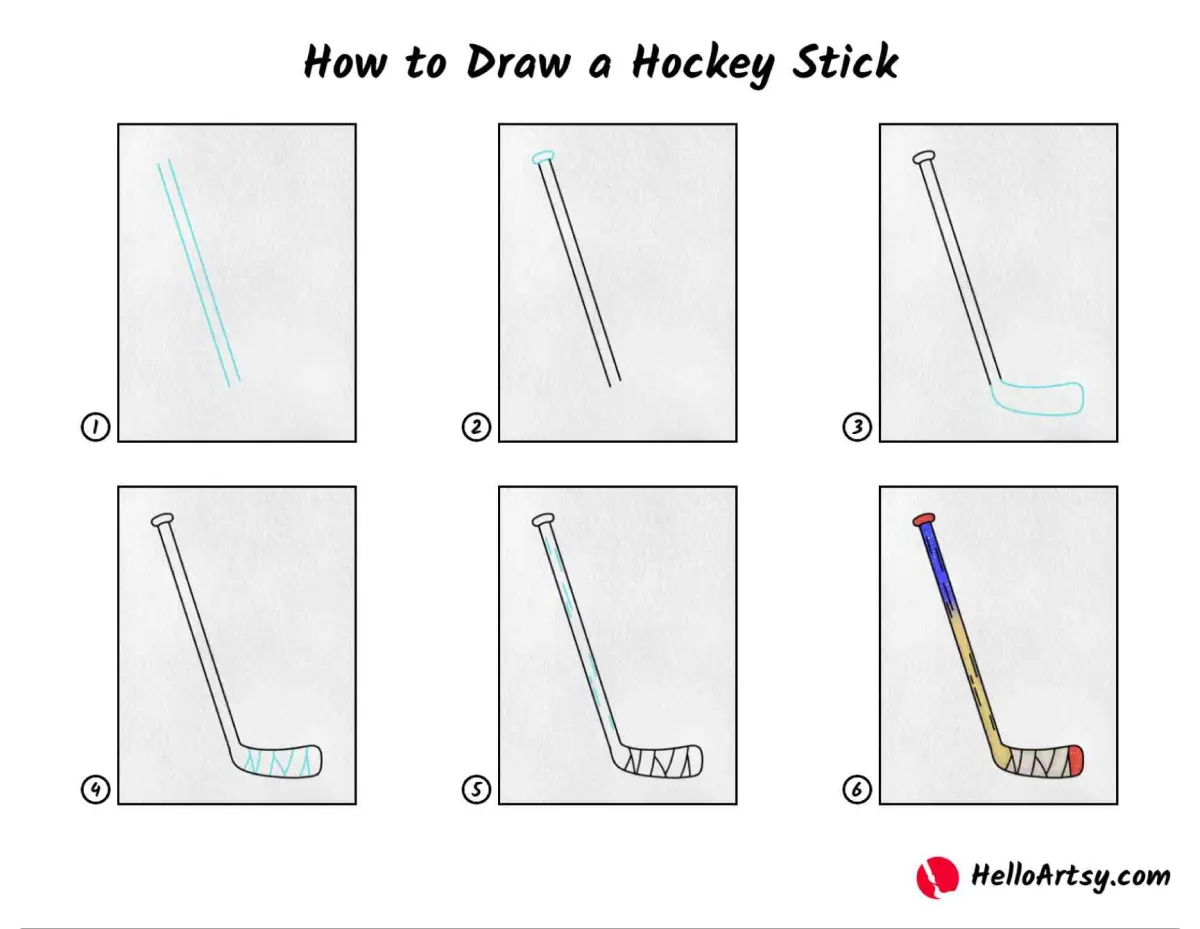
Drawing a hockey stick involves sketching a long, slender rectangular shaft attached to a curved blade at the bottom. Begin with two parallel vertical lines for the handle, then extend a horizontal, slightly rounded shape at the base. Add texture and subtle curves to define the blade's toe, heel, and distinct taper.

On this page
How to structure the basic hockey stick shape
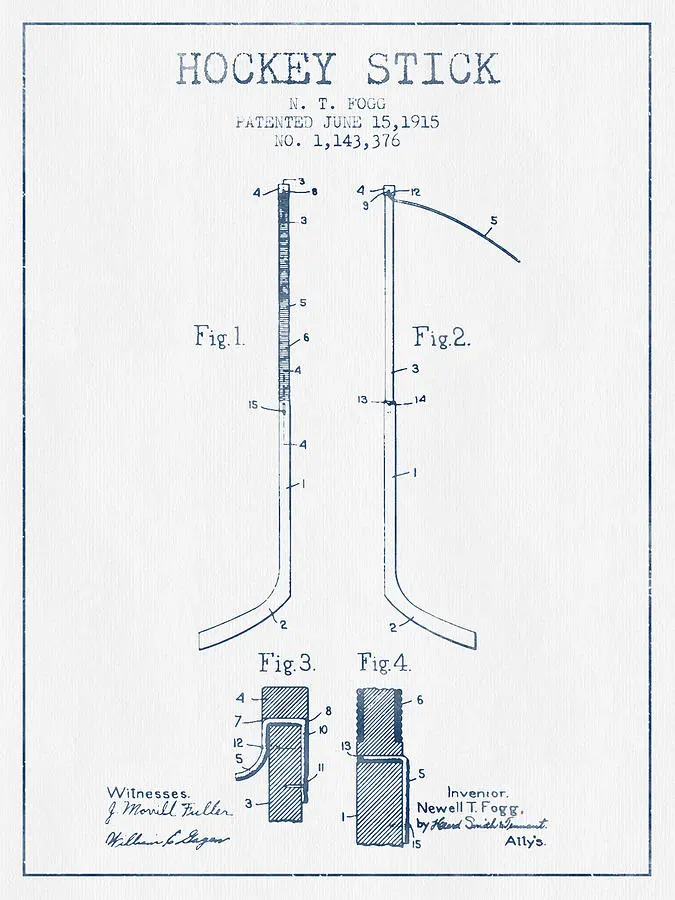
Drawing a hockey stick starts with establishing the correct proportions of the shaft and the blade. The shaft should be a long, narrow rectangle that is significantly taller than the blade is wide. Use a ruler to ensure the sides of the shaft are perfectly straight, as this provides a professional look. For a standard senior stick, the shaft typically measures between 50 and 60 inches in reality, so keep your drawing elongated to reflect this reach.
Once the shaft is set, draw the blade at a slight angle to the handle. The blade is not a simple rectangle; it features a rounded toe at the end and a thicker heel where it connects to the shaft. Sketch a gentle curve along the bottom edge of the blade to represent the "rocker" or the curvature that allows the stick to glide on ice. Keep your lines light initially so you can adjust the angle of the blade relative to the shaft.
How to add realistic blade curvature
The curvature of a hockey stick blade, often called the "lie" or "curve," is what gives the stick its character. To draw this, decide if you want a toe curve, a mid-curve, or a heel curve. A mid-curve is the most common and versatile option for beginners to draw. Start by drawing a slight concave arc on the top edge of the blade and a corresponding convex arc on the bottom edge.
To add depth and realism to the blade, follow these steps:
- Draw a thin, horizontal line through the center of the blade to act as a guide for the curve.
- Extend the toe of the blade slightly upward, making it more rounded than the heel.
- Add a small, triangular wedge where the blade meets the shaft to indicate the hosel, which is the reinforced joint area.
- Use cross-hatching or shading on the face of the blade to suggest the texture of composite material or wood grain.
How to detail the grip and tape patterns
Professional hockey sticks are almost always wrapped in friction tape to provide better control over the puck. To draw this, add a series of closely spaced, slightly slanted lines around the blade and the top of the shaft. You can vary the spacing of these lines to represent different taping styles, such as a thick heel wrap or a thin, spiral pattern along the handle.
When detailing the tape, remember that it should follow the contours of the stick rather than appearing flat. If you are drawing tape on the blade, curve your lines to match the arc you created in the previous step. For the handle, known as the "knob," draw a thicker, messy cluster of lines at the very top. This represents the extra tape players add to prevent the stick from slipping out of their gloves during a game.
Common mistakes when drawing hockey sticks
A frequent error is drawing the blade too straight or too bulky, which makes the stick look like a simple wooden club. Hockey blades are thin, aerodynamic, and specific to the player's handedness. Always ensure your blade is oriented correctly; a left-handed stick has the blade curving toward the left when looking down at the face, while a right-handed stick curves toward the right. Check your reference images to ensure the blade-to-shaft angle is consistent with real equipment.
Another common mistake involves the thickness of the shaft. Beginners often draw the shaft too wide, making it look like a baseball bat. Keep the shaft thin and consistent in width from the top down to the heel. Avoid making the transition from the shaft to the blade too abrupt. The hosel should look like a smooth, integrated part of the stick rather than a separate piece glued onto the side. Proper tapering creates a more authentic, athletic appearance.
Best tools for sketching sports equipment
Using the right tools can significantly improve the clarity of your drawing. A mechanical pencil with a 0.5mm lead is ideal for the initial structural lines, as it allows for precision when drawing the narrow shaft. For the shading and texture of the tape, a softer graphite pencil, such as a 2B, works best to create darker, more defined marks. If you want to add color, consider using cool grays for the shaft to mimic the appearance of modern carbon fiber composite sticks.
To refine your drawing, use the following techniques:
- Use a blending stump or a soft tissue to smooth out the shading on the shaft, giving it a sleek, metallic finish.
- Apply an eraser to create highlights along the edges of the shaft, which simulates the reflection of stadium lights on the stick.
- Use a fine-liner pen to trace over your final lines, ensuring the edges are crisp and clean.
- Add a small puck near the blade to provide scale and context, making the drawing feel like an active part of a game.
Key facts
- A hockey stick consists of two main parts: the shaft, which is the long handle, and the blade, which is the flat, curved bottom section.
- Start by drawing a long, thin rectangle for the shaft, keeping the lines parallel to ensure a stable grip.
- Attach the blade at an angle, typically between 120 and 135 degrees, to allow the player to reach the puck while standing upright.
- Use a slight curve on the blade face, known as the "toe" and "heel," to help control and lift the puck during shots.
- Keep the shaft length proportional to the player's height, usually reaching the nose when the player is standing on skates.
- Avoid drawing the blade too thin or perfectly straight, as a realistic stick requires a distinct "lie" or angle to make contact with the ice.
The bottom line
Drawing a hockey stick requires balancing geometric precision with functional design. By establishing a straight shaft and attaching a curved blade at the correct angle, you create a realistic representation of this essential sports equipment. Remember that the stick is an extension of the player, so maintaining proper proportions between the shaft and the blade is the most important step in achieving an accurate, professional-looking sketch.
People also ask
Does the curve of a hockey stick blade affect performance?
Yes, the depth and position of the curve significantly influence how a player handles, passes, and shoots the puck. A deeper curve provides more lift on shots, while a flatter blade is generally better for backhand shots and puck control.
What is the "lie" of a hockey stick?
The lie is the angle between the shaft and the blade of the stick. A higher lie number means the shaft is more upright, while a lower number means the shaft is more horizontal to the ice.
Are there different stick designs for left-handed and right-handed players?
Yes, sticks are manufactured with specific blade curves for either left-handed or right-handed shots. A player typically holds the stick with their dominant hand at the bottom of the shaft to maximize power.
What materials are modern hockey sticks made from?
Most professional hockey sticks are constructed from lightweight carbon fiber or composite materials. These materials provide a balance of stiffness and flexibility, which helps players generate energy during a shot.
Why do players tape their hockey sticks?
Players apply friction tape to the blade to improve their grip on the puck and protect the material from wear. The tape also helps dampen vibrations when receiving hard passes.
Is there a standard length for a hockey stick?
There is no single standard length, as sticks are customized to a player's height and playing style. Players often cut the shaft to a specific length to ensure it reaches the appropriate point on their body.
This answer was created with the help of AI research tools and reference sources. Spotted an error? Let us know — we correct mistakes quickly. See our editorial policy.